Round Applique Pincushion

Instagram: @daisitoegel
Website: www.flowersew.com
Size: 4 1/2in diameter
Skill level: Confident Beginner
--------------------------------------------------------

Let’s make a fun applique pincushion!! In this project I suggest that you use scrap fabrics and scrap batting. Let’s make a raw edge applique and add height to our pincushion.
Tools needed:
- OLFA RM-SG 18" X 24" Green Double-Sided, Self-Healing Rotary Mat
- OLFA 45mm RTY-2/C Quick-Change Rotary Cutter, Aqua
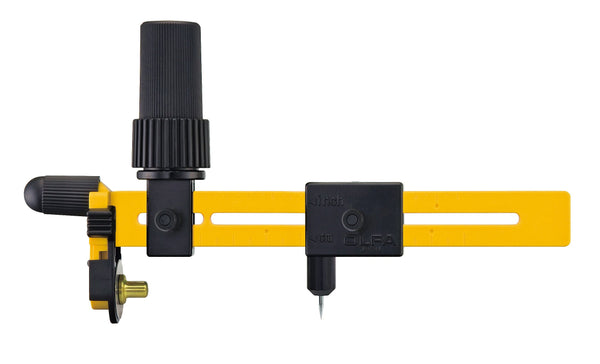
- OLFA CMP-3 Rotary Circle Cutter
- OLFA QR-6S 6 1/2" Square Frosted Acrylic Ruler
Fabric requirements:
- Circle Unit fabrics: (2) 5 1/2in squares – cut out (2) 5in circles;
- Batting: (2) 6in squares;
- Side fabric: (1) 2in x 16in strip;
- Side batting: (1) 2in x 16in strip;
- C1: (1) 4 1/2in square – cut out (1) 4in circle;
- C2: (1) 4in square – cut out (1) 3 1/2in circle;
- C3: (1) 3 1/2in square – cut out (1) 3in circle;
- C4: (1) 3in square – cut out (1) 2 1/2in circle;
- C5: (1) 2 1/2in square – cut out (1) 2in circle;
- poly-fil stuffing
- sewing machine, thread and needle (to close, final step)

1) Cut and prepare the fabrics:
Using the CMP-3 Rotary Circle Cutter, cut out all circles. Cut the batting squares and rectangle as well. It’s optional to use any fusible interfacing or starching for the circles C1 to C5.

For the circle unit fabrics (top and bottom parts) + batting squares, and the side fabric strip + batting strip, sew on the edge of each of these 2 units using 1/8in seam allowance to secure the fabrics to the batting. Trim and press.

Start doing the applique with the larger circle C1 on one of the circle units (the other circle unit will be the bottom of the pincushion). I used blanket stitch on mine, but you can play with any decorative stitch for the raw edge applique. Sew one circle at a time, and hold with a pin if necessary.

Press the whole applique unit when it’s finished.

Sew the two ends of the side strip using a 1/4in seam allowance. Clip the center of each circle units (top and bottom) and side strip by folding each piece in half. Clip a 1/8in tip of each corner. These marks will be used to match the side to the circle units when we clip each part to prepare for sewing.

Start clipping (or pinning) the top circle unit, matching the 4 clipped marks on the circle to the side strip.

Use a pinking shears scissors or make small clips on the sewn seam so the project turns right side out with minimal creases on the edges. Clip the other circle unit in the same manner as previously done. Leave a 2in opening for turning and backstitch at the beginning and end of the seams.


2) Finish the pincushion:
Fill the pincushion with poly-fil about 2oz. Close the opening with invisible hand stitch.

You’re done!!! Happy pinning!!!


I hope you enjoyed working with some raw edge applique and having added a fun pinnie to your collection! If you haven’t seen the other 2 previous pincushion tutorials check them out here: Striped Pincushion and Rectangular Pincushion.
Created by Daisi Toegel