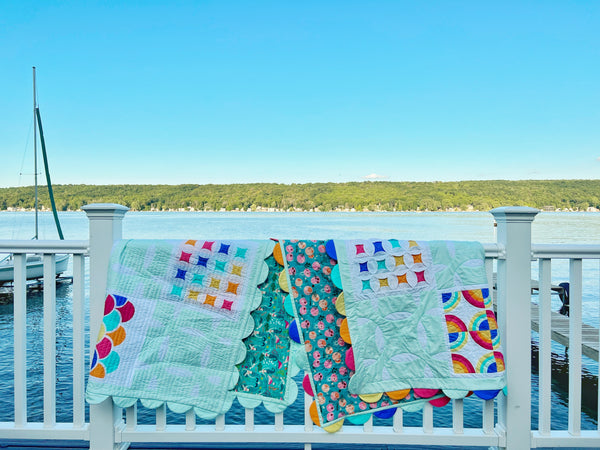
Curvetastic 10 Month OLFA Circle Cutter Quilt Along - Month 10

Instagram: @myfabricheart
Size or dimensions: 46” x 60”
Skill level: Intermediate
--------------------------------------

We did it! We made it to the end of the Curvetastic Quilt Along! I hope you have had as much fun as I have and learned something new along the way. If you are finding yourself at the of the quilt along you’re not too late. Jump in at any time! If you aren’t already following me on Instagram please do at @MyFabricHeart and let me know if you’re making your own Curvetastic Quilt!

I was so excited to see these quilts come together. A few of the blocks we made I want to use to make a full quilt. I feel like this is the beauty of sampler quilts. You get to try out blocks and methods before making a full quilt with them. Is there a block you are going to use again in another project?

Tools Needed This Month:
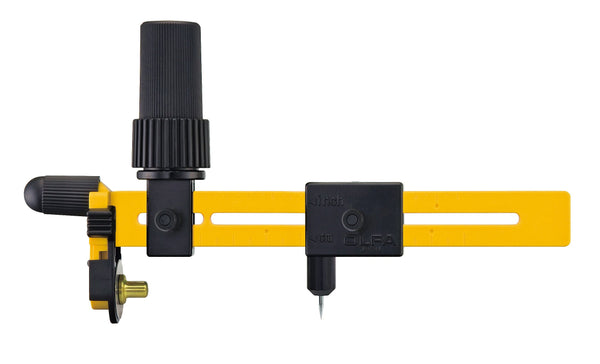
- OLFA CMP-3 Rotary Circle Cutter
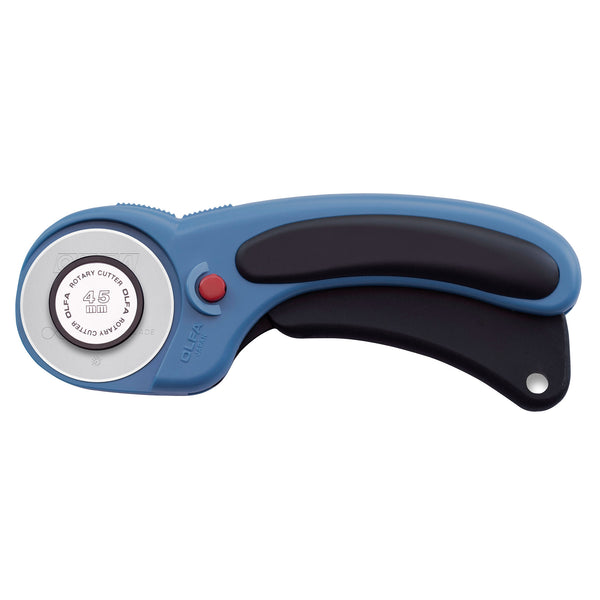
- OLFA 45mm RTY-2/C Quick-Change Rotary Cutter, Aqua
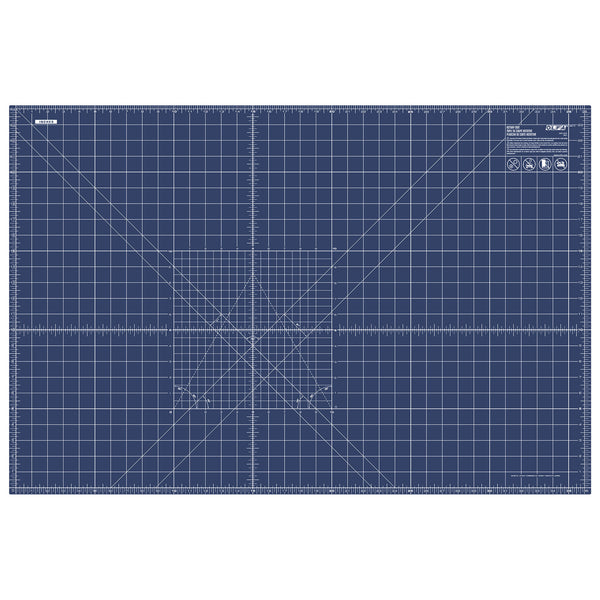
- OLFA RM-MG/NBL 24"X36 Double-Sided, Self-Healing Rotary Mat, Navy
- OLFA 5-Inch SCS-4 Precision Appliqué Scissors
- OLFA QR-6S 6 1/2” Square Frosted Acrylic Ruler
-
Pins or clips
Optional:
- OLFA 45mm RTY-2DX/PBL Ergonomic Rotary Cutter
- OLFA QR-6”x24” Frosted Acrylic Ruler
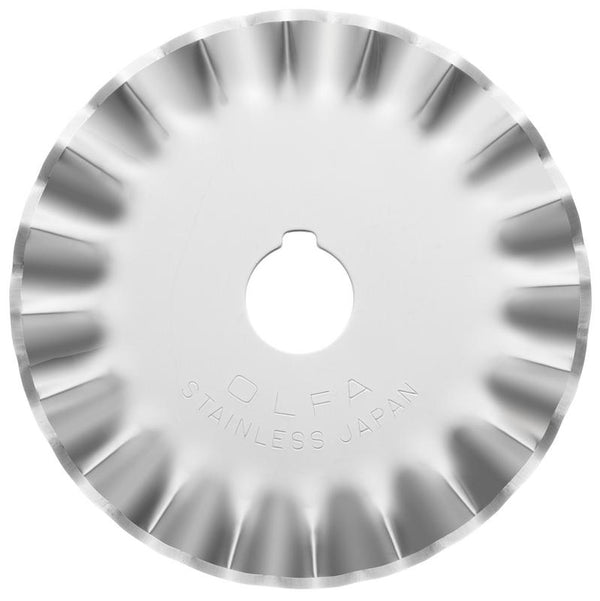
- OLFA PlB45-1 Stainless Steel Pinking Blade
- OLFA 6”x18” RM-HG01/Yel Double Sided, Self-Healing Rotary Mat, Yellow
Materials Needed This Month:

I have 2 different options for the scallops.
Option 1: You can use all the leftover 1/4 circles we have from making the background blocks in Month 2.
OR
Option 2: Use other scraps from the quilt (or other fabric really).

Materials:
- Scallop Fabric
- Option1: (92) 1/4 circles left over from month 2.
- Option 2: 1.25 yards of scraps or yardage
- (46) 3”x5.5” rectangles of left over batting (I used the batting we will trim off our quilt this month)
- (5) 2” wide WOF strips background fabric
Squaring Quilt:
There are lots of ways to do this so use whatever way works well for you. I’m going to give you 2 of my favourite ways.
Method 1:
For this method I’m using OLFA’s 6”x18” Double Sided Yellow self healing mat a 6”x 24” Acrylic Ruler (and I snuck my new favourite Magenta 45mm Ergo Cutter). You can use the OLFA products you have on hand that will work for you. The Yellow 6”x18” mat is amazing for this purpose.

- Find a space large enough to lay your quilt our flat either on the floor or a couple tables put together
- Take a moment to admire your entire quilt. You have done a great job!
- We squared up all the blocks before putting them together so we know our quilt is already pretty square. We will use the attached borders for our guide to square things up even more
- Use the seam line between your border and the main quilt to guid your trimming.
- I’m trimming so my border is 2.25” wide.
- If your border ended up being more narrow it is ok, just make your borders a consistent width

- Start at a corner of your quilt use both the vertical and horizontal border to try to make sure your corner will be nice and square
- Move your mat and continue to trim around your quilt

Method 2:
This method is great if you lack the space to lay your quilt flat or if crawling around on the floor isn’t an option.

- Square corners first
- Using your largest OLFA Square ruler place over one corner and using the seam line between your border and the main quilt to find a good compromise so the borders are 2.25” wide
- Trim both sides of the corner
- Repeat this for other 3 corners
- Trim between corners
- Using the longest OLFA ruler you have continue to trim your border working from each edge to the middle using the border seam as a guide
- If at any point your border is less than 2.25” trim to that narrowest width and trim all the edges to that width.
- At the middle these edges should line up nicely. If they don’t use the shorter edge as a guide and even out the line.
Making Scallops:
- Cut out (46) 3”x5.5” rectangles from leftover batting scraps
- Follow the directions below for the scallop option you are going with:
Option 1:

- Place 2 quarter circles together with right sides facing
- Find the middle of the curve by folding in half along the curve

- Set circle cutter to 2.5”
- With pivot point on the midline 1/4” from the original curved edge cut out an inside curve edge to edge

- Using your OLFA 6.5” square ruler and rotary cutter line up top edge with the 2.25” line with the bottom point centred and cut line and trim

Option 2:
- Cut (92) 3”x5.5” rectangles from chosen fabric

- Find the middle of one of the long edges of the rectangle and mark a pivot point 1/4” in from the edge
- Set your circle cutter to 2.5” and place your pivot on the marked pivot point and cut out an inside half circle.

- Using your OLFA 6.5” square ruler and rotary cutter line up top edge with the 2.25” line with the bottom point centred and cut line and trim

Both Options:
- Place 2 half circles with right sides facing on top of a 3”x5.5” batting rectangle
- With a 1/4” seam allowance sew through all 3 layers along the curved edge

- Repeat to make 46 units like this
-
Trim and prep units for turning by either:
- Using either your 45mm Ego Cutter with the Pinking Blade attached
- Using your Appliqué Scissor trim off the excess batting and make relief cuts into the seam allowance perpendicular to the stitch line

- Turn your scallops right side out making sure the seam allowance is pushed out
- Iron
- Using your OLFA 6.5” square ruler and rotary cutter line up top edge with the 1 7/8” line with the bottom point centred and trim

Attaching Scallops:
- Working one edge at a time pin/clip scallops to the front of the quilt along the edge with raw edges lined up.
- The first and last scallop on each edge should being a 1/2” from the corner

- Place 13 long the long edge and 10 along the short edge with
- Using the longest stitch your machine is capable of baste in place with a 1/4” seam allowance
Finishing the Edge:
This is a faced edge binding instead of a regular binding that goes around the edge of the quilt.
- Join the 2” background strips on the bias.
- Cross two strips with light sides together close to the end and pin/clip in place
- Draw a diagonal line from corner to corner dividing the short ends on one half and the longer end on the other half.

- Piece these together by sewing on the drawn line
- Trim off the short ends and press seam allowance to one side

- Repeat with all strips
- Fold these strips in half so the wrong sides face each other and the long raw edges are touching and press
- Cut 2 strips to the length of the short edge of your quilt
- Cut 2 strips to 1” shorter then the length of the long edge of your quilt
- Starting with the short edges pin/clip the raw of your shorter strips to the front of the shorter edge of the quilt, placing them on top of the basted scallops
- With a 3/8” seam allowance stitch these in place
- Attach your longer strips on the long edges but start and stop this strip 1/2” from each corner

- Stitch in place stitching 3/8” from the edge.
- On each corner of the quilt stitch a line diagonally across the corner where the seam allowance crossover

- Trim of the corner of the quilt
- Roll strips to the back of the quilt taking time to gently poke out corners

- Use your favourite hand stitch to secure the folded edge of your strips to the back of the quilt. I used a ladder stitch but a whip stitch or other stitches will work.
Here’s a video of 3 stitches: Ladder stitch, Whip stitch and Large Straight stitch. None of the stitches go through to the front of the quilt. The part that goes into the quilt grabs the backing and batting and then comes back through the layers.
Now your quilt is done! Great job!


Thank you so much for joining me in making this quilt! I can’t wait to see what you all do with this pattern. Make it your own and make sure to tag me on social media so I can see it!
~ Amanda