Curvetastic 10 Month OLFA Circle Cutter Quilt Along - Month 1

Designer: Amanda Brown
Instagram: @myfabricheart
Size or dimensions: 46” x 60”
Skill level: Intermediate
---------------------------------

I’m so very excited to share with you all about my up coming Quilt Along! Ok, I’m getting ahead of myself, I’m Amanda Brown of Fabric Heart and I LOVE colour (I’m Canadian and that’s how we spell color), and I LOVE challenging myself with stepping out of my comfort zone. A few years ago I was terrified of sewing curves and circles because I convinced myself it was too hard. I’m here to tell you it is not as hard as I thought. It took some practice but I love adding curves into my projects now.

Another thing about me is I live to share my knowledge with other people. I’ve made all the mistakes and figured things out. I don’t want you to make the same mistakes so I want to teach you all the tricks so you too can love to sew curves!
Here’s my artistic rendition of the quilt we are going to make together.

See, I told you I love colour and curves! So many curves in this project and you can definitely pick the colours that speak to you. I think this would look stunning in a minimal palette of 3 of 4 fabrics or maybe dark and moody. I can’t wait to see your fabric choices!
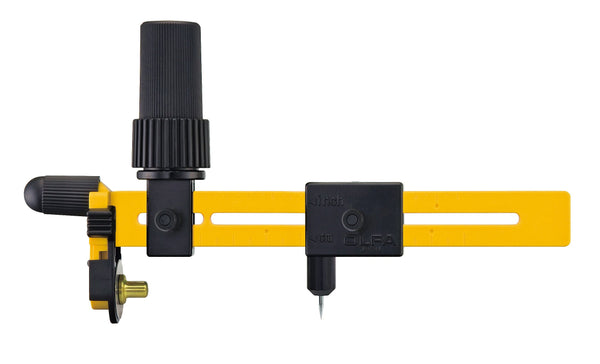
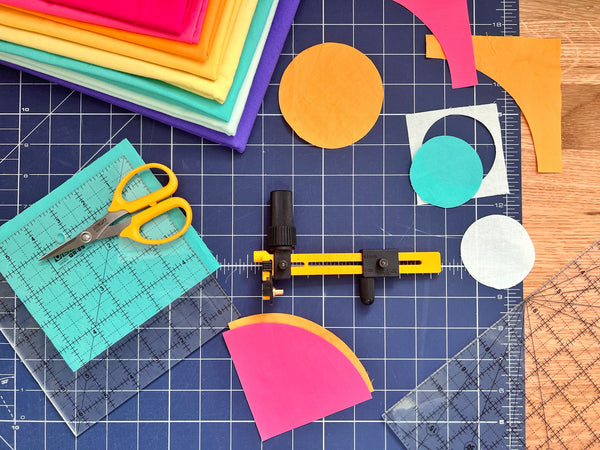
Many quilt patterns with curves have you spending hours prepping, cutting out fabric using paper templates and scissors or buying specific templates for each new size. Not this project! We are going to use OLFA’s Rotary Circle Cutter.

This cutter is AMAZING! You can cut out circles from 1-1/2-inch to 8-3/4-inch all with the same tool! PLUS you accurately cut out multiple layers at once! Recently I’ve been on a scallop bunting kick and using the OLFA Rotary Circle Cutter makes the whole process super quick.

Did you notice the scallop edge I drew around the quilt? This is technique my Grandma used on her quilts and I’m finally putting it into a quilt. My Grandma was the best and I know she is smiling down on me loving that I’m following in her quilting footsteps. The scallop is often called a Prairie Scallop. Here’s a photo of one of my Grandma’s quilts and this one she used Prairie Points instead of Scallops. My Grandma liked colour too!

With the OLFA Rotary Circle Cutter these will be quick and easy to make and will make our quilts stand out. If you want to omit this part you can reduce the amount of background fabric #2 below by about a yard.
Enough rambling, you probably want the details and how you can join in. Every month I’ll be back here with a new block for the quilt. Next month we are going to start with the background blocks. These are so much fun to make!
In total we will spend 10 months together (including this month) and at the end you will have a completely finished quilt! No rushing, just enjoying the process, learning and having fun together.

If you get stuck in between my posts you can always find me on Instagram @myfabricheart or contact me through my website. I’m always happy to answer your questions or help you out if you get stuck. Plus I’ll be over there sharing my blocks each month and I would LOVE if you tagged me in yours so I can see your progress too!
Each month I will have written instructions, photos, videos and diagrams to make sure you understand each step. I will even have bonus instructions to appliqué these blocks instead of piecing the curves if you have decided piecing curves isn’t your thing. That is a valid choice and I fully support that decision.
So are you in? I hope you are! I LOVE a good quilt along!
Time for the Nitty Gritty!

Materials:
- 2 + 1/4 Yards Background #1 (White)
- 3 + 1/2 Yards Background #2 (Aqua)
- 3 Yards combined total of accent colours (I’m using 7 - half yards)
- 4 Yds Fabric for Back
- 55” x 68” piece of batting
- Snacks ( Do not forget this!)

Tools:
- OLFA CMP-3 Rotary Circle Cutter
- OLFA 45mm RTY-2/C Quick-Change Rotary Cutter, Aqua
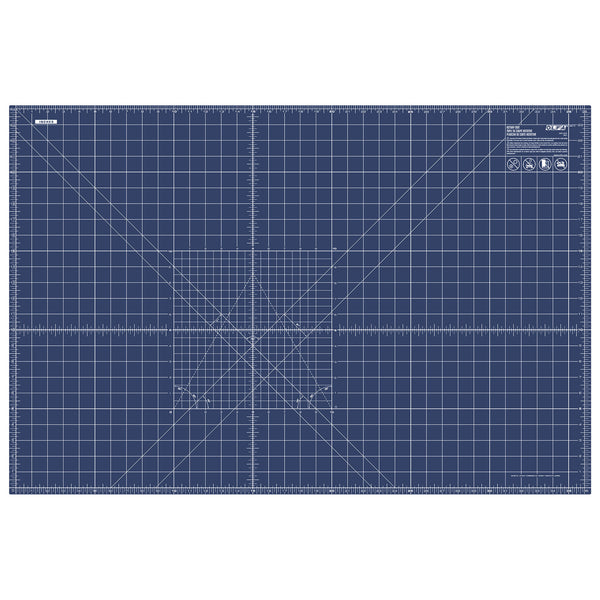
- OLFA RM-MG/NBL 24"X36 Double-Sided, Self-Healing Rotary Mat, Navy
- OLFA 5-Inch SCS-4 Precision Appliqué Scissors
- OLFA QR-6S 6 1/2" Square Frosted Acrylic Ruler
- OLFA QR-6x12 6" X 12" Frosted Acrylic Ruler
- OLFA QR-6x24 6" X 24" Frosted Acrylic Ruler
- Pins or clips
- Washable Glue Stick (did you know you can glue your curves before piecing them?)
- Quilting pins/spray
- Iron
- Ironing Mat
- Sewing machine of your choice
- Thread (one that matches your project for piecing and one for quilting)
- 1/4 piecing foot (with or without a guide)
- Walking Foot, Free motion Foot or your favourite Longarmer (for quilting)
To Do List for next time:
- Source, gather, procure all tools and materials so you are ready to rock next month
- If you are a pre-washer (this is a no judgement zone) you can get all your top and back fabrics washed and ready to go.
- Grab your OLFA Rotary Circle Cutter, some scrap fabric and practice using it. Check out this Here is a great resource on all the parts and a how to, Here!

- Get organized. We are going to be working on this project together for the better part of a year. We are going to be such good friends by the end of this. Find a clean container you can keep all your fabrics and pieces together so nothing gets lost or accidentally used for a different project. I love Ikea for this but your local dollar store, department store etc will probably have some affordable and accessible options for you. I also often use various sized kitchen zippy bags because they are inexpensive and work!
- For my keeners, here is an AMAZING how to (I’m not saying that just because I wrote it) on cutting and piecing curves. We will go over all this next month but I know some of you are itching to dig in and do some sewing. I see you.
See you back here next month!
Stitch on!
~ Amanda