Curvetastic 10 Month OLFA Circle Cutter Quilt Along - Month 2

Designer: Amanda Brown
Instagram: @myfabricheart
Size or dimensions: 46” x 60”
Skill level: Intermediate
---------------------------------
Welcome back! Are you all ready to get making your Curvetastic quilt? I (Amanda) would love to see the fabrics you have picked and your progress. If you aren’t already following me on Instagram please do @MyFabricHeart and give me a tag in your progress posts!

Materials and Tools needed this month:
- Scrap Fabric to practice cutting curves and piecing
- Scrap Paper for templates
- Background Fabrics #1
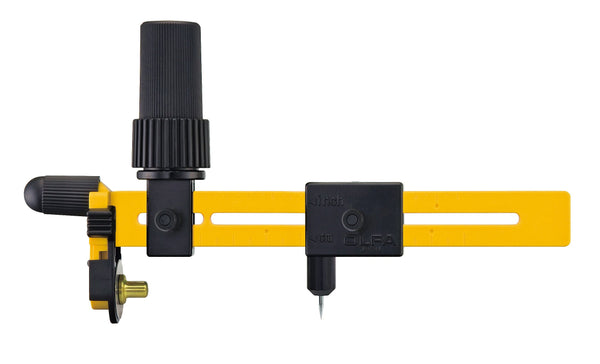
- OLFA CMP-3 Rotary Circle Cutter
- OLFA 45mm RTY-2/C Quick-Change Rotary Cutter, Aqua
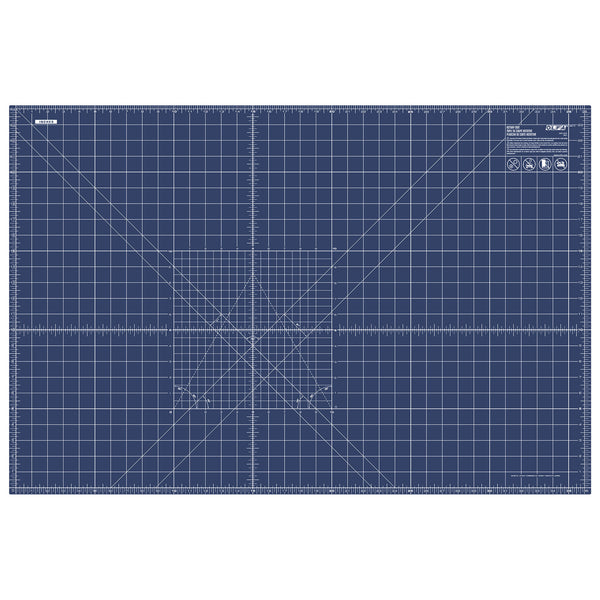
- OLFA RM-MG/NBL 24"X36 Double-Sided, Self-Healing Rotary Mat, Navy
- OLFA 5-Inch SCS-4 Precision Appliqué Scissors
- OLFA QR-6S 6 1/2” Square Frosted Acrylic Ruler
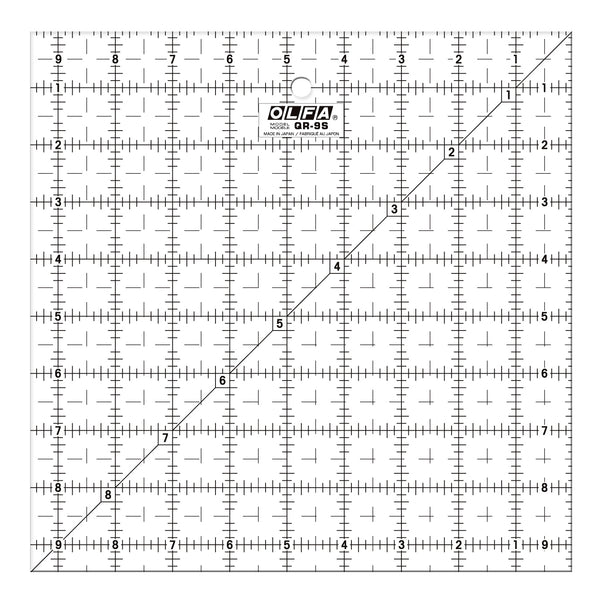
- OLFA QR-9S 9 1/2" Square Frosted Acrylic Ruler * Update from part one Optional but may be helpful
- OLFA QR-6x12 6" X 12" Frosted Acrylic Ruler
- OLFA QR-6x24 6" X 24" Frosted Acrylic Ruler
- Pins or clips
- Washable Glue Stick
Terminology:
Before we jump in to making the background blocks we have some skills to go over. We are going to go into this project brave and confident!
Let’s agree to what we are going to call each part of the curve. I will attempt to use the same terms all the way through.
Inside Curve vs. Outside Curve

Quadrants

Pokey thingy! Kidding! It’s the pivot point.

How to use the OLFA Circle Rotary Cutter
Last month I gave you a resource to check out with all the parts and how to use your cutter. Check it out, here! Remember to cover your blade and replace the pivot point cap after each use. That pivot point is super sharp!

Grab some scrap fabric and take some time to play around, adjust both the pivot point and the handle. Figuring out the motion and knowing when you run into difficulty will help you make sure each cut during the QAL is exact and smooth.
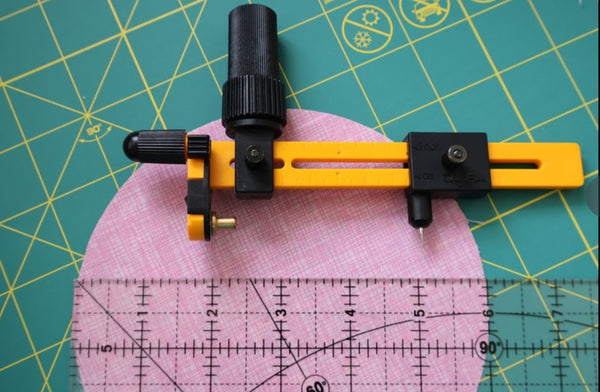
You’ll notice on the side of the OLFA Circle Rotary Cutter that there are 2 sets of measurement markings. The top set is inches and the bottom set is centimetres. We are going to be using the top set of inch markings. The arrow on the pivot handle points to the measurement line you are selecting. Each longer mark with a dot at the bottom of the line indicates an inch.

In the photo above I have the Circle Cutter set to 3”. This is the radius of the circle so this will make a 6” circle. You can check the accuracy of your cuts by measuring your circle.

Make sure you are comfortable with reading these markings and understand them. These are key for cutting out curves that can be pieced together.
Grab some scrap fabric and cut 2 - 4”x4” squares. On one corner of each square mark a point that is 1/4” in from each side. See the photo below. The inside point of this square is where we are going to put our pivot point.

Select one of your squares. Set your cutter to 3” and place your pivot on the point we marked and cut a quarter circle. We will be using the outside curve from this cut.

With the other marked square set your cutter to 3.5” place your pivot on the point we marked and cut a quarter circle. We will be using the inside curve from this cut.

Tips if your curve isn’t cutting smoothly:
- Make sure your fabric is well ironed before cutting and for slippery or thin fabric you may need to starch your fabric
- Practice the motion without fabric to help train your muscle memory. A smooth motion will help keep your cuts nice and smooth
- Adjust where your handle is and/or adjust how you are gripping the ratchet handle.
- If your blade skips a little patch because your pressure wasn’t consistent you can carefully use your scissors to complete the curve
- Change your blade especially if you’ve used it on paper in the past
Piecing Curves
Before we jump in here I want to assure you that you can in fact piece curves. We are starting with really easy curves. We will build up to harder curves. You’ve got this!
You can use glue or pins for this. Try both and decide what you like the most. I loved glue when I started piecing curves now I use a couple pins. If you are gluing use a washable glue and don’t use too much. Apply the glue in the seam allowance only and if you use scrap paper under your fabric it will keep your work station clean and not sticky.
Mark the middle and 1/4 marks on curve of your inside and outside curves. I fold mine in half along the curve and then do that again to get my 1/4 marks and iron them.

With the right sides together match up the ends and all the marks we made. It looks like it won’t fit but it will. Trust the process. Your curve should all be together now.

Set up your machine to sew a 1/4” seam and a stitch length of 1.8. If your machine has a pivot function (needle down, foot up) it is super helpful here. With the inside curve on the bottom slowly stitch the pieces together. Go slowly and stop often to make sure everything this lined up.
Iron the seam allowance towards the outside curve.

Background Blocks (24 units)
This is based on flowering snowball block. It looks complicated but is actually nice and straight forward. There are a fair number of them to make but we don’t need them all done until we are done the rest of the blocks so you have lots of time to work on them.
This is based on having 2 colours for your background. If you would like a version with more fabrics consider cutting as you go so you don’t cut too many blocks.
Make a Pivot Point Placement Template:
- Raid your recycle bin for a thicker piece of paper at least 3”x 3”
- On one corner mark out a square 1/2” x 1/2” and cut it out
- To use you will line up the edges along the sides of your fabric at one corner
- Mark a point in the inner corner of your template on the fabric below and this is where you will place the pivot point

Directional Fabric Consideration:
If you are using directional fabric and it bothers your if the fabrics aren’t facing the same way you will have to cut your fabrics for your outside curves in a specific way.

Half of your outside curve fabric you will want to cut upper left and lower right curves out and the other half lower left and upper right curves.

At this point you need to decide if you are going to piece your curves or appliqué your curves. I’m including instructions for both.
*** You only need to complete either the Pieced Blocks or the Appliqué Blocks. Not Both.***
Pieced Blocks Cutting Instructions
From your Color 1 (Aqua):
- Cut (10) 7.5” width of fabric strips.
- Sub cut these into (48) 7.5” squares (start cutting from selvedge to get 5 squares from each WOF strip)
From Color 2 (White):
- Cut (5) 7.5” width of fabric strips
- Sub cut these into (24) 7.5” squares (start cutting from selvedge to get 5 squares from each WOF strip)

Cutting your Outside curves:
- Using your template and a fabric safe marking tool mark a pivot point on 2 opposite corners of your Aqua Fabric
- Set your OLFA Circular Rotary Cutter to 3.75”
- Place the Pivot point on the mark you made and cut out a quarter circle
- Set the inside curve aside for future parts of this quilt and keep your Outside Curves close by
- Repeat for all 48 - 7.5” squares

Cutting Inside Curves:
- Using your PPPT and a fabric safe marking tool mark a pivot point on 2 opposite corners of your White Fabric
- Set your OLFA Circular Rotary Cutter to 4.25”
- Repeat for all 24 - 5” squares

You should now have 48 aqua outside curves and 48 white inside curves.
Pieced Blocks Assembly Instructions
- Using 1 outside curve and 2 inside curves sew together.

- Using your template and a fabric safe marking tool mark a pivot point on the corners with the aqua fabric

- Set your OLFA Rotary Circle Cutter to 4.25” and cut 2 quarter circles from the square you just pieced and marked.

- Using another aqua outside curve piece now attach these two new inner circle units together.

Repeat to make 24 blocks.
Appliquéd Block Cutting Instructions
From your Color 1 (Aqua):
- Cut (10) 7.5” width of fabric strips.
- Sub cut these into (48) 7.5” squares (start cutting from selvedge to get 5 squares from each WOF strip)
From Color 2 (White):
- Cut (5) 7.5” width of fabric strips
- Sub cut these into (24) 7.5” squares (start cutting from selvedge to get 5 squares from each WOF strip)
Cutting your Outside Aqua curves:
- Using your template and a fabric safe marking tool mark a pivot point on 2 opposite corners of your Aqua Fabric
- Set your OLFA Circular Rotary Cutter to 4”
- Place the Pivot point on the mark you made and cut out a quarter circle
- Set the inside curve aside for future parts of this quilt and keep your Outside Curves close by
- Repeat for all 48 - 7.5” squares

Cutting Inside Curves:
- Using your PPPT and a fabric safe marking tool mark a pivot point on 2 opposite corners of your White Fabric
- Set your OLFA Circular Rotary Cutter to 4.25”
- Repeat for all 24 - 5” squares
You should now have 48 aqua outside curves and 48 white inside curves.
Appliquéd Blocks Assembly Instructions
Placement template:
Cut a 7.5”x7.5” square of paper (I used a manila envelope) to use as a placement template

- Using your Placement Template lay two Inside curve units on opposite corners, lining up the edges.

- Lay an aqua outside curve piece on top of covering the rest of the template. Glue or pin the white inside curve pieces to the aqua. Using your favourite appliqué stitch sew the aqua outside curve pieces to each of the white inside curve pieces.

- Then lay a second Aqua outside curve piece on top of the unit finished in the step above. This should be placed on the opposite diagonal than the first aqua outside curve piece. Pin or glue in place.

- Appliqué this newly added Aqua Outside curve piece.

Repeat to make 24 blocks.
Work away on these blocks as you have time. There is no need to have them finished before next month.
Stitch On!
Amanda