Sewalong to the Tammy Handmade Etty Camisole

Designer: Catherine Holbrook
YouTube: @bringingsewingback
-----------------------------------------------
Size or Dimensions: Check pattern for required fabric, but somewhere between 1-2 yards.
Skill Level: Beginner Friendly

DESCRIPTION: Have you been looking for a quick beginner friendly sewing project that you can finish in an afternoon? Look no further! The FREE Etty Camisole by Tammy Handmade is the perfect tank pattern for such an occasion. While simple in construction, it does feature a scalloped neckline that makes it great for dressing up and adding visual interest. You also can exaggerate the depth of the scallops with the help of OLFA’s Rotary Circle Cutter. ’ll teach you exactly how to use it in this tutorial!
Additionally, within this blog post I will show you how you can change a fixed strap into an adjustable strap using strap rings. With the straps being so thin and delicate on this tank, it’s a great option to be able to adjust the length to fit whatever style you are going for. Grab your OLFA tools and we will begin!

TOOL & SUPPLIES NEEDED:
OLFA Products:
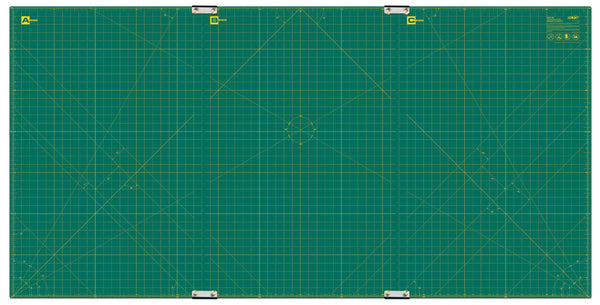
RM-CLIPS/3-01 35” x 70” Continuous Grid, Double-Sided, Self-Healing Rotary Mat Set
RTY-2DX/MAG 45mm Ergonomic Rotary Cutter
5-Inch SCS-4 Precision Appliqué Scissors
QR-1x12 1" x 12" Frosted Acrylic Ruler
Notions:
3/8” Plastic Loops and Sliders (2 of each)
Turning Tool

Fabric:
The Etty Camisole calls for light to medium weight woven fabrics such as Cotton, Linen, Twill, Viscose, Satin, and Crepe. You will need between 1-2 yards, depending on your size.
Pattern:
You can find the Etty Camisole Pattern by Tammy Handmade here at no cost to you!
Additionally, you can find the Youtube Video Tutorial By Tammy Handmade on how to sew the Etty Camisole here.
SEWING TUTORIAL:
We will begin by cutting out the pattern pieces that we need. Below is a quick tutorial on how OLFA’s Rotary Circle Cutter makes cutting out the scallops a breeze!
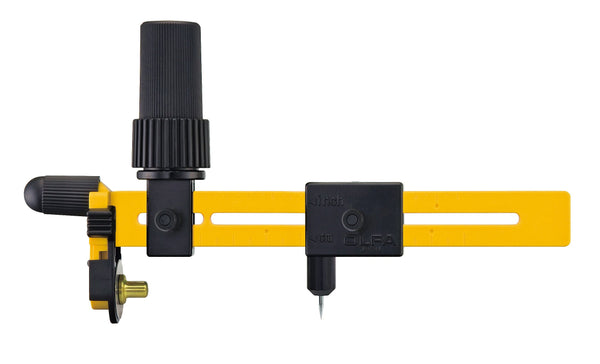
How to use the Rotary Circle Cutter for Cutting out the Scallops:

A deep dive on how to use the Rotary Circle Cutter can be referenced here.
In this tutorial, I will show you how you can use the Rotary Circle Cutter to exaggerate the scallops to be deeper set. If this is not desired, you can skip this portion of the tutorial.
We will begin by measuring the distance of all the scallops on one side of the Front Bodice piece. For the size 10, the distance is 6 inches, and it includes 3 scallops. Thus, each scallop is 2 inches wide.


The distance between the blade and the pivot point on the Rotary Circle Cutter is HALF the size of the scallop you are creating. So, you will divide that distance you just measured in half, and place the pivot point at that half measurement.
Example:
For the size 10, the distance between each scallop on the front bodice is 2 inches. Half of that measurement is 1 inch. So, I will set the pivot point on the Rotary Circle Cutter to 1 inch.

It is recommended to draw a straight line between the points of the scallops before you begin.


Placing your pivot point directly centered between the scallop on the drawn line, and your blade lined up with the start of the scallop, slowly begin turning the rotary cutter with the ratchet handle.

When the blade reaches the drawn line on the opposite end of the scallop, remove the blade and replace for the next scallop. Continue until all scallops are cut.


You can now use this method to cut the scallops on the front bodice piece of the Etty Camisole.

Cut the Following Pieces:
Front Top - Cut 1 Main
Back Top - Cut 1 Main
Front Facing - Cut 1 Main
Back Facing - Cut 1 Main
Straps - Cut 2 Main Piece
*If making adjustable straps, cut the straps 1.5 inches x 23 inches.*


Before we begin sewing, make sure to finish the bottom edge of both facing pieces, and mark the strap placements as indicated on the pattern.


Etty Camisole Tutorial:
Locate the two strap pieces. Fold each strap in half, right sides together, and press.


Sew down the length of the strap using a 3/8” seam allowance. Do not sew the short ends. Using a turning tool, turn the straps right side out and press.


In this tutorial, I will teach you how to turn these fixed straps into adjustable straps. If this is not desired, continue following the instructions from the Etty Camisole Pattern.
For the adjustable straps, cut 2” off of each strap end. Make sure you cut your straps 1.5 x 23 inches for this method.

Locate the two rings.

Feed the 2” strap ends through the rings and fold in half.


Baste the ends of the straps together using a 1/4” seam allowance. Set aside for a later step.


Locate the longer straps. Locate the Front Bodice and Front Facing pieces. Place the Front Facing on top of the Front Bodice piece, right sides together.

Insert the straps into the shoulders, sandwiching them between the front bodice and facing. Pin in place.


Sew across the armholes and neckline using a 1/2” seam allowance, taking your time to pivot when sewing across the curves. I find pivoting every 2 stitches works best.

Snip between each scallop up to, but not through, the stitch line. Trim the seam allowance and clip the curves.


Pull the top right side out. With a turning tool (or something else pointy), push all the scallops out and press.

Locate the small straps you set aside earlier. Locate the Back Bodice and Back Facing.

With right sides together, place the Back Facing on top of the Back Bodice. Sandwich the small straps between the Back Facing and Back Bodice at the markings.


Sew the back neckline using a 1/2” seam allowance. Turn right sides out and press.

Locate the two sliders. Slide each slider onto one of the longer straps of the front bodice and position 1/2” of the way up the strap.


Feed one end of the strap through the ring of the back bodice strap, going from the right side to the wrong side.

At the slider, pull some of the strap up to create some room.

Push the end of the strap that was fed through the ring through the top of the slider on the front bodice side.

Push the loose end through the bottom of the slider to the back bodice side.

Pull approximately 1 1/2” through the slider. Sew the end of the strap to itself. You now have a strap that can be adjusted by pulling through the slider!


Repeat with the remaining strap.


Pull the facing pieces away from the bodice pieces on both front and back.

Fold the front bodice down on top of the back bodice, right sides together. Aligning the side seams, sew down both sides beginning at the facing and ending at the hemline of the bodice pieces. Finish the edges.


Pull the facings down and press.

As a final step, hem the bottom of the top by folding the fabric to the wrong sides twice, enclosing the seam allowance. Stitch along the hemline.


You now have the perfect camisole to wear under any cardigan during the cold season or styled with shorts in the summer!