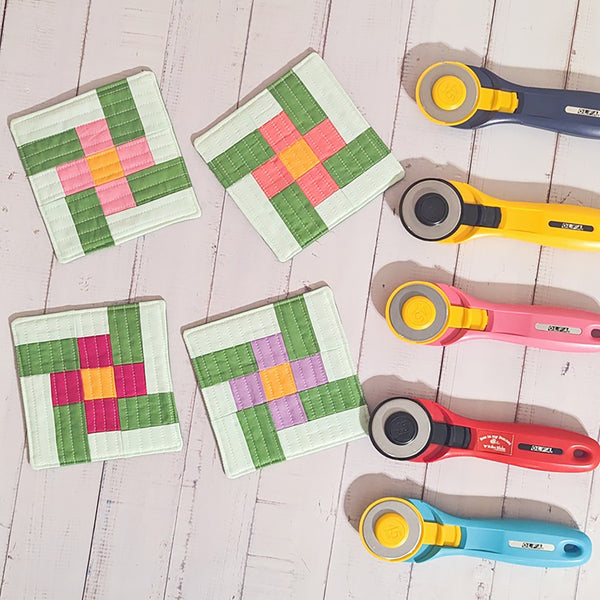
Flower Coaster – Foundation Paper Piecing

Instagram: @daisitoegel
Website: www.flowersew.com
------------------------------------------------
Size or dimensions: 5in square
Skill level: Confident Beginner

Description: Using a simple foundation paper piecing block, let’s create a cute coaster to add to our Spring decoration. Grab your fabric scraps to make it colorful, or use precut colors and print combinations to make a set for your house and to gift this season.
Let’s get started.
***THIS TUTORIAL IS CALCULATED TO MAKE (1) ONE COASTER.
Tools needed:
OLFA 45mm RTY-2/C Quick-Change Rotary Cutter, Aqua
OLFA RM-CG-01/GRY 12”X18” Double-Sided Self-Healing Rotary Mat, Gray
OLFA QR-12S 12 1/2" Square Frosted Acrylic Ruler

Fabric requirements:
*Get your scrap fabric basket! The pieces used for this project are 4in x 1 1/2in rectangles or smaller, so scrap fabrics are best, but if you prefer to use charm packs or larger fabric cuts, that is totally optional.
*(1) 1 1/2in square: flower center
*(4) 1 1/2in squares: flower petals
*(4) 1 1/2in x 2 1/2in rectangles: leaves
*(2) 1 1/2in squares; (2) 1 1/2in x 2 1/2in rectangles; AND (2) 1 1/2in x 4in rectangles: background
*(1) 5 1/2in square: backing fabric
*(1) 5 1/2in square: batting
*(1) copy of the foundation paper piecing template from this file, cut around each piece of the template 1/8in outside the dotted line.

1) Sew the individual blocks:
Download, print (at 100% scale) and cut the paper template sheet around each piece 1/8in outside the dotted lines.
Reduce the machine’s stitch length to 1.6mm or 1.8mm. This will help to remove the paper later on.
To follow the step-by-step of how to sew using the foundation paper piecing method, check this pincushion tutorial.
Trim all threads from the edges of the block, and following the paper template dotted lines, trim the block to 5.5in square, keeping the seam allowance edges.
Carefully remove the paper.

After removing the paper, press the block and baste it on the batting piece. Quilt using your favorite method. Trim the excess batting and press the quilted block.

Press the backing fabric and lay right sides together on top of the quilted piece. Use pins or clips to hold the sandwich together.

Sew using 1/4in seam allowance along the edges and leave a 3in opening to turn. Clip the corners off before turning.

Turn the project right side out and press. Topstitch all around the edges to close the hole and finish the coaster.

Quick and fun! Enjoy!

