Curvetastic Quiltalong Month 9

Instagram: @myfabricheart
Size or dimensions: 46” x 60”
Skill level: Intermediate
------------------------------------

We are so close to the end of the Curvetastic Quilt Along. Only one more month after this one and your quilt will be all ready to go! If you are just joining us, do not fear you can start this at any time. Here’s a link to the very first part so you can join in. I (Amanda) would love to see your quilt come to life! If you aren’t already following me on Instagram please do @MyFabricHeart and give me a tag in your progress posts!
This month we are going to assemble our quilt tops, sandwich them up and start quilting them. Next month we will square up our tops and add a fancy scalloped binding. This will give you lots of time to plan out and execute your quilting design. I have a few options for this so don’t start to panic. We’ve got this together!

Tools needed this month:
- OLFA 45mm RTY-2/C Quick-Change Rotary Cutter, Aqua
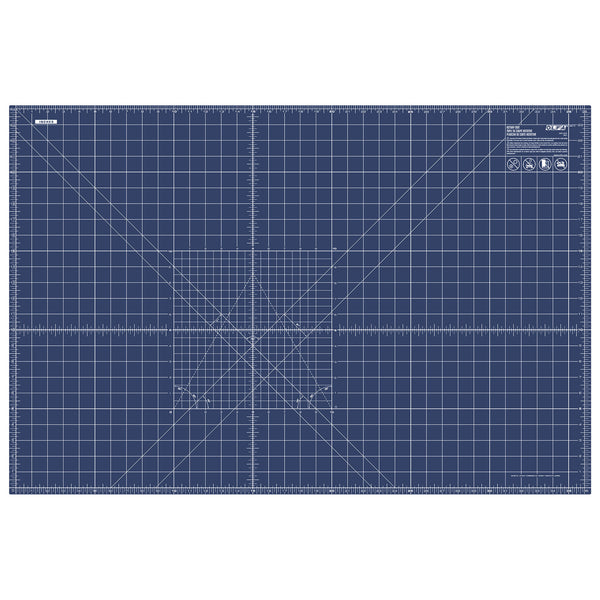
- OLFA RM-MG/NBL 24"X36 Double-Sided, Self-Healing Rotary Mat, Navy
- OLFA 5-Inch SCS-4 Precision Appliqué Scissors
- OLFA QR-6S 6 1/2” Square Frosted Acrylic Ruler
- OLFA QR-6x12 6" X 12" Frosted Acrylic Ruler
- OLFA QR-6x24 6”x24” Frosted Acrylic Ruler (Optional)
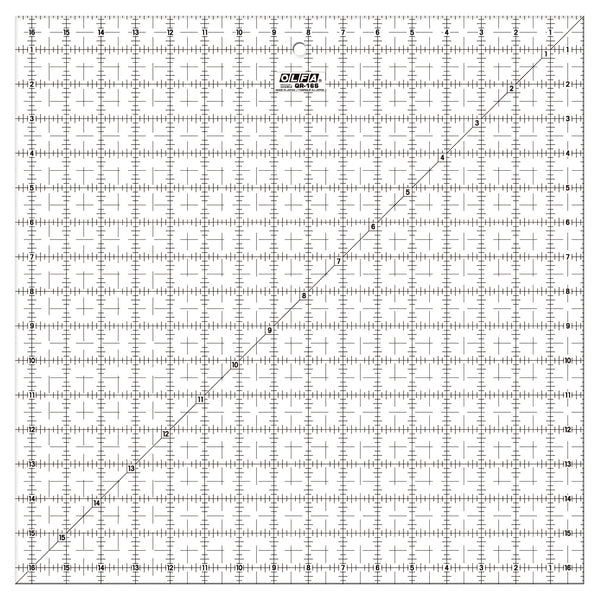
- OLFA QR-16S 16 1/2” Square Frosted Acrylic Ruler (Optional)
- Pins, Clips or Washable Glue Stick
- Quilt Pins or Basting Spray
- Painter’s Tape
Materials needed this month:
- Background fabric for borders
- 55” x 68” Batting
- 4 Yds Fabric for back
Both the appliqué and pieced versions of this quilt will use the same steps this month.
Step 1: Trim Blocks
Do not skip this step. I have tried to skip this step in the past and it did not go well. One of the biggest tricks to making sure your quilt is nice and straight is making sure each unit that goes into the quilt is the right size. We want all our blocks to measure 14.5”x14.5” before we start putting them together.
Tips:
- Iron your blocks before trimming to make sure they are nice and flat
- Try to trim even amounts off of all 4 sides of the blocks
- If your blocks are too small you can add larger borders and then square them up (no one will know, I promise)
- If all your blocks have mysteriously worked out to a completely different size (ie 16” or 12” square) you can trim them to a size that works for all your blocks. Then adjust the size of your border
There are many different ways to trim up your blocks to the right size. I’m going to give you my favourite 2 ways. If you are nervous about this step you can always use a washable fabric safe marking tool to draw on your blocks before you trim to make sure you have it right.
If you do not have a ruler that is 14.5”x14.5” use the lines on your OLFA cutting mat.
- Lay your block on your cutting mat along the bottom left hand corner
- Centre your block so it is straight and you have equal amounts over hanging the 0” and 14.5” lines
- Carefully trim off the excess on the 14.5” lines
- Rotate the square so the freshly cut edges are now on the 0” lines
- Carefully trim off the excess on the 14.5” lines

If you have an 16.5”x16.5” OLFA Frosted Acrylic Ruler use this method
- Lay your ruler on top of your block
- Using seams and the lines on your ruler make sure your block is nice and square and that it is centred in the 14.5”x14.5” area
- Trim off the two sides of the block
- Rotate your block so your freshly cut edges line up on the 14.5”x14.5” lines and then trim the last two sides.
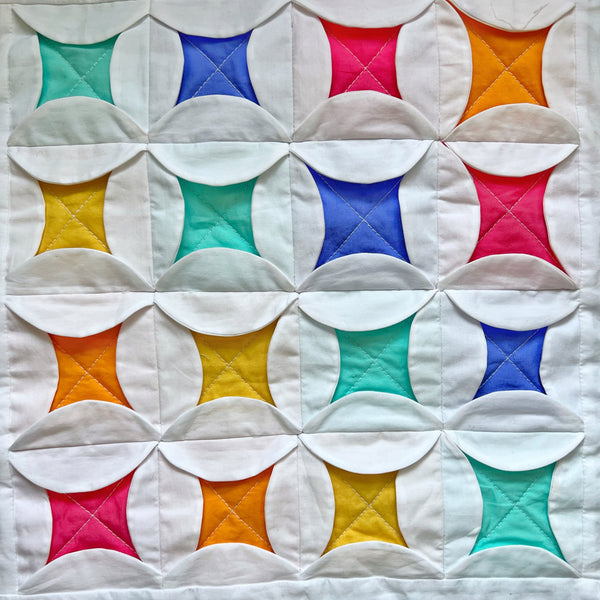
Step 2: Determine Layout

This is when you get to decide how your quilt looks. You are welcome to use the layout I have pictured here or you can do your own thing. If you have a large working area you may find it helpful to lay it out fully and work from this. I have limited space so I laid all my blocks out in piles to keep organized.
Step 3: Assemble Top
Using a 1/4” seam allowance stitch your blocks together and iron your seams flat. I stitch all the blocks into 3 columns and then stitch these together.

Step 4: Add Borders
Did you know there is a proper way to add borders? Adding borders improperly can lead to a distortion of your quilt or excess fabric at the edges. Make sure you are taking time to do this properly
Side borders
- Measure your quilt from top to bottom in 3 places (each edge and in the middle)
- Average these measurements and this will be your border length
- Cut 3 strips 3” wide from your background fabric
- Join these together along the short edge
- Cut to the length you determined above
-
Pin or clip each of these to each side of the quilt.
- Make sure to pin/clip on evenly by pining the start and end and the half way mark
- Adding as many pins/clips as needed
- Using a 1/4” seam allowance stitch the side borders on
- Iron your seams open
Top/Bottom borders
- Follow the steps above measuring side to side this time
Step 5: Piece the backing
If you have a backing wide enough for your quilt you can skip this step. Yay you!
For the rest of us you will have to piece together a backing. Do not feel you have to purchase enough of the same fabric to have all the same fabric on the back. You can use scraps to make some extra blocks to make your backing big enough. Or you can use a collection of fabrics to make a back. I often do both of these things. Check out two of my fun backs below.


Things to consider:
- You do not want a seam running along a place where you normally fold your quilt. This puts extra stress on the backing
- If you are sending your quilt to a Longarmer you may want your seam to run horizontally across your quilt. A vertical seam can some times add bulk in one particular area potentially causing issues.
- You can piece without matching patterns or you can take time to make it look seamless.
For this quilt I decided to pattern match to show you how I do it. If your fabric has a large repeat you may need extra backing fabric
- Cut one WOF (Width of Fabric) piece which measures 8” longer than your quilt top
- Determine the repeat of your fabric

- Lay your main back piece down on a flat surface
- On your next piece of backing fabric find the corresponding repeat as close to the top and side edge as possible on both pieces of fabric.
- Once this is determined you now want to vertically fold this second piece of fabric along the design you will match up on your top fabric (this should be a consistent fold over the entire length)

- Match up the two fabrics along this line and using washable glue, glue in place (ironing will set the glue quickly)

- Carefully unfold the fabric and stitch down the crease line

- Using your OLFA Ruler and Rotary Cutter trim you seam allowance to 1/4”
- Trim this piece so it is 8” wider than the quilt top in a way that won’t have the pieced seam on a fold line

If you aren’t worried about pattern matching or if you have a fabric without a pattern:
- Cut one WOF that is 8” longer than your quilt top
- Cut second piece the same length by the width needed to make your quilt backing 8” wider than the quilt top
- Piece together making sure to match the top, bottom and middle and distributing the fabric evenly
Step 6: Sandwich the quilt
Use your favourite method to layer your backing (right side down), quilt batting and quilt top (right side up) and either pin or spray baste. If you are using a backing with a stripe or a linear pattern make sure your quilt top is very square to this pattern.
If that was confusing, I have you, keep reading.
The easiest way to baste your quilt is either on a floor or collection of tables big enough to lay out your quilt nice and flat. (I’m demonstrating this with one block so it is easier to get photos)
- Lay your backing out with the right side facing down
-
Using painter’s tape secure the backing down along the edges
- Pull your quilt taunt but do not stretch it (it's a fine line)

-
Lay your batting on top of your backing with the right side up
- Some batting has a top and bottom where one side is fluffier and other side has a different texture or pin holes or bumps. You want the fluffier side up
- The batting should be slightly smaller than the backing

- Lay your quilt top down centring it on the backing and batting

- If pinning start in the middle and work towards the edges smoothing the top as you go
- If spray basting carefully pull back the batting and top and working from the centre out spray and secure each layer according to manufacturer's' directions
Step 7: Quilt
Story time, when I first started quilting this was the most mysterious step to me. I thought it was ridiculous that people spent hours “just sewing on top of their quilt”. I laughed so hard when I realized we do this so everything stays in place. Then I eventually learned about the beauty that can be added to a quilt when the quilting enhances the quilts beauty. No pressure.
A sampler quilt is the perfect time to try out new things. We have 6 different main blocks which you could have fun quilting in it’s own style. Or you could do an allover pattern which lets your eye focus on the blocks themselves. It is all up to you. I have 2 different quilts so I’ve done both.
The Appliqué quilt I used a walking foot and a quilt bar which lets me keep consistent lines which feeds evenly through my machine. Many machines come with a walking foot but if yours does not contact your favourite sewing machine store and they should be able to get you a walking foot for your machine.

Straight line quilting:
- Increase stitch length to 3.0.
- Start along one edge in middle of the quilt
- Using a seam or painters tape as a guide stitch straight across the quilt

- Repeat lines until you reach the edge of your quilt (always stitch in the same direction)
- Go back to the middle of the quilt and repeat finishing off the other half of the quilt
On the Pieced version of this quilt I used a variety of techniques. I tend to use my walking foot a lot but don’t always stick to straight lines. Here’s a run down of ideas and techniques I used. Maybe you will find some inspiration.
For the filler blocks I mostly used my walking foot and stitched in the ditch. This technique seems simple but takes practice and precision (no one will notice little wobbles, I promise). Some of my filler blocks I then embellished the centre with some ruler work.


Have you heard a saying something along the lines of “it will quilt out”? If you have a part of your quilt which won’t lay flat, have fun quilting a really dense pattern. This really helps it lay flat and makes it look 100% more amazing


On the pieced version of this quilt the block from month 7 has some 3D elements. For this block I kept it simple and added an x in the middle of each square.

I’ve been working more and more with ruler quilting. If you are new to this technique you should really try it out. Please note this does require a special foot for your machine and special rulers/templates. Do not use your OLFA rulers for ruler quilting.

I’m also trying to get better at free motion quilting. One of the quickest ways I quilt a quilt is to do a meandering pattern all over my quilt like this block. It fades into the background of the quilt and really lets the block shine.

The last block I will share with you features some orange peels that I freehanded. They are a bit wonky but I really love that about them. We don’t have to wait until our skills are perfect to use them on a quilt. We should be brave and try them out on quilts. I thought first I would do some flowers in my rainbows and changed my mind. I’m leaving that little flower there to remind me I tried it and it’s kind of cute.


I cannot wait to see how you quilt yours! Next month we will be squaring up our quilts and adding a scalloped trim to our quilts. This is an older technique but I think it is adorable and needs to make a come back.
See you next month!
~ Amanda