How To Make Art with Epoxy Resin
Have you ever seen those glossy, vibrant paintings that look like someone splashed a myriad of colors to create a stunning composition? Chances are, it was epoxy art. If you’ve never heard of epoxy art before, this article will cover all the basics: from understanding what epoxy resin is, to learning about the supplies you’ll need to be creative with it— and you can truly be imaginative, because no painting or artwork will ever look the same!
The History
The trend to use resin in art started a few years ago in the USA, Canada and Australia, although its recent popularity can be attributed to social platforms like TikTok. Videos of making epoxy art have gone viral, captivating viewers and inspiring fellow artists. But what is epoxy resin? Epoxy resins are a two-component system consisting of resin and hardener. By mixing the two components, a chemical reaction takes place so that the liquid resin gradually hardens to a solid plastic within hours. The result is a high-gloss, clear surface. You can use this technique to create anything you’d like: from tabletops, to coasters, jewelry, to canvas art, to even flooring. The options are endless.

(Photo credit: Dre Fandetti)
“Epoxy Resin, or known simply as Epoxy by its friends and family, is a great compliment to the art of woodworking, metal working, and maker crafts in general. From adding a pop of color to a delicate piece of jewelry to pouring gallons of it to make a dining room table, epoxy can be used in so many versatile ways to enhance your projects. Although following instructions is key to a perfect pour, don’t be intimidated by epoxy. At all levels, from beginner, to intermediate, to advanced, there are projects that you can accomplish with fantastic results”, says wood shop adventure Ethan Abramson (@thebuildwithethan).

(Photo credit: Ethan Abramson)
The Essentials
- Resin & Hardener: it may seem obvious, but the key elements in your project are resin and hardener. Whenever you use a resin, make sure you follow the mixing instructions provided as some require you to measure by volume whereas some others are by weight. Most Epoxy Resins have around a 30-minute working time. This is the time in which you can work with the resin after mixing it together before it begins to harden
- Gloves: since you’re working with liquids and resin, wearing a pair of gloves is crucial to protect your hands not only from sticky materials, but also from possible skin irritation.
- Apron: resin is very difficult to remove, so wearing an apron will protect your clothes from unwanted drips– we also recommend wearing old clothes while working with epoxy resin.
- Measuring Jug: accurately measuring the resin and hardener is crucial, as both parts have to be precisely the same amounts. Always measure and mix your resin in a plastic graduated jug.
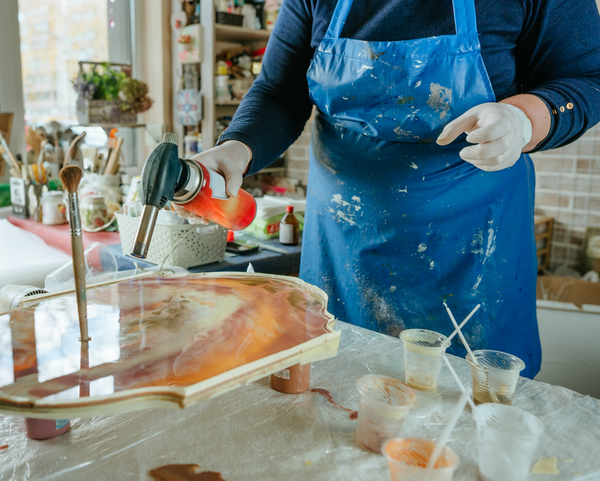
- Flame Torch: this is what most experts recommend if you want to achieve a flawless, bubble free finish. If you don’t have a flame torch laying around (let’s be honest, not all of us do), you can also use a hairdryer, although you’ll have to be very careful since hairdryers don’t get hot enough and can introduce dust into the resin.
- Precision Tools: epoxy resin will naturally self-level after you pour it, but you’re going to need some precision tools if you want to distribute it in a specific manner, or remove excess epoxy from the sides. Designed for blade control and delicate materials, OLFA Graphic Knives are the perfect tools. Dre Fandetti (@craftswithdre) is an experienced epoxy resin artist, who has been creating crafts since middle school: “I love using the OLFA Graphics Blades to trim off excess epoxy, and it’s also really helpful when trimming off the painters tape on the bottom of my projects”.
 (Photo credit: Dre Fandetti)
- Cleaning Tools: other than paper towels and isopropyl alcohol, having the right tools to clean the “aftermath” of using epoxy resin is critical. OLFA Scrapers can help you remove all the residues until there is none left! The OLFA 40mm GSR-2 Scraper and 120mm GSR-1/3B Multi-Grip Scraper offer a flexible work range, from delicate removal projects to work-intense tasks. These scrapers feature a slim design and a non-slip rubber grip, complemented by stainless-steel parts to resist corrosion or rust. For bigger projects, you need tougher scrapers, like the OLFA XSR-200 Extra Heavy-Duty Scraper. With a non-slip rubber grip and a durable steel strike plate, this scraper can be used to remove tough spots easily and fast, thus reducing user strain.

Now that we’ve covered the basics, you’ll be ready to experiment with some resin projects so you can get your creativity flow— in all directions!
