Everything You Need to Know About Changing Your OLFA Blades
Utility knives are considered extremely handy because of the multiple purposes they serve: from hanging wallboard, trimming wallpaper, cutting cardboard boxes or ceiling tiles and more. These knives are also more heavy-duty than the disposables ones and can offer the convenience of replaceable blades. Depending on how much you use your utility knife, you may need to replace the blade occasionally, or quite often. To help you understand the best practices on how and when to change your blade, we consulted with expert Chris Milton (@modernmilt), a well-known carpenter in the industry.
“The utility knife that I use the most is the OLFA MXP-AL Handle Auto-Lock Knife. I always have it on me and I use it for a variety of applications: from opening, scraping, sharpening, cutting – you name it. Because I use it daily, I have to change the blade frequently. When I change the blade of my knife, there are three things that I want to achieve: fresh length, fresh sharpness and cleaner blade.
There are certain signs to watch for to know when your utility knife blade needs to be replaced. The main one comes down to common sense: if the blade doesn’t cut like it did when you first got it, it may be time to change it. Another warning that could point to replacing the blade is when there are issues with extending and retracting the blade. An additional way to gut check if it’s time to replace it is when the blade can no longer sharpen a pencil. Keeping your blade sharp doesn’t just make your work easier, but it also avoids getting hurt while using your utility knife”.
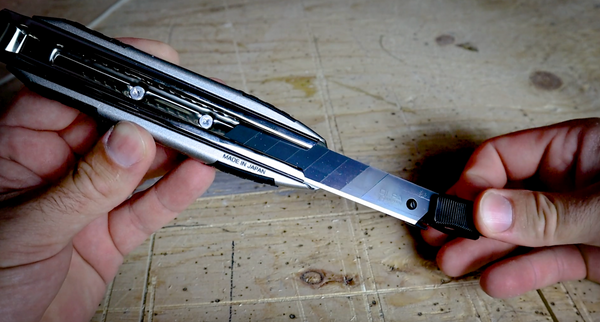
“As you can see, changing the blade is different whether you’re using an auto-lock or ratchet-lock. With the auto-lock utility knife, replacing the blade is very easy: move the auto-lock down all the way through the back-end of the knife. Once it comes out, insert the new blade and put it back in – it’s just that simple. For the ratchet-lock, turn the ratchet counterclockwise until the blade becomes loose where you can slide it up and down. Once you’ve done this, you’ll be able to slide the blade to the back and take the old blade off. Grab a new blade, place it on the lock and then back into the handle of the knife. That’s it, your blade has been changed”.
When we asked Chris if he could walk us through the process of changing the blade of his utility knife, he did more than that: he created a video showing us how he changes the blade of the OLFA 18mm MXP-AL Auto-Lock, as well as the OLFA 18mm L-5 Ratchet-Lock Utility Knife and the OLFA 18mm L-2 Ratchet-Lock Utility Knife. Check out the video below!
Stay tuned for Part 2 “Blade Snapping 101” starring specialist Chris Milton sharing best tips on how to snap the blade of your OLFA knife!

Chris Milton Bio:
Chris is an experienced carpenter from Ottawa, Canada. He loves a challenge, and uses new and unique tools each time to tackle his projects – no matter the size.

