Through the Seasons Together: DIY Photo-Changing Card

Designer: Marcia Izabel Marchiori
YouTube: MarciaBel Vlog
Instagram: @marciabel
---------------------------------------
Level: Beginner
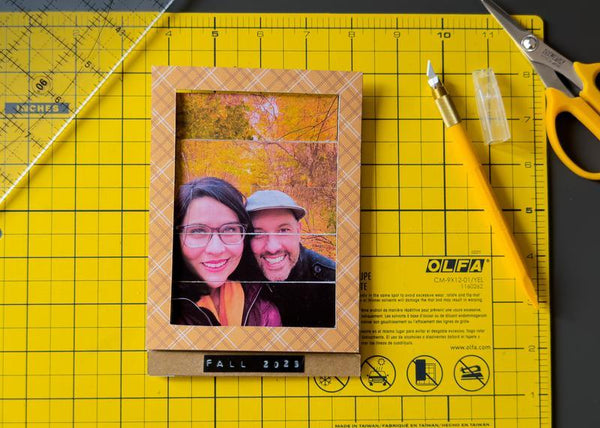
If you enjoy meaningful crafts and want a creative way to share a memory, this DIY photo-changing card is a beautiful project. The front of the card features two photos that flip with a gentle pull, showing a glimpse of how time moves, just like the seasons.
In this tutorial, I’ll show you how to make a handmade card using two pictures: one was taken in the warmth of summer, and the other during a walk in autumn. When you pull the tab, the top photo flips to reveal the second one underneath, creating a lovely surprise. 


The inside of the folded card is left blank, so you can write a personal note or message.
TIP: This flip photo technique is also a great idea for scrapbook layouts, travel journals, or any project where you want to include more than one image in a fun way.
Let’s get started on this charming little card that celebrates time, love, and creativity.

Supplies:
OLFA CM-9x12-01/YEL Double-Sided Self-Healing Cutting Mat
OLFA AK-5 Designer Graphic Art Knife with 30 Replacement Blades
OLFA QR-6x12 6" x 12" Frosted Acrylic Ruler
OLFA 5-Inch SCS-4 Precision Appliqué Scissors
Lightweight chipboard paper (letter size)
Kraft paper (letter size) for card
Two coordinating patterned scrapbook papers (letter size)
Interfacing - Used: Therm O Web HeatnBond Lite Iron-On Adhesive
Adhesive tape (double-sided and regular)
Two 3 ½ x 5” printed photos
Iron
Optional: Dymo Mechanical Embosser with Tape, Black
Optional: Dried Leaves for embellishment
Instructions
Step 1: Cut your base pieces
Using your OLFA mat, ruler, and art knife:
• Trace and cut one 9 x 6” rectangle from Kraft paper (this is REC 1). Use the ruler and the tapered side of your art knife to score a line down the middle of this rectangle. Fold the card in half and set it aside.


• Cut two 4 ½ x 6” rectangles from chipboard (these are your REC 2 pieces)

Step 2: Prepare the patterned paper
• Using the two coordinating patterned papers, cut one 4 ½ x 6” rectangle from each pattern.

• Use Therm O Web interfacing to adhere each patterned paper to a REC 2 piece, following the interfacing manufacturer’s instructions (the correct layering order, from bottom to top, is chipboard as the base, then interfacing for bonding, and finally patterned paper with the pattern side facing up). This gives your frame pieces a sturdy structure.


Step 3: Create the windows
• With a pencil and your OLFA ruler, trace a centered 3 ½ x 5” rectangle on each REC 2

• Cut out these inner rectangles using the OLFA art knife

Step 4: Cut the sliding strips
• Cut SIX 1 x 4 ½” rectangles from chipboard using the OLFA art knife, mat, and ruler

• You can totally skip this step, but for a nicer finish, I added a piece of patterned paper to the back of the strip that goes on top. You’ll see later that this part shows when we move the photos.

Step 5: Assemble the flip mechanism
• On the back of the first REC 2 (chipboard side), use regular adhesive tape to attach each of the six strips (1 x 4 ½” rectangles), spacing them vertically, as shown below:
• Then apply another set of tape pieces on top of each one you just placed (as shown below)
Step 6: Create the frame
• Gently flip all five small rectangles downward
• Place the remaining piece (the other REC 2) on top, aligning the bottom edge of the inner window with the bottom edge of the first strip at the top. Adhere it in place.
Step 7: Prepare the photos
• On the back of each 3 ½ x 5” photo, use a pencil and OLFA ruler to divide the height into five equal 1” sections
• Cut each photo into five 1 x 3 ½” rectangles
Step 8: Add the photos to the mechanism
• On the front of the card, adhere the first photo (the fall photo) one strip at a time using double-sided tape
• Flip the mechanism down and repeat with the second photo (the summer photo)
Step 09: Finish the card
• Make sure everything is secure and lines up neatly. Then, attach the photo-flipping mechanism to the front panel of the folded card, using double-sided tape.
• Attach a ½ x 4 ½” kraft paper strip to the bottom edge of the front photo to neatly finish the pull tab.


Your photo-changing card is ready! Gently pull the bottom of the flip mechanism to switch between photos. It’s a wonderful way to share memories and a beautiful handmade touch for any occasion. If you’d like, decorate the inside of the card with dried leaves and flowers to bring in a cozy autumn feel.
Don’t forget to tag me @marciabel and @OLFA_craft in your finished card, we would love to see your creation!
Marcia