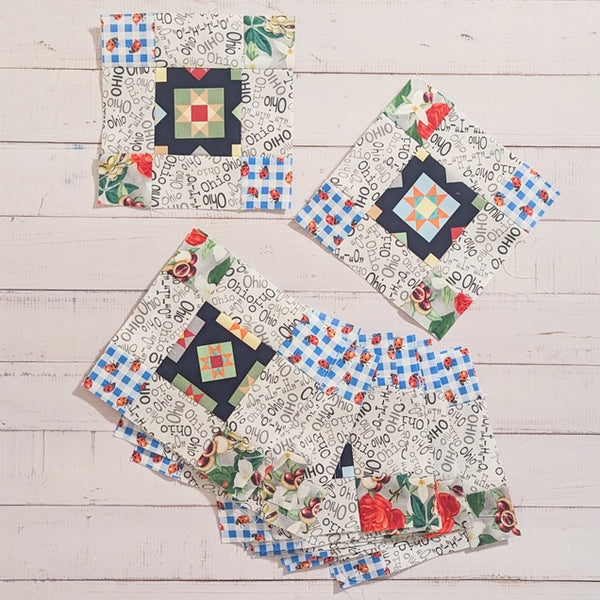
Ohio Table Runner

Designer: Daisi Toegel
Instagram: @daisitoegel
Website: www.flowersew.com
Shop: www.etsy.com/shop/daisiflowersew
---------------------------------------------------------
Pattern notes:
- Seam allowance is ¼in unless noted otherwise.
- WOF = width of fabric: assume 42in.
Fabric Requirements:
|
(16 blocks + borders | 6 1/2in unf. block size) |
|
|
Color A (cA) = Ohio Star |
1/4yd |
|
Color B (cB) = Words Gray |
2/3yd |
|
Color C (cC) = Flowers Gray |
1/4yd |
|
Color D (cD) = Ladybugs |
1/4yd |
|
Color E (cE) border = Stripe |
1/3yd |
|
Backing |
2 Yd |
|
Binding |
1/3yd |
|
Batting |
55in x 22in |
Cutting instructions:
- Color A = Cut (2) 3 1/2in x WOF strips; sub-cut (16) 3 1/2in squares;***or see steps for fussy cutting in the ‘block construction’ step 1.
- Color B = Cut (6) 3 1/2in squares x WOF strips; sub-cut (64) 3 1/2in x 2in rectangles.
- Color C = Cut (2) 2in x WOF; sub-cut (32) 2in squares.
- Color D = Cut (2) 2in x WOF; sub-cut (32) 2in squares.
- Color E: Need 133in total = Cut (4) 3in x WOF strips; join the strips together, extra 33.5in won’t be used.
- Binding: Cut (4) 2 1/2in x WOF strips.
- If you plan on fussy cutting the Color A squares (3 1/2in x 3 1/2in), align the print in the center of a 3 1/2in square ruler or larger, make sure the same inches cover all the sides of the print.
- Cut the right side and top, rotate and repeat the cut to trim the remaining sides.
- Cut (16) 3 1/2in squares in total.
- Press all (16) blocks and sew two rows of (8) blocks.
- If sewing a border, use the long strip to sew and cut as you go, this way there’s no risk of stretching the fabrics and wind up having a shorter edge than what’s needed to cover the runner extension.
- Sew the vertical sides first, then the horizontal (top and bottom).
- Press the entire top, baste and quilt using the method of your choice.
- Bind using your preferred method.
Congratulations!!!! What a beautiful project you’ve completed!!!


