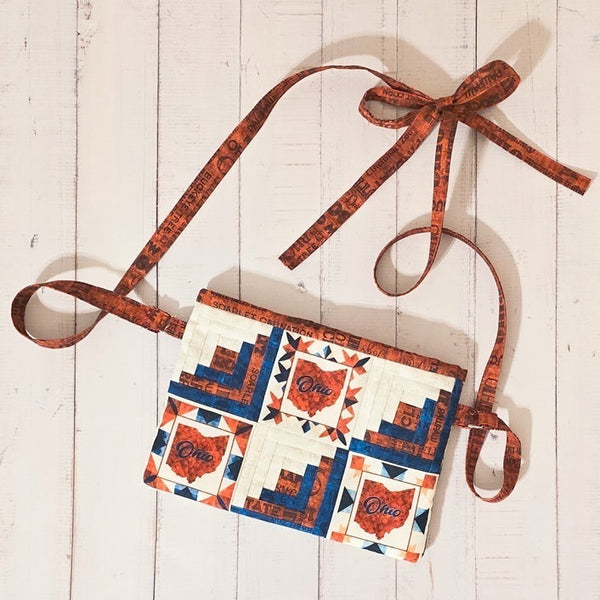
OHIO Log Cabin Purse

Designer: Daisi Toegel
Website: www.flowersew.com
--------------------------------------------
Category: Patchwork/Quilting
Size: 6in x 9in
Skill level: Confident Beginner
Pattern notes:
- Read all instructions before starting.
- Seam allowance is 1/4in unless noted otherwise.
- WOF = width of fabric: assume 42in for yardage (YD); 18in x 21in for Fat Quarter (FQ); 9in x 21in for Fat Eight (FE).
- FPP = foundation paper piecing
Fabric Requirements:
|
(3 log cabin blocks + 3 fussy cut squares = 2 x 3 grid - 3 1/2in unf. Block/square size) |
||
|
Color 1 (c1) = OHIO |
1 FE |
Fussy cut squares |
|
Color 2 (c2) = Words Ivory |
1 FE |
Log Cabin block |
|
Color 3 (c3) = Words Navy |
1 FE |
Log Cabin block |
|
Color 4 (c4) = Words Reg |
1/4 YD |
Log Cabin block|Top binding|Handle straps |
|
Color 5 (c5) = Barns |
1 FE |
Backing |
|
Color 6 (c6) = Icons Gray |
1 FE |
Lining |

You’ll also need:
*(1) printed copy of the PDF file for the FPP Log Cabin block 3 1/2in unfinished HERE
Note that the PDF has four blocks in one page, you’ll use only 3.
*(1) set of magnetic snap buttons
*(2) 1/2in D rings
*(2) 6 1/2in x 9 1/2in batting or stabilizer of your preference (I used quilt batting)
Tools needed:
RM-SG; RM-SG-01 18" x 24" Green Double-Sided, Self-Healing Rotary Mat
45mm RTY-2/C Quick-Change Rotary Cutter, Aqua
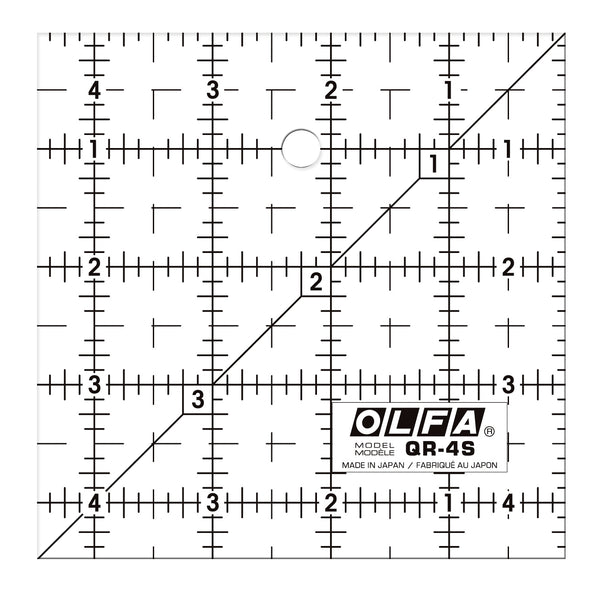
QR-4S 4 1/2" Square Frosted Acrylic Ruler
QR-9S 9 1/2" Square Frosted Acrylic Ruler
***This is not a quilted purse; magnetic snap button parts are priorly installed to the front patchwork and backing fabric and then sewn into a “sandwich”. If you wish to quilt this project, hand quilting or another method of closure such as zipper is recommended.
Cutting instructions:
FUSSY CUT SQUARES:

To cut the fussy cut squares from c1 position the QR-4S 4 1/2" Square Frosted Acrylic Ruler with the 3in marks around the fussy cut square on the fabric leaving 1/4in on all sides so the square to be cut is 3 1/2in on all sides.
Cut (3) OHIO fussy cut 3 1/2in squares from C1.


(1) 2 1/2in x WOF; Sub-cut: (1)2 1/2in x 20in (top binding), (3) 1 1/2in square (A1), (3) 1in x 2 1/2in (A8) and (3) 1in x 3in (A9).
(2) 2in x WOF; Sub-cut: (2) 2in x 40in (handle straps).
C5: Cut (1) 6 1/2in x 9 1/2in rectangle (backing).
C6: Cut (2) 6 1/2in x 9 1/2in rectangles (lining).

Cut out 3 paper blocks (PDF file) leaving 1/8in extra paper around the seam allowance lines.
Sew the FPP blocks following THIS tutorial available on OLFA.com.
Trim the blocks on the seam allowance line and press. Do not remove the paper from the back yet.

Sew the front part of the purse according to the picture below, with two rows of log cabin + fussy cut squares combined. First sew two rows of 3, then sew the rows together.
TIP: For each time you sew the FPP block with another block or square, remove the paper AFTER sewing the seam allowance, and then press.
Press seams open.
Remove all papers when the entire patchwork is sewn.

Prepare the handle straps:
First, fold each handle fabric piece (2in x 40in) lengthwise with right side out and press, then open and fold each side towards the center creased line. Fold and secure it closed with clips or pins.

Sew along both length edges to finish.
From each 40in long handle strap, cut (1) 2in long piece (for the D rings side tabs).
Insert each of the side tabs pieces on one D ring. Fold the raw edges together and clip them to hold.
Press the binding piece in half lengthwise with right sides out.

Sew the magnetic buttons:
Baste the lining fabrics on the batting pieces, press well.
Mark a small dot on the center of the top part of the lining (attention to directional fabrics), 5in from each side and 1in below the top edge.
Install the magnetic snap buttons on each side of the bag.

After installing the magnetic snap buttons on the lining side and batting, baste the front and backing on each part. Sew the 3-layer sandwich parts separately using 1/8in seam allowance to secure all parts together for each side of the purse.
Sew the side tabs on each side of the front part 1in below the top edge.

Clip the purse parts together with front and backing sides touching.
Sew a U shape, backstitching in the beginning and end of the seams, use 1/4in seam allowance.

Use the zig zag stitch to finish the raw edges, but before cut the corners diagonally, and be careful not to cut too close to the seam.
After sewing the zig zag, fold the top side of the seams towards the back side of the bag and sew it in place backstitching a couple of times to secure the edge flat, so it’s prepared for binding.

Turn the purse so the front and back sides are out.
Fold the edge of the binding strip on a 45-degree angle before starting to sew.

Sew the binding and at the end let the tip overlap on top of the initial fold by 1in. Sew and backstitch to secure.
Fold it towards the inner part of the purse and secure with clips. Finish the binding with hand stitches.

Insert each handle strap on the D rings and fold 1/4in in twice. Sew the folded part on each side to finish, backstitching always.

Tie a knot or a bow according to your preferred height when wearing the purse, and you’re all done!