Florida Summer Backpack

Designer: Daisi Toegel
Website: www.flowersew.com
--------------------------------------------
Size: 15” H x 13” W approx.
Skill level: Intermediate
Pattern notes:
- Seam allowance is mentioned for each step.
- No templates used, to round corners (optional), use any round tool from 2in to 4in.
- For better structure use a firm stabilizer such as ‘Soft and Stable’ or ‘Pellon Flex Foam’.

Fabric Requirements:
|
Color A (cA) = FL Toss White |
1/2 yd |
Main body |
|
Color B (cB) = Blender Bedrock Almond |
1/2 yd |
Lining |
|
Color C (cC) = Festivities |
1 FE |
Flap main side |
|
Color D (cD) = Sandals |
1/2 yd |
Front pocket / Carry-on sleeve |
|
Color E (cE) = Candy Cane |
1/6 yd |
Handles and tabs |
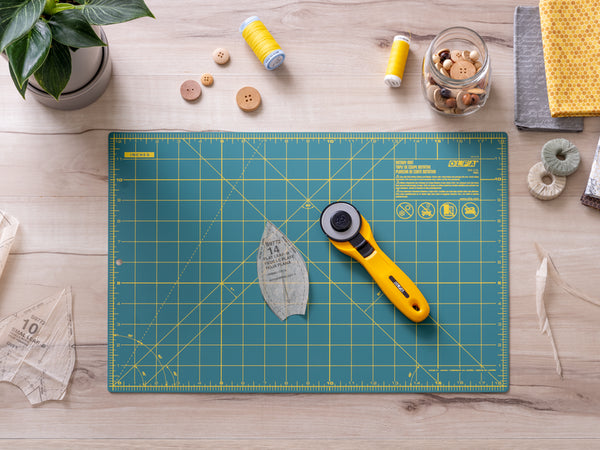
Tools needed:
OLFA RTY-2CYEL/ST-01 Fabric Cutting Kit, Yellow (rotary cutter + rotary mat)
OLFA QR-6x24 6”x24” Frosted Acrylic Ruler
OLFA QR-6S 6 1/2" Square Frosted Acrylic Ruler

You’ll also need:
*(2) 15 1/2” x 13 1/2" stabilizer (body)
*(1) 11 1/2” x 6” stabilizer (flap)
*(1) 11” x 6” stabilizer (pocket)
*(1) 13 1/2” x 6” stabilizer (carry-on sleeve)
*(1) 9” x 1” (top handle)
*(2) 41” x 1” (shoulder handles)
*(2) 3 1/2" x 1” (side tabs)
*(2) 1” D ring
*(2) 1” webbing sliders
OPTIONAL (according to the closure method you choose to use):
(1) set of magnetic buttons (flap)
(1) set of snap buttons (pocket)
Cutting instructions:
*(2) 15 1/2” x 13 1/2" – fabric A (body main side)
*(2) 15 1/2” x 13 1/2" – fabric B (body lining)
*(1) 11 1/2” x 6” – fabric B (flap lining)
*(1) 11 1/2” x 6” – fabric C (flap main side)
*(1) 13” x 11 1/2" – fabric D (pocket)
*(1) 13 1/2" x 13” – fabric D (carry-on sleeve)
*(1) 10” x 4 1/2" – fabric E (top handle)
*(2) 42” x 4 1/2" – fabric E (shoulder handles)
*(2) 4 1/2” x 4 1/2" – fabric E (side tabs)

Prepare the handles:
Use the same process below for all fabric E pieces and the stabilizer 1” strips according to the fabric size (each 1” stabilizer strip was cut 1” smaller than the fabric it’s meant to be used with, for reference).
For the example, fold the fabric E pieces in half lengthwise to crease, open and fold the long edges towards the crease (1). Add the stabilizer piece (2).
Then, fold both long edges towards the center covering the stabilizer piece (3). Join the long edges using clips (4) and sew on both long edges using 1/8” seam allowance.

After repeating the process for all fabric E pieces, insert the D rings on the smaller pieces as the photo below shows, and set all handles and tabs aside.

Prepare the body:
With the wrong side of each fabric A pieces touching the same sized stabilizer pieces, fuse (if applicable) and quilt using your favorite quilting design.

Start making the parts to complete the BACK of the backpack.
Fold the 13 1/2" x 13” fabric D piece on the 13 1/2"edge in half with right sides touching. Add the stabilizer, and sew the long edge using 1/4” seam allowance.

Turn the unit right side out through one of the open sides (now measuring 6”), and press.
Align the unit 3 1/2" above the bottom of the back part and sew on both sides using 1/4” seam allowance.

It’s time to add the handles and tabs.
Mark the top center of the back part. Align the (10” long) top handle strip 1” far from the top center mark on each side. Clip it in place.
Insert the shoulder handles on the D rings (with the tabs previously looped through), and add the webbing slider.
***follow this Youtube video tutorial to install the strap adjuster (webbing slider):
DIY Bag Strap Adjuster | How To Install a Strap Adjuster | @sewquaint
Align the tabs right below the carry-on sleeve on each side and clip.
Align the other shoulder handle tip right besides the top handle on each outer sides – it should be 3 1/2" far from each top edge of the back part.
Sew all in place using 1/4" seam allowance to secure.

Make the flap:
With the wrong side of fabric C (11 1/2" x 6”) touching the same sized stabilizer piece, add the lining fabric B also in the same size, with right sides touching.
OPTIONALLY, draw a round mark on the bottom corners using any round tool available in your sewing room, ranging from 2” to 4”, or leave it a rectangle.

Sew using 1/4" seam allowance, sewing INSIDE the corner mark (if applicable).
Trim the excess fabric using pinking shears on the corners (if applicable).

Turn the flap right side out and press.
Topstitch all around the edges to finish.

Install the magnetic button (if applicable). Or between the previous step and this current step, finish the closure method chosen.

With main flap side touching the main side of the body back part, align the flap to the top center. Clip and sew using a 1/4" seam allowance.
You’ve completed the back portion of the backpack. Set it aside.

Start making the parts to complete the FRONT of the backpack.
Install the front magnetic button (if applicable), on the center top of the front part of the backpack, 2” below the top.
Or, install or sew the other closure side/part of the closure method chosen.

To make the pocket, sew the rectangle unit in the same method used to sew the carry-on sleeve. Use the fabric D 13” x 11 1/2" piece with the 11” x 6” stabilizer piece, and fold the fabric with right sides touching on the 13” side, so when the unit is sewn it will measure 11 1/2" x 6”.
Using a heat erasable pen, mark from each short edge:
1/4"
1”
1”, as shown in the photo below.

Fold on each 1” mark closer to the edge and sew. (This is the front of the pocket).
Fold on the 1” mark farther to the edge on the opposite side and sew. (This is the inside of the pocket).

Pocket front: install the snap button – guide the flat side to be the outside.

Inside of pocket. Each of the sides have the seam on the 1” mark sticking out (so when sewing attention to sewing them in opposite folding directions as mentioned).

With the pocket front side out, fold the 1/4" side edges in, and align the pocket as shown below: 2 1/2" far on each side of the front part of the backpack and 4 1/2" far from the bottom.
Sew the sides first. First seam 1/8” seam allowance and a second seam 1/4" seam allowance.
Sew the bottom of the pocket using 1/8” seam allowance.
Install the other side of the snap button on the main front side of the body (if applicable).

From both back and front parts, cut a 2” square from each bottom corner (to make the box corners).

Clip both back and front parts together with right sides touching and leave the top unclipped.
Attention for not getting any part of the handles on the seams.
Sew all 3 edges using 1/2” seam allowance.

Without turning the bag to the right side yet, open the bottom corners and join the seams to nest and sew each one using a 1/2” seam allowance to make the boxed corners.
Turn the bag body right side out and carefully poke the corners out.

Repeat the corners cut for the lining rectangles. Cut a 2” square from each bottom corner. With right sides touching, sew the sides and bottom using a 1/2” seam allowance, but leave a 5” opening to turn.

Don’t turn the lining right side out. Insert the main body with the main fabric side touching the main lining side and adjust the top edges and sides to nest. Clip all around and sew using 1/2” seam allowance.

Turn the project right side out through the bottom opening on the lining.
Press the lining and carefully sew the hole to close the bottom.

Push the lining inside the bag and adjust the boxed corners to touch. Clip the edge in place and topstitch all around so body and lining are secure together on the top.
Attention to sew UNDER the handles on the back. If needed, push the handles and sew, cut the thread and push the handles back, and continue sewing.

To secure the bottom of the lining to the bag body, and give it more stability, sew the front and back base of the bag on the outside as shown in the photo below, using 1/8” seam allowance.

You’re all done!