DIY Winter Keepsake: How to Make a Concertina Mini Photo Album

Designer: Marcia Izabel Marchiori
YouTube: MarciaBel Vlog
Instagram: @marciabel
----------------------------------
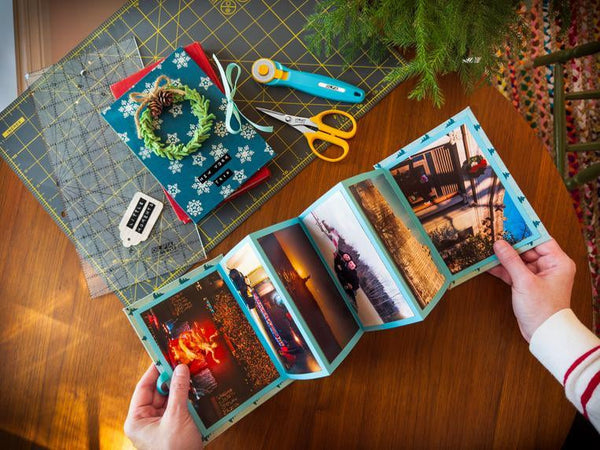
 There’s something special about creating an album that celebrates the season. A concertina album is not only beautiful to display, but also a wonderful way to hold treasured winter memories. With its zigzag fold and a fabric cover, this little book makes a thoughtful holiday gift or a cozy keepsake for your coffee table.
In this tutorial, I’ll guide you through the process of binding a mini concertina album with fabric covers attached to each end of the folded pages. The method is simple and beginner-friendly, making it a relaxing project to enjoy during the colder months.
To finish the album, we’ll add a handmade mini wreath, an easy detail that brings charm and a festive touch. Together, the design and decoration turn this album into both a seasonal craft and a beautiful piece of holiday décor.
So, let’s get started!
Tools & Supplies Needed
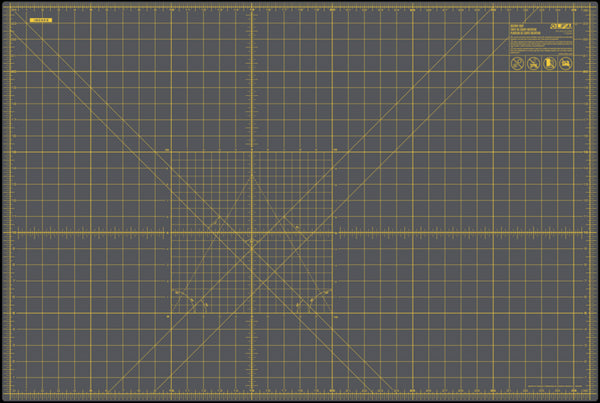
- OLFA Cutting Mat RM-MG-01/GRY 24" x 36" Double-Sided - Self-Healing Rotary Mat
- OLFA RTY-1C/TK-AQA 28 mm Quick-Change Rotary Cutter
- OLFA Acrylic Rulers (largest you have; shown: QR-6x12 and QR-6x24 Frosted Acrylic Rulers)
- OLFA SCS-4 5" Precision Appliqué Scissors
- 100% cotton patterned fabric, winter themed
- Bristol paper 22" x 28", in a color that matches your fabric (you can use any long, narrow strip of medium to heavy-weight paper so you won’t need to join two sheets together, but that’s optional)
- Cardboard scrap for two covers (recycled packaging works perfect)
- Felt, for leaves, in a color that matches your fabric
- Green floral wire and wire cutter, if needed
- Small foraged pinecones
- Ribbon
- Hot glue gun
- HeatnBond Lite Iron-On Adhesive
- Double-sided adhesive tape
- Iron (used: Oliso M3Pro)
- Bone folder
- Pencil and eraser
- 4 x 6” Printed winter themed photos of your choice
Instructions
Make the fabric covers
You might already be familiar with the technique of applying fabric to a cover using white glue (such as Mod Podge) as the adhesive. Today, however, I’d love to introduce you to a different method using interfacing. I often prefer this approach because it preserves the texture of the fabric and eliminates the long drying time of glue. Once you press the layers together with an iron, the cover is ready instantly. Let’s learn how to do it!
- Using the OLFA mat, ruler, and rotary cutter, cut two pieces of cardboard to 5" x 7". These are your front and back covers.

- Cut fabric and interfacing: cut two pieces of patterned fabric to 6 1/2“ x 8 1/2“. Cut two matching pieces of HeatnBond Lite to the same size. Note: this will give about 3/4“ extra all around to wrap to the back of cardboard.  These are the pieces you have so far:
- Fuse adhesive to fabric. Follow the manufacture's instructions to fuse the adhesive to the wrong side of each fabric piece. Let cool, then peel off the protective paper.

- Place one fused fabric piece wrong side up, then center a cardboard board on top. Lightly press the center area with the iron (on right side of the fabric) to tack the cardboard in place. You are only anchoring it for now.
- Flip to the fabric side up. With the ruler and rotary cutter, trim each fabric corner at a 45° angle, leaving a small gap from the cardboard corner (basically it’s the thickness of your cardboard). This gap is the trick to neat, closed points.
- Using the iron, press the fabric flaps along the long top and bottom edges over to the back of the board and fuse.
- Next, press the short side flaps over, pulling the fabric snug as you fuse.
- Use the tip of the iron to nudge the tiny fabric triangles at the corners inward before sealing, for crisp corners.
Repeat this process for the second cover. This is the finished result:
Cut and prepare the concertina strip
- From the 22" x 28" Bristol sheet (or whichever size your large paper sheet is), cut a long strip that is 6 1/2" high. You can place the two OLFA rulers, if have it, end to end for one clean cut, or mark and cut in sections.
- Choose a panel width that fits into your covers and with your photos (mine are 4 x 5” each): 5 1/4" works well with the 5 3/4" wide covers. Lightly mark the fold points across the length of the strip, starting from center of paper strip.
Always score for clean folds. Place the OLFA ruler on the first mark, in the center. With a bone folder, score along the ruler edge with firm, even pressure. Repeat at each fold. Scoring prepares the fibers and gives perfect folds. Fold along the scored lines in a zigzag, keeping edges aligned. Sharpen each fold with the flat side of the bone folder. Cut out excess paper.


Add the ribbon closure
- Cut two pieces of ribbon, each 10" long.
- Attach one ribbon to the center of the long edge of each cover, securing it with double-sided tape.

Attach the concertina to the covers
- Cover the back of the first panel of the concertina with strong double-sided tape, right to the edges. To mount it to front cover, center and adhere this panel to the inside of the front cover, leaving an even margin on all sides. Burnish well.

- Repeat for the back, taping the last panel and adhering it to the inside of the back cover. Check that the accordion opens and closes smoothly.
Make the felt mini wreath
- Cut felt strips: with the ruler and rotary cutter, cut felt into 1/2" wide strips.
- Using the OLFA appliqué scissors, snip along one long edge to create a fringe. Space the cuts about 1/8" apart, stopping before you cut all the way through.

- Add a dot of hot glue to one end of a felt strip. Place the end of the floral wire at a 45° angle and fold the felt over the wire to lock it in. Continue wrapping the felt along the wire at the same angle, adding a small amount of glue around every inch. Trim excess felt when you reach the end.


- Wrap the felted wire around a round object about 2" in diameter to shape a neat circle.
- Trim any excess wire, glue the ends together to form the wreath, then add two mini pinecones at the top and finish with a small twine bow.
Finishing the album
- Use double-sided tape to adhere your printed winter photos to the concertina panels.

- Center the wreath on the front cover and glue in place. Add any extra embellishments you’d like. For mine, I chose to give the album a title using a mechanical text embosser. Tie a bow on the side with the ribbon.
Your winter themed concertina album is ready to display or gift!

Don’t forget to tag me @marciabel and @OLFA_craft in your finished album, we would love to see your creation!
Marcia