Jacket Applique

Designer: Whitney Manney
Instagram: @whitneymanney
-----------------------------
Check out Whitney's Interview Here.

Supplies:
- Six fabrics: this is the perfect scrap buster project
- Top row (add 5/8” seam allowance):
- (2) 4 ½ x 6 ½ right and left blocks, (1) 6 ¾ x 5 ¼ center block
- Middle row (add 5/8”seam allowance):
- (2) 7 ¼ x 4 right and left blocks, (1) 7 ⅜ x 5 2/8 center block
- Bottom row (add 5/8”seam allowance):
- (2) 6 ¼ x 4 right and left blocks, (1) 6 ½ x 5 ⅜ center block
- 1 piece of 11 x 13 fabric for your cutout applique
- ½” folded bias tape
- Misc. scraps
- Download Applique Template
Tools:
- OLFA 9mm SAC-1 Stainless-Steel Graphics Knife With 30-Degree Precision Blade
- OLFA 5-Inch SCS-4 Precision Appliqué Scissors
- OLFA 60mm RTY-3/DX Ergonomic Rotary Cutter
- OLFA 45mm RTY-2/G Straight Handle Rotary Cutter
- OLFA QR-1x12 1" X 12" Frosted Acrylic Ruler
- OLFA QR-6x24 6" X 24" Frosted Acrylic Ruler
- OLFA QR-6S 6 1/2" Square Frosted Acrylic Ruler
- OLFA RM-MG 24" X 36" Green Double-Sided, Self-Healing Rotary Mat

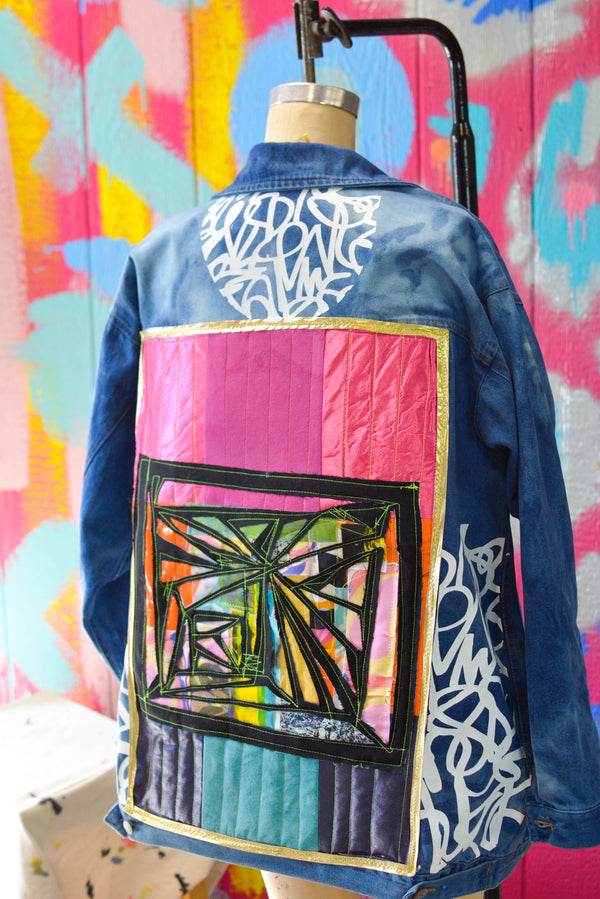
The fun part of this project will be choosing your fabric mixes. I went with a rainbow-inspired theme for the base patch but you could mix based on prints, textures, etc.
Instructions:
1. Stitch your fabrics together one row at a time with a ⅝” seam allowance: top, middle, and bottom. Then join the jaws together (3 rows of 3 blocks each gives you a 9 square large block. sew in the order provided below)
- Top row (add seam allowance):
- (2) 4 ½ x 6 ½ right and left blocks, (1) 6 ¾ x 5 ¼ center block
- Middle row (add seam allowance):
- (2) 7 ¼ x 4 right and left blocks, (1) 7 ⅜ x 5 2/8 center block
- Bottom row (add seam allowance):
- (2) 6 ¼ x 4 right and left blocks, (1) 6 ½ x 5 ⅜ center block

2. Once your big patch is stitched and pressed, you’ll cut the same shape out of batting. Pin in place to the back of the patch.

3. Quilt the batting & patch: I used a neon thread for contrast and spaced the stitches 1”

4. Now time for the geometric applique! A few notes: I used a lightweight twill that I stiffened with starch and interfacing but cutting but I think this would work really well with faux leather or thick felt.

5. I used the knife to cut the design. I drew the design on tracing paper, laid it on top of the fabric, and cut through both layers. The frosted rulers are the real MVP of this project. They don’t slip while cutting!


6. Where you want to layer your cutout is up to you! I kind of centered mine to show off as many colors as possible.

7. This step is optional but I layered a few scraps of my designed fabric to add some pops of pattern
8. Stitch the cutout to the big patch, this will take the most time. You can be as perfect as you want to be or go with the flow. I approached this with a collage mindset like Gee’s Bend quilts.

9. The big steps are done! Stay stitch your piece to the center panel of your jacket then topstitch bias tape along the edges.
10. I finished off my jacket with one of my patterns cut out of heat transfer vinyl on the side panels and as an accent on the yoke.

Be sure to head over and read interview with Whitney Manney here.