Unleash Your Creativity: 5 Quick and Easy Washi Tape Projects

Designer: Marcia Izabel Marchiori
YouTube: MarciaBel Vlog
Instagram: @marciabel
---------------------------------------
Hey there, fellow crafters! Have you ever found yourself mesmerized by the sheer array of colors and patterns of washi tapes? Made from rice paper, they have become a beloved staple in crafting communities worldwide. Their versatility knows no bounds, whether you're jazzing up a scrapbook or sprucing up your journal. But here's the thing: there's so much more you can do with washi tape beyond the typical paper crafts, like adding a touch of pizzazz to everyday items around the house!
That's why I've put together these five super quick and easy videos tutorials to help you explore the endless possibilities of this magical material. In less than two minutes each, along with the instructions below, you'll learn how to make:
- A stunning embellished tray, ideal for adding flair to a guest bedroom, serving your afternoon coffee, or organizing trinkets on your dresser.

- A darling "Happy Birthday" mini garland - or any personalized wording you fancy, thanks to my handy alphabet template!

- These adorable gift tags, radiating all the spring vibes:

- Colorful magnetic bookmarks easy to make and practical to use, for all bookworms in your life:

- And last but not least, we are going to embellish a photo frame, transforming a bland frame into a piece of art that's as unique as your home is!

These tutorials are very quick to make, and today I'd love to showcase three stunning washi tape sets from Riley Blake Design: Mercantile, Quilt Fair, and Home Town. These sets are absolutely gorgeous and perfect for mixing and matching in any project. 😊 So, let's get ready and unleash our inner creativity!
These are the OLFA Tools Needed For All 5 Projects:
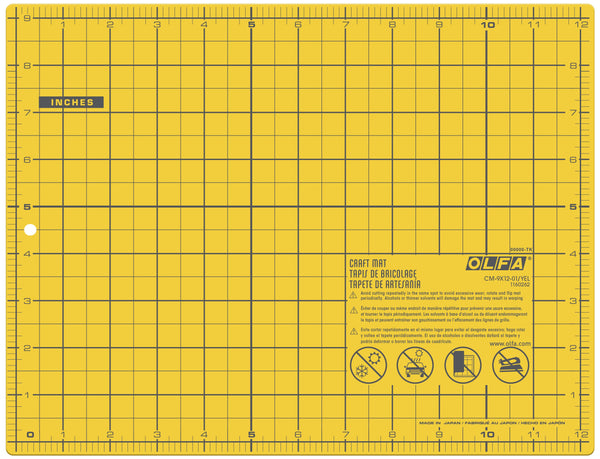
- OLFA CM-9x12-01/YEL Double-Sided Self-Healing Cutting Mat
- OLFA AK-4 Cushion Grip Art Knife
- OLFA QR-1x12 1" x 12" Frosted Acrylic Ruler
- OLFA 5-Inch SCS-4 Precision Appliqué Scissors
Project 1: Embellished Wooden Tray

Supplies Needed:
- Wooden Tray
- Riley Blake Designs Mercantile Washi Tape by Lori Holt of Bee in my Bonnet Set
- Riley Blake Designs Starch Brush By Jilllily Studio
- Mod Podge
Instructions for Project 1:
Gather all tools and materials.
- Start at one edge of the tray and unroll the tape enough to cover the entire length, plus a little extra on each side (you'll trim it later, after covering the entire tray), smoothing it down with your finger as you go. When applying the next layer of tape, slightly overlap the pieces of tape to prevent any of the tray from showing through and to help them stick together better.
- If needed, use OLFA art knife to trim the width of the last piece to ensure a perfect fit.
- After covering the entire tray with alternating strips, it's time to trim the edges of the washi tape. Use your OLFA ruler to press the corner firmly, ensuring a clear guideline for trimming. Then, with your OLFA AK-4 art knife, carefully cut away all the excess tape, ensuring a clean edge along both sides of the tray.
- Next, apply two layers of Mod Podge to the entire surface of the washi tape, using the brush, allowing each layer to dry before applying the next one. This will seal the tape and help make it water-resistant.
Voilà, your tray is ready to use!

Project 2: Mini Letter Garland

Supplies Needed:
- White label full letter size sheet (suitable to print, brand used: Avery)
- Riley Blake Designs Washi Tapes sets used in this project:
- Mercantile by Lori Holt of Bee in my Bonnet
- Quilt Fair by Tasha Noel
- Home Town by Lori Holt of Bee in my Bonnet
- Riley Blake Designs Chunky Thread (used in this project: #2 Sampler Package by Lori Holt of Bee in my Bonnet STCT-10907. I chose this set to have many color options, but you can choose one color of your choice)
- Printer for TEMPLATE
Instructions for Project 2:
Gather all tools and materials.
For this project, I've prepared a "Happy Birthday" template. Additionally, I've created a sheet with all the alphabet letters, giving you the versatility to write any motif you'd like to celebrate.
Note: If you want to use your own font, opt for a bold ”chunky" font. This provides significantly more space to apply washi tape compared to narrow fonts.
- Print the template on the white label sheet.
- Using OLFA scissors or the AK-4 art knife, cut out all of the rectangles of the templates.
- Cover each rectangle space with strips of washi tape until they are completely covered. You can apply the washi tape horizontally, vertically, or diagonally, and mix the patterns any way you prefer.
- Fold all of the rectangles in half.
- When everything is taped, you'll still see the printed letters because washi tape is somewhat translucent. Using the OLFA scissors, carefully cut out all the edges of the letters. For the internal parts of the letters, use OLFA AK-4 art knife for a precise cut (and OLFA acrylic ruler for all straight lines, when needed). IMPORTANT: be cautious to NEVER cut the top of the letters where you just folded.
- Peel off the protective sheet from the label, position the thread on the folded crease, then carefully align and attach both sides of each letter together. Repeat this process with all the letters, leaving enough space between letters and doubling the space between words.
Your garland is ready!

Project 3: Gift Tag

Supplies Needed:
- Kraft Paper
- Riley Blake Designs Washi Tapes sets used in this project:
- Mercantile by Lori Holt of Bee in my Bonnet
- Quilt Fair by Tasha Noel
- Home Town by Lori Holt of Bee in my Bonnet
- Dried Flowers (used in this project: white baby's breath flower I left air drying for a couple of weeks)
- Riley Blake Designs Chunky Thread (used in this project: #2 Sampler Package by Lori Holt of Bee in my Bonnet STCT-10907. I chose this set to have many color options, but you can choose one color of your choice)
- Pencil and eraser
- Hole Puncher
Instructions for Project 3:
Gather all tools and materials.
- Start by tracing the tags onto the kraft paper with a pencil. Use the guides on your OLFA mat and the OLFA acrylic ruler, along with a pencil, to trace parallel lines lengthwise with 2 inches apart from each other. Important: leave some extra margin (around half an inch from all edges of the sheet before starting tracing the tag lines).
- Still using your OLFA mat as a guide, along with an acrylic ruler and pencil, trace lines widthwise with 3 1/2-inch spacing between each other.
- Begin adhering the washi tapes strips (your choice of patterns) from the corner of the bottom of the rectangle, using your OLFA mat as a guide to stick them diagonally at a 45-degree angle. Stop adhering them after you cover about half of the area of the tag. Repeat this process with all the traced rectangles. Note: use enough tape to cover the rectangle area, plus a little extra for each side, extending beyond the rectangle lines (you’ll trim it later).
- Using OLFA AK-4 art knife and acrylic ruler, cut out each rectangle.
- After you have your rectangles made, trim off the top two corners: measure 1/2 inch of the corners (kraft paper side), trace a diagonal line on each side, then cut out the corners with the OLFA AK-4 art knife and ruler.
- Punch a hole between these two corners, about 1/4 inch down from the top of the tag.
- Measure and mark 1/2 inch from each side of rectangle, then cut out two lines with AK-4 art knife, following the lines of the last washi tape attached.
- Insert the dried flower between the two cut lines. Thread on top of the tag: cut your thread to the desired length (approximately 20cm). Double it up, then thread both ends through the hole. Next, pull the ends through the loop. Finally, pull tightly to secure the thread in place.
And your tags are ready!

Project 4: Magnetic Bookmark

Supplies Needed:
- 1-inch Flexible Magnetic Tape Strip with Self Adhesive (or can also use those business card magnets as a budget friendly, sustainable alternative!)
- Riley Blake Designs Washi Tapes sets used in this project:
- Mercantile by Lori Holt of Bee in my Bonnet
- Quilt Fair by Tasha Noel
- Home Town by Lori Holt of Bee in my Bonnet
- Copy Paper, letter size (not cardstock, the thin paper works better with these thin magnets)
- Optional: Mod Podge and Riley Blake Designs Starch Brush By Jilllily Studio
Instructions for Project 4:
- Using the OLFA AK-4 art knife, ruler, and mat, cut out rectangles measuring 4 inches by 1 inch.
- Begin adhering the washi tape strips (your choice of patterns) on one side of the rectangle, ensuring to use enough tape to cover the entire rectangle area, plus a little extra for each side, extending beyond the rectangle lines.
- Turn the rectangle over, and using the OLFA art knife and ruler, trim all excess tape, leaving a margin of approximately 1/4". Cut out all four corners diagonally. Then, fold down the washi tape on all sides towards the back of the paper.
- Apply more washi tape on top of the back side to finish both sides and hide all of the raw edges. I prefer using 2-inch wide washi tapes as they already cover the entire width of the rectangle (and just cut the exact 4-inch length of the rectangle, trimming with scissors or art knife). However, you can also mix narrower ones, ensuring to carefully trim all sides with your OLFA art knife or scissors.
- Fold the rectangle in half.
- Optional Step: If you would like your bookmarks to be more durable, give them a coat of Mod Podge on both sides. Allow it to dry completely before proceeding to the next step.
- Cut two pieces of the magnet strip, each measuring approximately 1". Peel off the sticker and stick them to either end of your bookmark. If you're using old magnet business cards, cut out a rectangle measuring 1 inch by 3/4 inch, and attach it with double-sided tape.
Now you can simply fold it over the page in your book, and you have your bookmark! This technique is so simple, and it’s great to have a couple of spare ones to mark your reading, planners, notes, and everything you need! Also, it makes a wonderful thoughtful gift along with a book 😊

Project 5: Washi Tape Decorated Frame

Supplies needed for embellished photo frame:
- White or Unfinished Wooden Photo Frame (ideally a frame that is flat in front and sides)
- Riley Blake Designs Washi Tapes used in this project are from the following sets:
- Mercantile by Lori Holt of Bee in my Bonnet
- Quilt Fair by Tasha Noel
- Home Town by Lori Holt of Bee in my Bonnet
- Mod Lodge
- Riley Blake Designs Starch Brush By Jilllily Studio
Instructions for Project 5:
- Take off the frame's back, along with the glass and any paper insert or artwork.
- Unroll sufficient washi tape to cover the front and sides of the frame, leaving a bit extra on both ends. Position it diagonally on one corner of the window fram Gently press the tape onto the front and sides of the frame, then wrap it around to the back.
- Use OLFA scissors or AK-4 Art Knife to trim the excess tape at the edge of the back of the frame.
- For the second strip of tape - and the following ones - unroll a sufficient amount of tape. Carefully position it under the other piece, leaving a blank space of the same width as your washi tape. Apply the tape until reaching both the top and right sides of the frame. Note: If your frame is wider than mine, begin applying the washi tape diagonally as explained above, but ensure to cover the entire blank space while maintaining the same measurements between all the tapes applied.
- Use OLFA scissors to cut the excess tape in the window of the frame, always leaving a bit extra on all ends. Note: reuse any excess tape to complete smaller parts of the frame further, minimizing tape waste.
- Then, wrap all of the sides of the tape to the back, as you did in the previous step, including the inside of the window frame. Trim the excess with OLFA scissors or art knife.
- Repeat this process, alternating the patterns, until you have covered the entire frame with washi
- Sealing the washi tape (front, sides and back of the frame) is important, especially due to the delicate nature of this medium and the fact that washi tapes sometimes have a lighter adhesive power. Additionally, sealing your frame will help with overall maintenance and cleaning. Simply apply two layers of Mod Podge with the Riley Blake Designs Starch Brush, allowing the first layer to completely dry before applying the second one.
And your frame is beautified and ready!

I hope you have lots of fun making these, and don’t forget to tag me @marciabel , @OLFA_craft and @rileyblakedesigns in your finished projects, we would love to see your creations!
Stay crafty!
Marcia