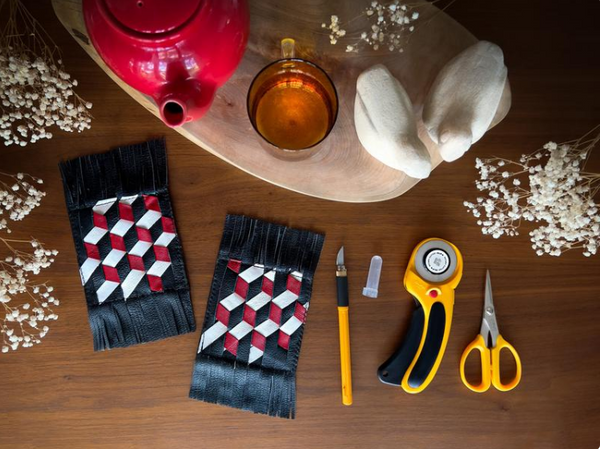
Triaxial Weave Mug Rugs
Designer: Randa Roberts
Level: Intermediate, Experienced Crafter
Time: 3-4 hours
---------------------------------

Hello there! I’m so excited to be showing you how to make some useful and beautiful mug rugs using upcycled leather, premium OLFA cutting tools, and a fancy triaxial weave. This is one of those projects that looks very complicated, but once you get the hang of the weave pattern, (over one, under two, over one...) you’ll be amazed at the 3D pattern that will emerge.

This tutorial is packed with easy-to-follow photos, instructions, and tips that you can refer back to when you need.

Featured Tools:
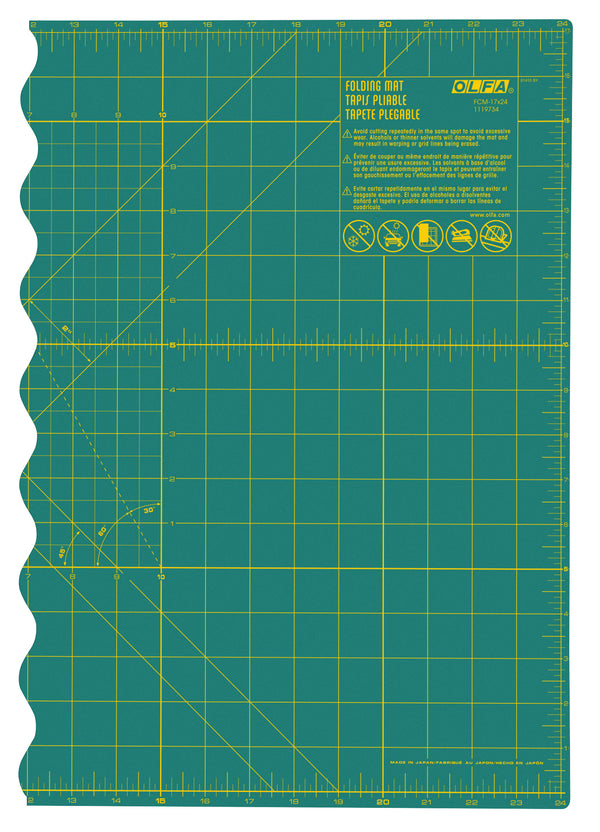
- OLFA FCM-17x24 17" X 24" Folding Cutting Mat
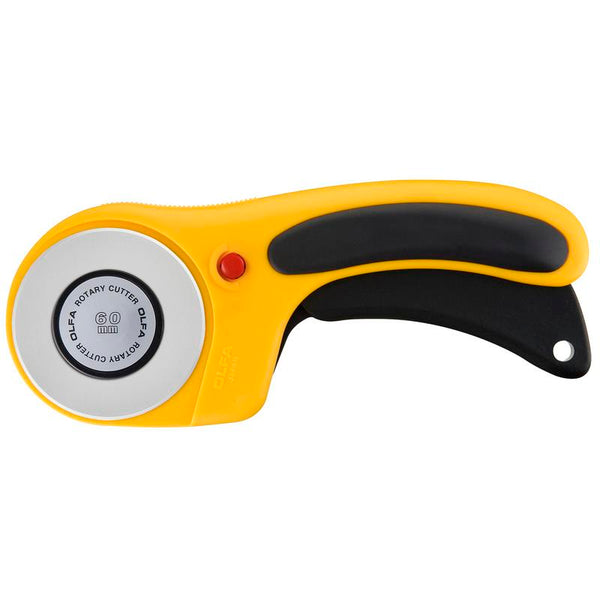
- OLFA 60mm RTY-3/DX Ergonomic Rotary Cutter
- OLFA AK-4 Cushion Grip Art Knife
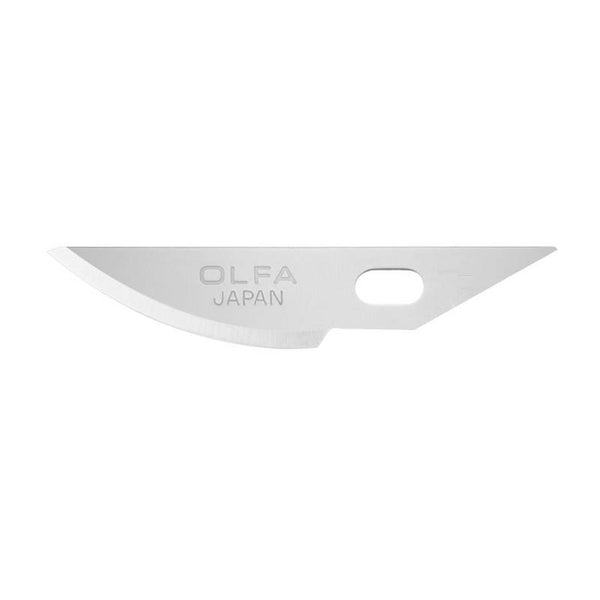
- OLFA KB4-R/5 Curved Carving Art Blade, 5pk
- OLFA 5-Inch SCS-4 Precision Appliqué Scissors
Materials:
- Upcycled leather or Cork,
- 3 colors
- at least 8 x 8” square or 8” long each
- 5 x 8” piece of leather for bottoms
Other Tools and Supplies:
- OLFA QR-4S 4 1/2" Square Frosted Acrylic Ruler
- OLFA QR-6x12 6" x 12" Frosted Acrylic Ruler
- Bodkin, or other tool used to pull material/leather
- Double sided tape
- Clips
- Leather punch
- Measuring tape
Upcycled leather is ideal for this project, not only because of its natural heat resistant properties, but because it’s easy to find a leather jacket in most charity shops, especially in the winter. Make sure you have three colors to choose from so the 3D pattern will pop. If you prefer, cork is a sustainable substitute material with the same heat resistant properties and is easier to sew.

The secret to pulling the leather strips through is a bodkin. Maybe you have one in your sewing supplies already, but they are easy to find online or in fabric stores. The one I own is a long rod style with a loop for my finger and a small latch at the top. I used a leather punch to make a hole at the top of every strip and used my bodkin to weave through the warp.

This project may look a bit daunting at first, but I hope that my step-by-step photo instructions make it fast and fun.

Let's get started with a quick primer on weaving: vertical strips are the WARP and horizontal strips are the WEFT. For this triaxial weave – triaxial literally meaning relating to three sides – we have two wefts. The finished mug rug should be approximately 4” wide by 7” long with a backing sewn on.
Cutting:

Using the 4x41/2 ruler and your OLFA Rotary Cutter, cut two identical squares and set them aside to be used as the backing later.
Cut leather strips using your ruler and rotary cutter to be 1/2” wide by 8” long. Take your time to line up your ruler and keep your fingers far from the edge. Make a long cut with your rotary cutter.

You’ll need 8 warp strips, and 7 for each weft layer.

If you’re using a bodkin like the one I have, take your leather punch and make a small hole at the top of the 15 weft strips so you can hook them when you weave. Which you are about to do!
Weaving:

First, find the 30-degree angle on your OLFA Cutting Mat. Imagine your mat as a loom, and this as a center for your weaving, and place two trips of double-sided tape about 8” apart, and no less than 4” wide.

Take your warp strips, and stick them to the tape, gently tugging on each one so they are taut. Follow the grid on your OLFA Cutting Mat to line them up perfectly.
Now it’s time to weave the first layer of the triaxial pattern. NOTE: there are actually two different weaving techniques here. The first one is a method, the second one is identifying the angle and pulling the weft through.

This is the method for step one:
- Strip 1: Over one, under two, over one, under two….
- Strip 2: Under one, over one, then under two, over one, under two, over one….
- Strip 3: Under two, over one, under two, over one….
In this video, you can see how I gently coax the bodkin through the warp, attach it to the red leather weft strip and pull it back through. Then I line it up with the 30-degree line on the mat.

Follow this method until you have 7 strips woven. It should look just like this, with diagonal diamonds in a row. If it doesn’t, you’ve skipped a step and you’ll need to go back. Don’t worry, practice makes perfect. Just wait until you see the 3D boxes emerge. Wow!

Step Two:

The second layer of the triaxial weave will go through the “Z” pattern here. You’ll find it if you look hard, but follow along with this video and I’ll show you how it’s done.
You’ll be pulling this strip through the warp and weft, so take your time and eventually you’ll know where it goes, and you’ll be on your way. You can use a ruler to see the line a little easier.
Stop around the 7th weft, or wherever you find it looks best.
Finishing and Trimming:

It’s time to tuck, snip, tape, flip, and sew. In that order! Once you’ve adjusted and tightened your weaving to your satisfaction, gently tug at the top and bottom of the taped down warp pieces to release them from your OLFA mat. Carefully flip your weaving so the wrong side is up. Gently pull the tape remains off of your materials and mat.

To put the backing on your weaving, take one of the 4x41/2” squares and place a strip of double-sided tape on all four sides. Center it on the weave and press down to secure. Use your double-sided tape or clips to secure the strips that need it.

Using your OLFA Precision Applique Scissors, snip the ends of the weft off near the top and bottom. Secure with a clip or tape.

Take it to the sewing machine and using matching thread, sew a simple stitch all the way around, backstitching at the end.


Finishing time! Use your 60mm OLFA Rotary cutter and 6x12 ruler to trim as close to the stitching lines on each side. The 60mm blade will cut through all of the layers with no difficulties, making it so handy to have.

Now turn your mug rug and trim the warp edges so they’re even.


Set your small square ruler on a warp piece. Holding the AK-4 Art Knife comfortably in your hand, slice into the leather and rock the curved blade forward to get as close to the stitch line as possible. Pull the art knife down slowly. Repeat 3 times per warp strip until you have created a consistent fringe on both sides.

You can choose to finish your edges with a product such as Edge Coat, or leave them. Both are beautiful.
There you have it! I hope that my instructions have inspired you to try a new craft. Enjoy the process, go slow and have fun!