The Beauty of French Seams for Sewing with Tulle

Designer: Mary Stanley
Instagram: @whatmommamakesig
-------------------------------------------------
Materials and Tools Needed:
- OLFA 45mm RTY-2/DX Ergonomic Rotary Cutter
- OLFA RM-MG 24" X 36" Green Double-Sided, Self-Healing Rotary Mat
- OLFA QR-6x24 6" X 24" Frosted Acrylic Ruler
- Clips or Pins (but clips are preferred)
- Tulle Fabric
The month of June usually ushers in the beginning of wedding season each year and, if you sew, that means you may be working on bridal gowns, bridesmaids dresses, flower girl dresses…or just a fancier dress for yourself. These special occasion dresses are usually comprised of fabric that can be a bit trickier than sewing with a simple cotton or knit fabric.
Tulle is definitely one of the most common fabrics used in bridal sewing, and although it may seem intimidating at first (especially when the fabric requirements needed for sewing with tulle are usually much higher than a dress sewn from normal apparel fabric), tulle is not a fabric to be afraid of! In fact, since it does not fray, you don’t even have to hem it! You can simply leave the edges unfinished for a light and airy look, or you can finish off the edges with a horsehair braid (see my last OLFA project) for a more dramatic look! Either way though, it’s such a great fabric to work with!
Tulle is a light, often soft fabric that varies greatly in many aspects. Tulle can be made from silk, nylon, rayon or polyester and has differing weights and hole size in the mesh of it. It can also be embroidered or beaded as well, for those super fancy looks. Oftentimes people confuse netting with tulle but, to be clear, they are different with distinct purposes! Netting is great for cheaper crafts or possibly for building out stiff underskirts. However, it is extremely stiff and scratchy, so tulle is better suited for using in garments, and certainly for anything bridal or special occasion.
One of my favorite tricks to learn when sewing with tulle is mastering a French seam. Due to the sheerness of tulle, you do not want to see ugly seams under the skirt layers, so constructing a tulle garment using French seams creates a very high-end finish! Let’s get to work!
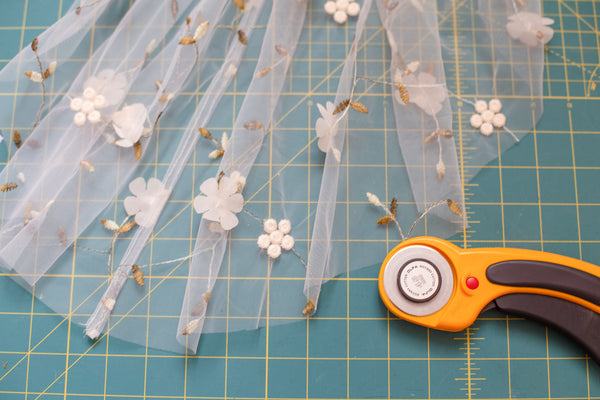
First off, we will take two pieces of our fabric that we are wanting to join and place them WRONG SIDES TOGETHER! Yes, trust me, I know this goes against everything our brains tell us when we are used to assembling garments, but be sure you have wrong sides touching each other and the right sides facing outward. You can see in the second photo I am holding out the flower detail showing the right side of the fabric is facing out.
Next, we will sew along that seam we just pinned together – and this will slightly depend on what pattern you are sewing up. Each pattern calls for a certain seam allowance, so if you are sewing it with a French seam instead of a standard seam, you will subtract ¼” from the seam allowance your pattern calls for. For example, if your pattern states to sew the seams with a ½” seam allowance, for the french seam you will sew with a ¼” seam allowance here instead.
Then you will trim back that seam allowance down to 1/8”. Using your rotary cutter and frosted ruler here is best as you can easily keep your lines straight and neat without cutting into the sewn stitch line.
Next, we will fold our fabric so that it is RIGHT SIDES TOUCHING with the newly trimmed seam in between the two fabric layers. Here you want to press it to create a nicely pressed crease where the seamline is. Clip in place to keep that tulle from slipping or sliding around and keeping your crisp edge.
Finally, we will sew together with a ¼” seam allowance, ensuring that you are completely enclosing that first seam we created with none of that sticking through. If you do not enclose all of that initial seam allowance, it would actually stick out on the right side of the final garment, so ensuring it is fully enclosed is important!
And Voila! Looking at the right side of your garment you will have a nice and crisp seam while being able to see the high-end finishing underneath as well!
Of course, you can use this technique for your seams on standard apparel garments as well if you want that extra special touch but isn’t as necessary as it is with garments with a transparent top layer. So, what do you think of this final flower girl gown…sewn completely with French seams?


