Embrace Spring With DIY Lavender Sachets: A Cross-Stitch Tutorial
Designer: Marcia Izabel Marchiori
YouTube: MarciaBel Vlog https://www.youtube.com/@marciabel
Instagram: @marciabel
Level: Beginner

There's no better time to welcome spring than with a charming DIY project! Today, I am guiding you into the art of crafting fabric sachets, infused with the delicate fragrance of dried lavender.
In this tutorial, I’ll guide you through the steps of creating these sachets but also introduce you to the timeless art of cross-stitching, covering basics from selecting the perfect fabric for your project and floss to understanding essential techniques.
So let's embark on a journey of creativity, relaxation, and get stitching!

Tools & Supplies Needed
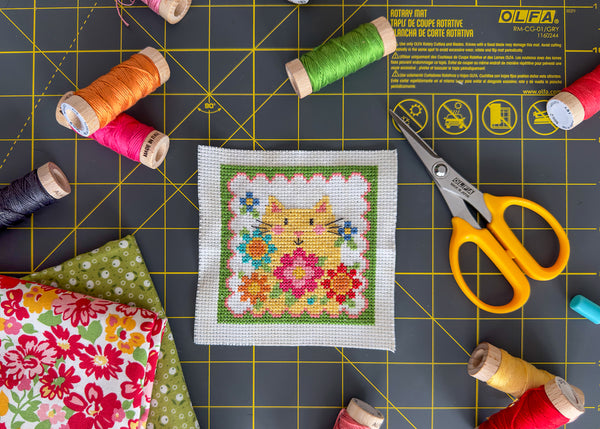
- OLFA RM-CG-01/GRY 12”X18” Double-Sided Self-Healing Rotary Mat, Gray
- OLFA 45mm RTY-2/C Quick-Change Rotary Cutter, Aqua
- OLFA QR-1x12 1" X 12" Frosted Acrylic Ruler
- OLFA 5-Inch SCS-4 Precision Appliqué Scissors
- Template to download
- Riley Blake Designs Bee Cute Lace (Natural Assortment by Lori Holt of Bee in my Bonnet)
- Riley Blake Designs Bee Basics Floss Aurifil Embroidery Floss Set (Colors Used: Yellow 2130, Green 1114, Green 2882, Blue 4140, Coral 5002, Orange 5009, Pink 2530, Pink 2425, Red 2270, Burnt Yellow 2134, Grey 2630, Teal 1148, Light Pink for nose 2435)
- Riley Blake Designs Glamper Sewing Pins
- Riley Blake Designs Embroidery Needles
- Dried Lavender Buds - For an extra special touch, consider using dried lavender buds from last year's harvest, making your project even more special!
- Sewing Machine (basic skills) & notions
- Iron and ironing mat
- Optional: embroidery hoop of your preference
Fabric Requirements (all from Riley Blake Designs):
- Vintage Cloth Cross Stitch Fabric - 14 Count Evenweave Malted Milk VC14-MALTEDMILK
- 5-inch square of Red Mildred C13070-RED
- Lettuce Suzanne fabric C13086-LETTUCE
- Cross Stitch Fabric used for instructions/demonstration: 14 Count Evenweave Malted Milk, 20-count Vintage Cloth Linen and 25-count Evenweave Heritage.
Fundamentals of Cross Stitching
Before we dive in the sachet tutorial, and if you're brand new to the world of cross stitching, let's start with the basics to help you grasp the materials and tools needed for this technique. Cross stitch is one of the easiest forms of hand embroidery to learn. It involves creating x-shaped stitches on various fabrics with an even and open weave, also available in different colors. The most commonly used fabrics for cross stitch are AIDA cloth and linen.

An essential concept in cross stitching is understanding the "count" of the fabric, which refers to the number of warp and weft threads per inch in the woven fabric. Essentially, it determines the number of cross stitches per inch in your finished embroidery project.
AIDA CLOTH: It is specifically designed for cross stitching, featuring a 100% cotton composition with woven thread arrangements that form visible tiny squares in the fabric. AIDA is often preferred by beginners due to its distinct "holes" that make it easier to see and stitch. Its natural stiffness also provides stability, allowing you to work without an embroidery hoop if preferred.
It is labeled according to stitch count, indicating the number of squares per linear inch. So, for instance, a 14-Count fabric will have 14 squares per linear inch. Common sizes include 7, 10, 11, 12, 14, 16, 18, and 20 counts.
EVENWEAVE LINEN: On the other hand, linen threads offer another excellent medium for cross stitching, giving us very delicate results, although requiring careful thread counting due to its finer texture.
It is categorized by its thread count. For example, 25-count linen means there are 25 threads in one linear inch. When cross stitching on evenweave linen, stitches are made over 2 warp threads horizontally and 2 weft threads vertically.
To better illustrate this concept, here's an example of the same pattern (a heart shape) stitched on 3-inches squares, with three different fabric counts (AIDA and linen):

Understanding a Cross Stitch Chart
Cross stitch patterns serve as the blueprint for your embroidery project, guiding you through each stitch to bring the design to life. These patterns are typically presented as a grid of squares or boxes, with each colored square (generally with a symbol) representing a single crossed stitch.
A practical approach to starting your project is by locating the middle of the pattern. Look for arrows positioned at the top, bottom, and sides of the chart, indicating the central point. Beginning from the center allows you to maintain control over the stitch counts, particularly beneficial for larger designs as it reduces the need for frequent counting.
While smaller patterns may allow you to locate the center using only your fingers, larger ones may require the assistance of a pointed tool (needle, pencil, etc) or ruler to navigate through the stitches accurately. It's worth noting that many charts feature bolder lines, often numbered, every 10 squares. These lines serve as visual aids to facilitate your counting process, making it easier to navigate through the intricate grid and maintain accuracy throughout your stitching journey.
Tip: Pinching and creasing the center point of your cross stitch fabric is a practical method to mark it effectively. Additionally, you can enhance the visibility of the center by placing a pin or making a small stitch at this marked point. These additional markers serve as visual cues, ensuring that you maintain accuracy as you progress through your project.

Prepare Your Thread
It's essential to prepare your thread for stitching. I find it helpful to cut a length of thread measuring about 18-20 inches, roughly the length of my arm. Alternatively, you can use the guides on your mat for measurement. Be cautious not to cut threads too long, as they're more prone to tangling while stitching.
Floss typically comes in 6 strands, and you'll need to separate these strands to use the appropriate amount for your stitches. While most patterns specify the number of strands required for each type of stitch, it’s also up to your personal preference and desired aesthetics. For 14-count AIDA cloth, I recommend using 2-3 strands, while for linen, 1-2 strands work well, depending on the fabric's count (20-25-count).

A couple of handy tips on threads:
- If you're uncertain about the number of strands to use, experiment with a few test stitches using different strand counts on your chosen fabric. This will help you determine the ideal combination for achieving the desired look and ease of stitching.
- Also, while stitching, you may notice that the thread tends to twist. To prevent this, take a moment every so often to let your needle and thread hang freely, allowing them to unwind naturally. This simple practice helps maintain the smooth flow of your stitching process and minimizes the likelihood of tangles or knots.
Here’s an easy way to separate two strands of your 6-strand floss without tangles:
Basic Stitching Instructions
Once you've chose the starting point of your project, the stitching process typically involves working in rows from left to right. The key is to ensure consistency in crossing your stitches, maintaining a uniform appearance throughout your design.
When it comes to anchoring your thread, I have two preferred methods.
- One method, known as the "Away Waste Knot Anchor”, involves tying a knot away from the main stitched area, providing a little extra thread. After completing your stitching, simply cut out this knot with OLFA precision appliqué scissors
and weave the extra thread into the stitches on the back for a clean finish.
- Another method I love is starting with a loop on the back of the fabric. So, if you're using a 2-strand 18-inch thread for your project, take instead a 1-strand 36-inch thread folded in half to create a loop at one end. Begin the stitch at the back of the fabric, coming up to the front while leaving a "tail" with the loop at the back. When you return to the back, pass your needle through the loop and pull tightly to create a snug knot. Then, continue stitching as usual. This technique provides a secure start without the need for knots. Note: this method is excellent for starting a new color in your work each time. See next video to see this in action :-)
Making a Row of Cross Stitches
When it comes to creating a sequence of cross stitches, consistency is key to achieving uniformity in your stitches. Always use the same sequence to maintain regular stitches. My preferred method involves the following steps (see video below):
-Begin from the back side of the fabric (position 1) , bringing your needle up through a hole toward the front.
-Next, pass your needle through a hole diagonally across from where you started to create a slanted half cross stitch (position 2).
-From the back, bring the needle back to the front directly below the last hole you used (position 3).
-Finish by passing the needle diagonally again to complete the cross stitch (position 4).
-Repeat this sequence for the entire row, ensuring that each stitch follows the same pattern to maintain regularity in your work.
Here are some tips to keep in mind:
-Work toward a nice, easy tension for your stitches. Avoid pulling them too tight, as this can warp the fabric, or leaving them too loose.
-To maintain a neat appearance while stitching, avoid making long jumps across the back with the thread. Aim to jump across 2-4 squares at most. However, ensure that the thread is not left loose; instead, pass it in the back through existing stitches. This technique helps to secure the thread.
-When the thread ends, also finish its end going back a few stitches on the back of the cloth, this way you won’t need any knot in your entire work:
By understanding these fundamental aspects of cross stitching and fabric counts, you'll be well-equipped to embark on your stitching journey with confidence and creativity. Now, finally let’s start the sachet tutorial!
Lavender Sachet Instructions
- Let’s begin our cross stitch project by printing the pattern to scale HERE. Note: While this pattern displays the precise size of the finished project when using 14-count cloth, it can certainly be adapted for use with different counts. However, please keep in mind that the final size will vary accordingly.
- Using OLFA scissors, cut a 4 1/2-inch square of the Riley Blake Designs 14-Count Vintage Cloth Cross Stitch Fabric. We're cutting the cloth a bit larger so that we can trim it later on, when finishing the cross stitch.

- Start by locating the first point of your work, ensuring to center the design within the 4 1/2-inch square of fabric right from the beginning. A good strategy is to press your cloth in half, then in half again to make creases (this way you’ll always have the center marked for reference until the end of your work), them mark the center of squares with pins. Tip: Always have your OLFA acrylic ruler to assist you in measuring/finding the center and stitch placements, this will make it easier to count the fabric squares. Now it’s easy to find and start your project accurately :-)


- Following all the guidelines outlined above regarding cross-stitching techniques, cross stitch the entire pattern onto your square.
Tip when cross stitching: It’s much easier to start the work by making the entire green border first, this way you will always have a guide, from all sides, to locate the rest of the motifs in the design, always referring to the border when counting towards a new color pattern.
- Here is the cross stitch design finished:

- Using the OLFA rotary cutter, ruler and mat, measure 1/4” allowance of all sides and cut excess fabric.


- Let’s make the fabric border: with OLFA rotary cutter, ruler and mat, cut two 4 x 1-inch strips of Riley Blake Designs Lettuce Suzanne fabric.

- With the fabrics' right sides together, start by pinning the border to the cross-stitched square top at its center and then at the ends.

- Sew both together with a 1/4" allowance. Press open both sides.


- Measure the other two sides, it should have 5” at this point. Using OLFA rotary cutter and ruler, cut two 5 x 1-inch strips to match the length you just measured.

- Repeat the same process as explained above: sew the remaining two borders in the same manner as you did with the first two sides, pressing them open as well. The result should be a 5” square.
- Using OLFA rotary cutter, ruler and mat, cut and a square of Red Mildred floral fabric, matching the measures of your cross-stitched square with border, which should be 5”.

- Sewing everything together: to hang your sachet, attach a lace measuring about 11 inches folded in half to the top center of your fabric squares. Ensure that the ribbon does not interfere with the seams when closing the sachet. Pin and sew everything together with a ¼ inch seam allowance, keeping the right sides together. Leave an opening of approximately 1 ½ inches on the bottom side to fill your finished sachet with lavender. Tip: it's best to mark this opening before you start sewing with pins, as it's easy to forget otherwise.


- With OLFA scissors, carefully trim away all the excess fabric in the four corners. This step helps reduce bulkiness and ensures cleaner corners when you turn the sachet right side out.

- Make a funnel out of a sheet of paper, then fill your sachet with dried lavender.

- Now, close the sachet with invisible stitches. Here's how I do it:
And your lavender sachet is ready!


I hope you have lots of fun making these, and don’t forget to tag me @marciabel , @OLFA_craft and @rileyblakedesigns in your finished projects, we would love to see your crafts!
Marcia