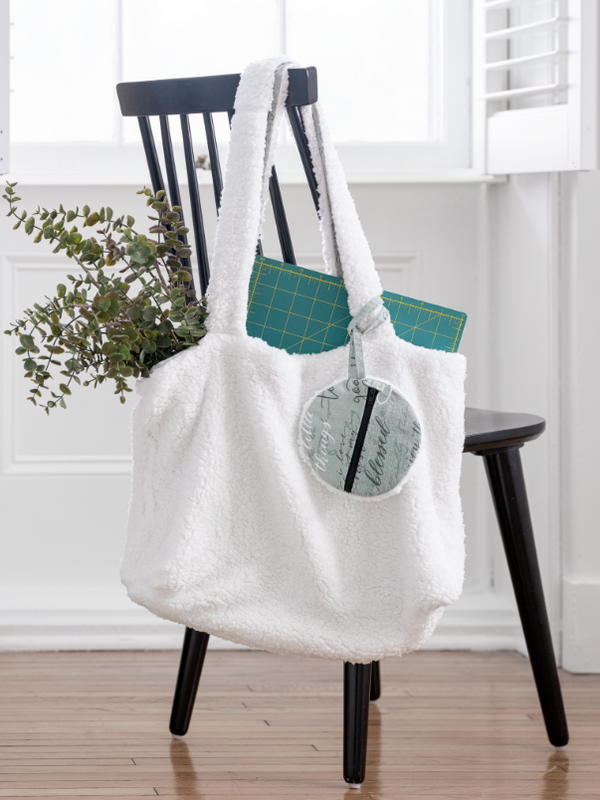
Sherpa & Canvas Reversible Tote with Circle Pouch
Designer: Randa Roberts
IG: So Comfy Designs
Crafting Time: OVER 5 HOURS / WEEKEND PROJECT
Skill: INTERMEDIATE
Supplies & Tools
OLFA FCM-17x24 17” X 24” Folding Cutting Mat
OLFA 45mm RTY-2/DX Ergonomic Rotary Cutter with
OLFA PIB45-1 Stainless Steel Pinking Blade
OLFA QR-6x24 6” X 24” Frosted Advantage Ruler
OLFA CMP-3 Rotary Circle Cutter
OLFA 7-Inch SCS-2 Serrated-Edge Stainless Steel Scissors
1.5 yards of Solid Sherpa Faux Fur Fabric
https://www.joann.com/solid-sherpa-faux-fur-fabric/zprd_17763343a.html
1.5 yards of Cotton Canvas Fabric
https://www.joann.com/live-simply-words-cotton-canvas-fabric/18321703.html
6” nylon zipper
Iron & ironing board
Sewing machine and desired colour of thread
Pins or clips
DIRECTIONS:
FOR TOTE:
CUTTING
Lay your canvas flat on your cutting surface.
Decide what size you want your bag to be. The one featured in the photos is approximately 23” wide by 21” deep.
Using your ruler and rotary cutter (with pinking blade) cut out a rectangle that is 24” wide by 22” deep. Repeat to cut the back OR fold your canvas in half if you want to cut both sides together.
Repeat exact same steps with your sherpa faux fur. Set aside.
Cut a canvas rectangle that is approximately 8” deep by 10” wide for a front pocket. Fold the raw edges WST in about 1/4” and press with a hot iron and steam. At the top, fold down one more time about 1” and sew across the bottom of that seam.
Center the pocket on the front of your canvas. Position it closer to the top because you will be creating boxed corners and will need room for the bottom of the bag. Pin pocket in place, and sew around the 3 sides, leaving the top open.
For the straps, cut two long rectangles, approximately 3” wide by 32” long out of canvas and sherpa. Set aside.
For the circle pouch, set your OLFA Rotary Circle Cutter to 3” and cut out 3 canvas circles and 1 sherpa faux fur circle.
Cut one long strip of canvas that is approximately 3/4” wide by 18” long for the handle.
Set aside.
SEWING
Take your canvas front and back body, with right sides together, and sew along the sides and bottom with a 1/4” seam allowance. Press open the seams.
Take your Sherpa Faux Fur bag body pieces and repeat the same steps, but do not use an iron.
BOXED CORNERS
Take your bottom corners and lay them flat on your table, with the pressed seams lining up. You’ll have a triangle in front of you. Use a ruler to measure 3” from the bottom, and mark with a light pencil line. Do this to both sides.
At your sewing machine, sew a strait line across where you marked. Use your ruler and rotary cutter to trim the triangle end leaving a 1/4” allowance.
Repeat steps with the Sherpa Faux Fur BUT be sure to leave a 4” opening on one side to pull the bag through once it’s sewn together.
STRAPS
Line up your canvas and sherpa, right sides together, and sew along each side, leaving 1/4” seam allowance. Turn out - there will be just enough room to work it through. Press ONLY on the canvas side to flatten them.
Take your canvas bag body, and measure 5” in from with side. Using pins, pin on end of your strap, canvas side down, to the right side of your canvas body. Repeat for both sides.
JOINING THE BAG
Making sure that the canvas and sherpa are both turned wrong side in, stuff the canvas into the sherpa. Push the bottom corners together so the bag looks like it’s inside out. Line up the side seams and pin or clip around the entire opening of the bag.
Starting 3” before a side seam, sew all the way around the bag.
Pull the bag through the opening in the Sherpa Faux Fur you left, and work until the shell and lining are perfectly aligned.
Stitch the opening closed.
MAKING THE CIRCLE POUCH
Take the long rectangle you cut early and fold along one side 1/4” and press. Do the same to the other side. Then fold it in half and press again.
Stitch along both sides.
Take two of the canvas circles you cut, fold them in half, right side out, and press.
Sew a zipper in between both halves. Trim zipper if need be.
Take the long strap you just made and fold it in half. Pin the ends to the top of the circle about 1/2” before the zipper. Sew in place, and be mindful that you don’t sew the long loop in the next steps.
Open the zipper half way so you can turn your pouch out.
Lay your Sherpa Faux Fur circle on top of the zippered circle, RST.
Layer the last canvas circle, right side up, on top of the wrong side of the sherpa.
Pin or clip all the layers together.
Sew all the way around the circle, making sure all the layers line up.
Unzip the rest of the zipper and turn the pouch out. Use your fingers to push out the edges of the circle, then press ONLY on the canvas zipper side.
Use the pouch on it’s own, or to loop around the bag strap as an accessory.
HACKS
Use a decorative stitch on the pocket, such as a zig zag for a little decoration.
Keep a lint roller handy for all the fluff that will result from cutting the sherpa. A pinking blade will cut down on the fluff as well. Make your bag any custom size you wish.


