Sewing With Horsehair Braid!

Designer: Mary Stanley
Instagram: @whatmommamakesig
-------------------------------------------------
Tools and Supplies Needed:
- OLFA 45mm RTY-2/DX Ergonomic Rotary Cutter
- OLFA RM-MG 24" X 36" Green Double-Sided, Self-Healing Rotary Mat
- OLFA QR-6x24 6" X 24" Frosted Acrylic Ruler
- Horsehair braid (size and color of your choice) and any item to which you would like to add a gorgeous new show-stopping hemline.

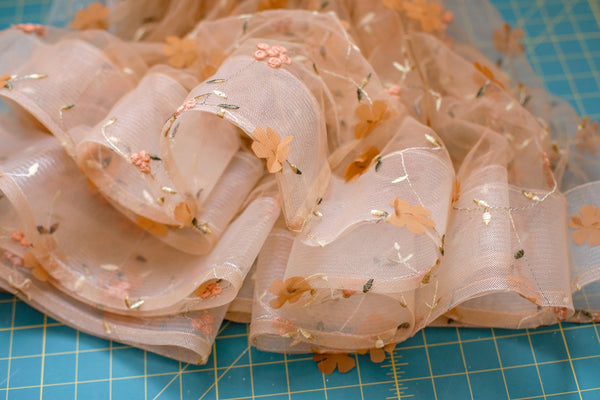
First off, what in the world is horsehair braid? No, it is not actually made from horses’ hair any longer (although in years gone by it was created from the hair of the horses tail and mane!)– it is a type of crinoline netting, often used in hems of bridal gowns or fancy dresses that provides structure and body to the hemline and skirt of the dress. And contrary to what I had originally assumed – horsehair braid is EXTREMELY easy to use! It has become one of my favorite ways to hem a skirt actually!

Horsehair braid (lets shorten it to HHB for the remainder of this article) is available in a wide range of colors, stiffness and sizes, starting at ½” and going up to 6” in width! The wider the width, the more body and pizzaz you’ll end up with! A ½” -1” width provides a much more subtle look, mainly acting more like a facing and stabilizer for hemming while 6” is mostly used for pageantry and costumes. The same thing follows for the stiffness of the HHB- if it’s a softer variety, it will provide a more subtle structure, while a stiffer HHB creates a more rigid and full body look.
Some types of HHB have little loops of thread along one edge of it that you can pull as needed to help shape it if you are sewing a big circle (or wavey) skirt, but today I’m working on a rectangle skirt, so that isn’t necessary. Today you’ll see me working with one 3” and one 4” HHB, both are the type of HHB that does not have the thread along the top edge.
HHB can be sewn to tulle, organza, and all sorts of fancy fabrics, but it can also just as easily be sewn to cotton or your lining layers. So today let’s try both! If you know anything about me, my passion is repurposing thrift store finds into something new, and although I have rarely found any type of tulle for repurposing, I will be using a $1 thrifted fitted sheet that I found for our bodice and lining layers. To get that prepped I’ll first use my OLFA rotary cutter to cut off the elastic edges of this fitted sheet.

Next, I’m going to use the super easy Viola dress pattern from Violette Field Threads to sew up this flower girl inspired dress!


It’s really pretty as is, but now let’s give it that extra wow factor by hemming the skirts with the HHB!
First off, we are going to finish off the bottom raw edge of our fabric with a zig zag stitch or small rolled hem if our fabric is something that will fray. If you are using tulle or mesh that doesn’t fray then you do not need to finish the bottom edge first.

Next, we will lay our HHB on the RIGHT side of our fabric, aligning it along the bottom edge starting from a seam towards the back of the skirt. You want to clip the HHB loosely to your fabric – do not pull it taunt as it will stretch the HHB and make the hemline look twisted. So loosely pin the HHB all the way around until you reach back where you started.

The cut edge of the HHB is somewhat sharp/pokey so I always like to enclose it in a piece of bias binding in a coordinating shade or just a casing made from the fabric of your skirt, but be sure that your binding is UNDER the HHB in this step – once we flip it around you’ll want that binding facing out.


Next, we are going to sew along the bottom raw edge that we just pinned with a 1/8-1/4” seam allowance.


Once that is sewn on, you are now going to flip the HHB around until it is on the wrong side of the skirt. Here I love to use my OLFA frosted ruler to help push/flatten the HHB down into that edge we just created. Pin or clip the edge as you get it nice and flattened out.


Finally, you can hand stitch the top line of the HHB in place, but I find it quicker to just topstitch it on the machine!


And Voila! The finished hemline…. See that difference in the before and after of all the volume the HHB created in the skirt?


