Sewalong to the Galena Dress by Styla Patterns (Cuff Hack)

Designer: Catherine Holbrook
YouTube: @bringingsewingback
-----------------------------------------------
Size or Dimensions: reference fabric requirements chart for the exact yardage needed for your size
Skill Level: Beginner Friendly

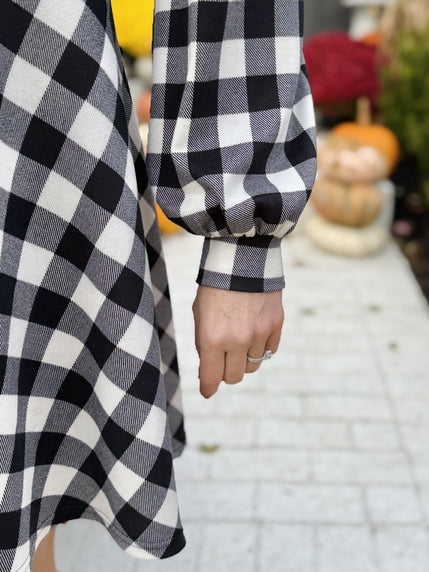
Description: Looking for a beginner friendly dress pattern that you can wear to all of your favorite Fall festivities? I’ve got you covered! The Galena Dress by Styla Patterns is full of options, including a faux button placket and big billowy bishop sleeves. Bonus: the pattern is FREE, so there’s no out of pocket cost!

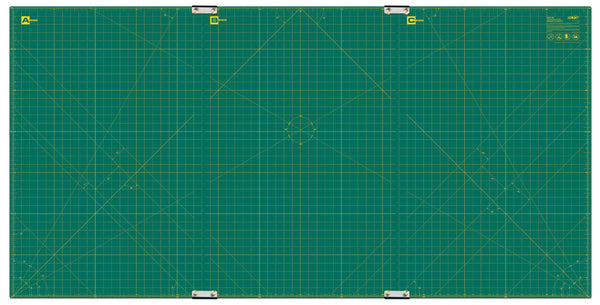
In this tutorial, I’ll walk you through how to sew up this dress pattern, focusing on a neat cuff hack that makes installing cuffs a breeze. This dress takes less than an afternoon to sew up, includes only a few pattern pieces, and has no closures. A dream pattern if you ask me! You’ll want to make sure to use your continuous rotary grid for this project, as it’s got the perfect amount of room to fit the large skirt pattern piece. Grab the rest of your Olfa tools and let’s get started!


Tool & Supplies needed:
OLFA Products:
OLFA RM-CLIPS/3-01 35” x 70” Continuous Grid, Double-Sided, Self-Healing Rotary Mat Set
OLFA RTY-2DX/MAG 45mm Ergonomic Rotary Cutter
OLFA 5-Inch SCS-4 Precision Appliqué Scissors
OLFA QR-6x24 6" X 24" Frosted Acrylic Ruler
Marking Pen/Chalk
Twin Needle (Optional)
Fabric:
Approximately 3 yards (see fabric requirements for your size!) of light to medium weight knit fabrics with good 4-way stretch and recovery. Ideal fabrics would be: Cotton Lycra, Double Brushed Poly, Ribbed Knit, etc.
Sewing Pattern: The FREE Galena pattern by Styla Patterns can be downloaded here.
For this project, cut the following pattern pieces:
*I will be making the simple bodice, bishop sleeve, dress version*
Front Bodice (cut 1 on the fold - 1 Main)
Back Bodice (cut 1 on the fold - 1 Main)
Sleeves (cut 2 as a mirror image set - 1 set Main)
Skirt (cut 2 main on the fold - 2 Main)
Neck Binding (cut 1 - 1 Main)
Bishop Sleeve Cuff (cut 2 - 2 Main)


Preparing the Pieces:
Ensure all markings/notches have been transferred to the pattern pieces. Place the front and back bodice pieces right sides together, aligning the sides and shoulders. In this tutorial, you will need to sew every seam with either a serger or a stretch stitch as the fabric we are working with stretches. Sew to attach the shoulders and sides with a 3/8” seam allowance.

Remember to trim your threads using your Precision Appliqué Scissors after each seam is sewn! The precision appliqué scissors are the perfect size and sharpness for getting all those loose threads clipped.

Constructing the Bodice and Neck Binding:
Locate the neck binding. Fold in half, right sides together. Sew at the short, raw edge with a 3/8” seam allowance. Press seam allowance open.


Quarter off the neck binding as well as the neck opening. These markings will line up in the next step.

With the bodice turned wrong side out and the neck binding right sides out, align the quarter points together, connecting the neck binding to the bodice. The right side of the binding should be touching the wrong side of the bodice as shown in the picture.


The neck binding will be smaller than the bodice neck opening, and will need to be slightly stretched to fit when attaching. Sew around the neck opening with a 3/8” seam allowance.

If the seam feels stretched out, it is recommended to steam with your iron to shrink back down. Turn the bodice right side out and pull the binding up and away from the neckline.


Fold the binding wrong sides together so that the raw edge of the binding meets the sewn edge of the neckline. Press if desired.


Fold the binding over the original sewn edge, enclosing it within the binding. The folded bottom edge of the binder will cover the original stitch line. Pin/clip to secure.


Sew to attach 1/8” from the folded edge of the binding. It is recommended to use a twin needle, a cover-stitch, or stretchy thread. If none of those are available, a long straight stitch will work!


Cuff Hack:
In this tutorial, I am going to teach you a super simple way to attach a cuff! I learned this trick a few years ago and I exclusively create cuffs this way now. Let’s begin by laying the cuff piece right sides up.

We are going to fold the fabric the same way you would read a book: left to right, then top to bottom. Start by grabbing the left side and fold over to meet the raw edge of the right side. The fabric will be facing right sides together.

Now fold the top raw edge down to meet the bottom raw edge. Pin the short right hand right hand side. There will be a fold on the left hand side and top of the cuff. Bottom is raw, right side is pinned together.

Sew the short right hand side with a 3/8” seam allowance. Turn right sides out.

You will notice that all of the seams are enclosed together and the two layers line up perfectly at the raw edges. This makes for an easy installation into the sleeve hemline at a later step.


Constructing the Sleeves:
Locate the sleeve pieces. Sew a gathering stitch on the cap of the sleeve between the markings.


Fold the sleeves in half, right side together. Sew to attach with a 3/8” seam allowance.


Sew a gathering stitch 1/4” from the edge of the sleeve hem.


With the sleeve wrong side out, place the cuff into the hem of the sleeve, right sides together, aligning the raw edges and side seams.


Sew to attach the cuff to the sleeve with a 3/8” (1 cm) seam allowance. Turn the sleeve right side out. Press the seam allowance up toward the sleeve.

Turn the bodice wrong side out. With the sleeve right side out, place the sleeve into the bodice aligning the underarm seams. Ensure the gathering fits the opening.

Clip in place and sew to attach with a 3/8” seam allowance. Turn right sides out. Our dress is almost done!


Constructing the Skirt:
Locate the skirt pieces. Place the front and back skirt pieces right sides together. Sew to attach with a 3/8” seam allowance.

With the bodice right side out and the skirt wrong side out, slide the bodice down into the skirt opening. Align the side seams of the bodice and skirt. Sew to attach with a 3/8” seam allowance.


Turn the dress right sides out.

Our final step is to hem the bottom of the skirt. Fold the bottom edge of the skirt 5/8” wrong sides together and press. Hem the bottom edge with a twin needle, cover-stitch, or stretch stitch.


Give the dress a final press and you’ve got yourself the most adorable dress to wear to any upcoming event!