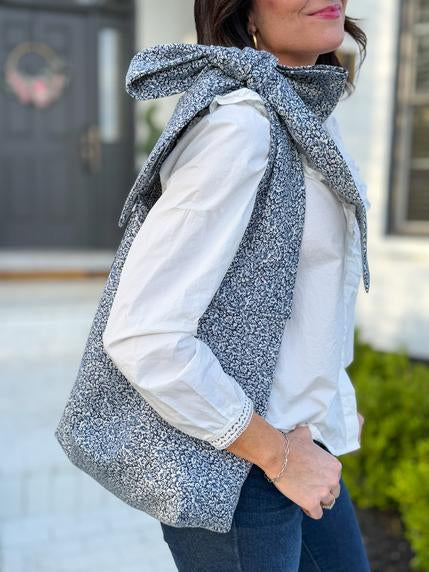
Sewalong to the Bow Tote from Sewing and the City

Designer: Catherine Holbrook
Youtube: @bringingsewingback
-----------------------------------------------
Skill Level: Beginner Friendly
Description: If you have been looking for a great scrap busting project, look no further! Whether you are a busy mom on the go, headed on a vacation or looking for a simple WOW project you can gift to a friend, this Bow Tote is the pattern you have been looking for. And bonus, it’s FREE!
Sewing and the City created this adorable carry all tote bag featuring long straps that tie in a bow over the shoulder. As this pattern is fully lined, it’s the perfect project for dipping your toes into color blocking. Think a cream bag with blue/pink straps for that expecting mama, or a white bag with lace straps for your newly engaged friend. The options are endless!
This tutorial will walk you through the process of creating the bow tote, and will teach you how to swap a zipper for a button closure. Just make sure you have your AK-4 Cushion Grip Art Knife ready to go!
Tool & Supplies needed:

1.5 yards of lightweight to medium weight woven fabric that has structure such as: cotton poplin, linen, denim, tweed, twill, leather, wool.
OLFA RTY-2DX/MAG 45mm Ergonomic Rotary Cutter
OLFA 45mm Tungsten Steel Endurance Rotary Blade
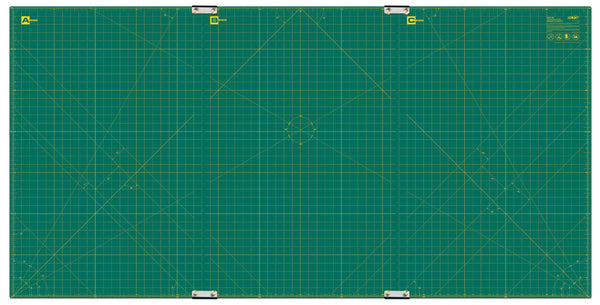
OLFA RM-CLIPS/3-01 35" x 70" Continuous Grid, Double-Sided, Self-Healing Rotary Mat Set
OLFA AK-4 Cushion Grip Art Knife loaded with Curved Carving Blade (comes in package)
OLFA QR-6x12 6" x 12" Frosted Acrylic Ruler
OLFA QR-1x12 1" x 12" Frosted Acrylic Ruler
OLFA QR-6x24 6" x 24" Frosted Acrylic Ruler
1 Button of your choosing.
The FREE Bow Tote pattern by Sewing and the City will be used for this tutorial and can be downloaded at the link below. You will need to submit your email address to receive the pdf file.
Youtube Tutorial by the Pattern Designer:
Prep:
We will begin by printing and assembling the Bow Tote pattern from Sewing and the City.
For this project, you will cut the following pieces:
Outer Bag (A), Cut 2 Main Fabric
Lining Bag (B), Cut 2 Lining Fabric
Pocket (C), Cut 1 Lining Fabric
Strap (D), Cut 2 Main Fabric

Using the 45mm Ergonomic Rotary Cutter and the Continuous Grid Rotary Mat, cut out the pieces listed above. If you are finding your fabric is shifting on you while cutting, the Frosted Acrylic Rulers can help stabilize the fabric, giving you a precise cut!


The Bow Tote Pattern includes a zippered pocket. If you would like to use a zipper, follow the instructions in the YouTube video linked above.
This tutorial will be altering the pocket to opt for a button closure instead of a zipper closure. If omitting the zipper, do not transfer the zipper markings on the Lining and Pocket pattern pieces.
Sewing Tutorial:

Constructing the Button Pocket:
We will begin by creating the inner pocket with the button hole closure. From the top, fold the Pocket piece in half, right sides together. The fold will become the new top of the pocket. Sew across both sides and bottom of the pocket using a 1/2” seam allowance, leaving a small 2 inch opening at the bottom of the bag. The 2 inch opening is indicated by the purple clips in the photo.


Once sewn, clip corners with the AK-4 Cushion Grip Art Knife, with Curved Carving blade loaded, and flip right sides out. Turn the 2 inch opening seam allowance to the inside of the pocket. Press.
NOTE: The curved carving blade is honed the same as OLFA rotary blades so it works beautifully on fabrics!


Top stitch across the top edge of the pocket with a 1/4” seam allowance.

Measure down 1.5 inches from the center of the top of the pocket, and sew a button hole opening big enough for your chosen button.


Using the AK-4 Cushion Grip Art Knife, with Curved Carving Blade, cut open the button hole.

Locate the lining pieces. The inset squares are the bottom of the bag, and the straight edge is the top of the bag.

Fold one of the lining pieces wrong sides together to find the center point. Measure down three inches from the top of the center point and make a mark. Align the top center of the pocket to the mark.


Pin the pocket in place. Topstitch with a 1/8” seam allowance around the sides and bottom to secure the pocket to the lining piece. The top of the pocket will remain free to open and close.


Hand stitch the button into place beneath the pocket’s button hole opening. Secure the pocket with the button.


Place the remaining lining piece on top of the pocket lining piece, right sides together. Using a 1/2” seam allowance, sew the sides and bottom, leaving the inset squares and the top unsewn. Press seams open.


Locate the square insets. With right sides together, align the side seam raw edges with the bottom seam raw edges. Sew to attach with a 1/2” seam allowance. Press.


Repeat with the remaining square inset.

Repeat the previous steps with the main pieces. Place the main pieces right sides together. Using a 1/2” seam allowance, sew the sides and bottom, leaving the inset squares and the top unsewn. Press seams open.


Locate the square insets. With right sides together, align the side seam raw edges with the bottom seam raw edges. Sew to attach with a 1/2” seam allowance. Press.


Turn the lining bag right sides out. Keep the main bag wrong sides out. Place the lining bag inside the main bag, matching the side seams. Pin in place.


Sew across the top of the bag with a 1/2” seam allowance, leaving a 4 inch opening in the center of the bag (denoted by the purple clips in the photo).


Using the 4 inch opening at the center top of the bag, turn the bag right sides out. You will notice that the lining bag is 2” shorter than the main bag. Push the lining bag down to the bottom of the main bag so that the top seam is folded inside roughly 2 inches down.


Slipstitch the 4 inch opening closed.


Locate the strap pieces. Fold right sides together. Sew down the side and point of the strap with a 1/2” seam allowance, leaving the short straight end unsewn.


Clip the corners of the strap pieces using your AK-4 Cushion Grip Art Knife and flip right sides out. Using a corner tool, press the corners out.


Press the straps. Fold the raw short edges of the straps to the inside roughly 3/8". Press.

Place one strap 4 inches down from the top of the main bag, centering the strap on the side seam. Pin into place.


Topstitch around the edges of the strap roughly 1/8”, securing it to the main bag. If desired, a criss cross X can be sewn for more support.


Repeat for the remaining strap.

Give a final press to the bag and tie the straps into a bow at the top. If a more secure bow is desired, a simple straight stitch can be sewn across the straps before tying into a bow. The designer from Sewing and the City recommends measuring roughly 7 inches up on the straps. See Youtube Video for more details. Enjoy your new bow tote bag!