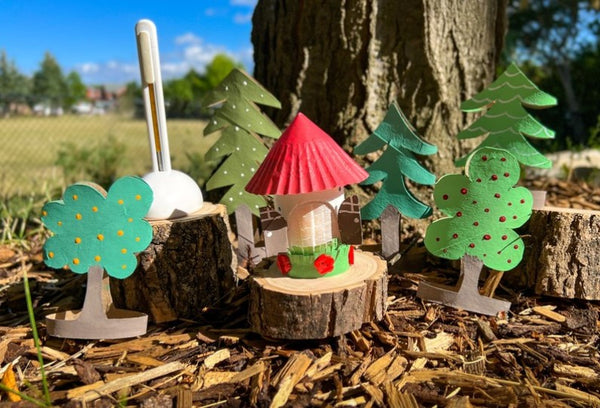
Recycled Toilet Paper Roll Craft: Whimsical Forest and a Fairy House

Designer: Marcia Izabel Marchiori
YouTube: MarciaBel Vlog
Instagram: @marciabel
----------------------------
Welcome back to our Craft For Kids Series!
Today we are going to create the most whimsical fairy forest, and the coolest thing is that everything is mainly made out of toilet paper rolls, but you can certainly spruce up your artwork with items that you can find lying around. Follow these instructions and you will have the cutest fairy house!
Tools & Supplies
- OLFA FCM-12x17 12" X 17" Folding Cutting Mat
- OLFA ESK-1 Beginner Craft Knife With Stand
- OLFA QR-1x12 1" X 12" Frosted Acrylic Ruler (optional, but it helps a lot when marking and cutting out the straight lines)
- Empty toilet paper or paper towel tubes
- Glue stick, adhesive tape or hot glue
- Pencil and eraser
- Cupcake paper liner
- Optional Decorative Items:
- Assorted colored paper (such as construction paper, cardstock, origami paper, etc)
- Markers, colored pencils, crayons, oil pastels, etc. (assorted colors)
- Craft paint such as gouache, assorted colors and brush
- Buttons
- LED candle
Instructions
Let’s start with the fairy house.
Begin by flattening one cupcake paper liner, and cutting a straight line from the center to the edge, using OLFA ESK-1 Beginner Craft Knife.
Glue the edge making a cone shape:
Measure 2 3/4” height and cut the toilet paper roll with the craft knife.
With a pencil, sketch the window and cut the edges, making sure to keep both sides of the window intact (the space marked between arrows, below).
Cut two stripes in different heights of green paper, cut fringes in both to make the grass, and glue them together.
Let’s start making the trees, so we’ll have everything ready to paint.
Flatten several rolls (if you have assorted heights, it’d be better to create different types of trees) and sketch tree shapes with a pencil.
Important: make sure to leave all the edges connected, and to draw a base, so you can have the tree structured to stand by itself.
After cutting all the pieces, you can keep them in their natural color. But if you would like to take it to the next level, start decorating them by adding some color. Here I’ve used gouache to paint mine.
Tip: Using different tones of green will create a good contrast in the composition.
After the paint dries, assemble the pieces by gluing the roof, grass and the rest of the decoration.
And it’s ready to play with!
I hope you enjoy making these.
Please don’t forget to tag me @marciabel and @OLFA_craft on your finished projects, we would love to see your magical forest!
Have a fun!
Marcia
All activities should be supervised by an adult.


