Quilted Fabric Postcard Tutorial
Hello! My name is Sarah Ruiz and I’m happy to be here today with a fun tutorial on how to make a quilted fabric postcard. Earlier this year, I did a 100 day project where I made (and mailed) one postcard every day – and I enjoyed it so much that I blew right past 100 and have now made more than 170! These small pieces are a great way to play with favorite fabrics, practice new techniques, and bring a smile to friends and family with a bit of happy mail.

There are many, many ways to make postcards. I’ll cover my preferred method, but I encourage you to experiment with different materials and techniques to see what you like. (p.s. You can find more information on material options and construction tips on my blog.)
Materials:
- Fabric scraps in 8 different colors or patterns measuring 2-3” x 6-8”
- 5” x 7” piece of quilt batting
- 5” x 7” piece of heavyweight double-sided fusible interfacing (such as Pellon 72F)
- 5” x 7” piece of cardstock or light-colored solid fabric
- Coordinating thread (such as Aurifil 50 wt cotton)
- OLFA 28mm RTY-1/C Quick-Change Rotary Cutter
- OLFA 60mm RTY-3/DX Ergonomic Rotary Cutter
- OLFA RM-CG 12" X 18" Green Double-Sided, Self-Healing Rotary Mat
- OLFA QR-6x12 6" X 12" Frosted Acrylic Ruler
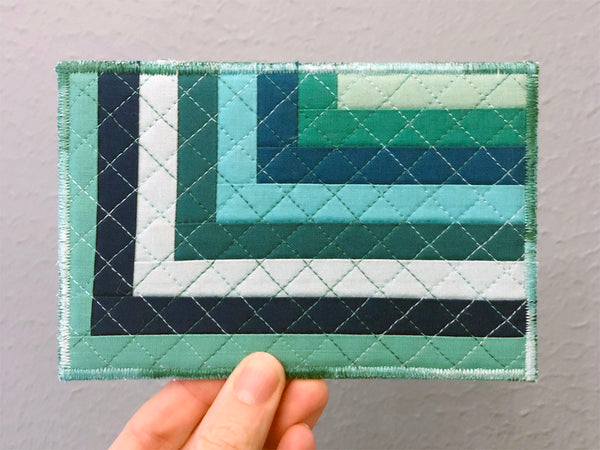
This postcard is based on one of my quilt patterns featuring a modified and elongated log cabin block. Use your ruler, rotary cutter, and mat to cut strips from each of your 8 fabrics as listed below. Fabrics are numbered in order from upper right to lower left. I really like using a compact 6” x 12” quilting ruler for cutting smaller pieces like these, and the non-slip feature ensures that you can cut these thin 1” strips accurately.


With right sides together, sew the 1” square Fabric #2 square to the left side of the 1” x 3” Fabric #1 strip. Press the seam toward the darker fabric.

Sew the 1” x 3½” Fabric #2 strip to the bottom of this unit, and press again.

Continue sewing in this manner, alternating between adding a strip to the left side and adding a strip to the bottom, to build the rest of the block. The completed block measures 6½” x 4½”.

To quilt your postcard, layer the quilt block on top of the 5” x 7” piece of quilt batting and quilt as desired. I find that basting usually isn’t necessary for such a small piece, but you can use a few pins or a spritz of basting spray if needed. You can quilt with the exposed batting on the back, or add a thin piece of backing fabric; this back will not be visible on the finished card.

To construct your postcard, layer the card stock backing (face down if applicable), fusible interfacing, and quilted card top face up. Fuse the sandwich together with an iron according to the manufacturer’s instructions for your interfacing. You may need to press from both front and back to make sure the double-sided fusible sticks fully on both sides. Once your postcard sandwich is secure, use your ruler and rotary cutter to trim to 4" x 6".


To finish the edges of your card, I recommend a satin stitch/very tight zig zag stitch to frame the design and keep any loose threads in place. Select the zig zag stitch on your sewing machine and lower the stitch length to 0.5-0.7. Stitch around the entire perimeter of the card twice to get full stitch coverage, and backstitch at the end to secure. I used a variegated Aurifil 50 wt cotton thread to add an extra element of fun!

Your postcard is ready to send! I mail each one in a 5” x 7” envelope to ensure it arrives undamaged. It can be mailed “naked” like a traditional postcard, but if you choose to do this you may need to have the stamp hand-cancelled at the post office. No matter which option you choose, you must use a regular 55-cent first class mail “forever” stamp; the 35-cent postcard stamp is not enough to cover postage for this heavier, thicker postcard. To send internationally, you’ll need a $1.20 global “forever” stamp.

Whether you make 1 or 100, the possibilities for postcards are endless!
By Sarah Ruiz
IG: @saroy
Web: sarahruiz.com