Quilted Bowl Cozy

Designer: Erin Kroeker
Website: www.theblanketstatement.ca
Instagram: @theblanketstatement
------------------------------------------------------
Finished Size: 9” x 9” x 2”
Skill Level: Confident Beginner

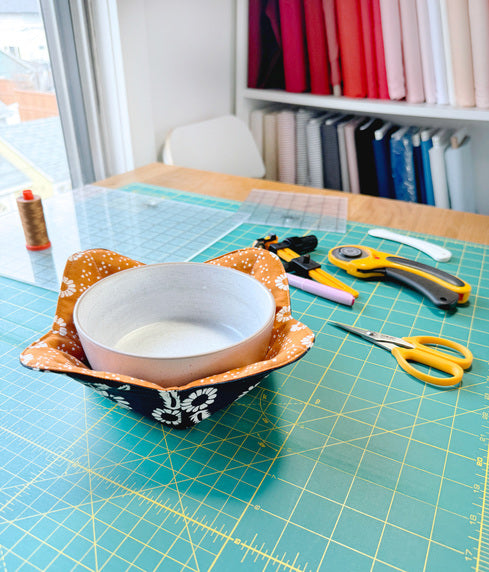
A bowl cozy is a simple, functional project that adds comfort to everyday routines—perfect for protecting your hands from hot soup bowls or cold dishes straight from the freezer. This version uses two 10" fabric squares and a few easy sewing steps, making it a quick, practical make whether you're sewing for yourself or putting together thoughtful gifts. As always with items intended for microwave use, using 100% cotton materials is key for safety.
Once you’ve made one, it’s easy to adjust the size or shape to suit your needs. You can scale the size of fabric and batting squares up or down to fit different bowls, or experiment with shaping the darts for a deeper or shallower fit. It’s a great project for using up fabric scraps, trying out quilting techniques on a small scale, or batch sewing for seasonal markets and gifts.

Tools Needed:
OLFA RM-MG-01 24" x 36" Green Double-Sided, Self-Healing Rotary Mat
OLFA 45mm RTY-2/DX Ergonomic Rotary Cutter
OLFA 45mm Tungsten Steel Endurance Rotary Blade, 1 or 2 pack
OLFA QR-12S 12 1/2" Square Frosted Acrylic Ruler
OLFA QR-6S 6 1/2" Square Frosted Acrylic Ruler
OLFA 5-Inch SCS-4 Precision Appliqué Scissors
(Optional) OLFA CMP-3 Rotary Circle Cutter
Fabric & Supplies:
(2) 10” x 10” Fabric Squares, 100% Cotton*
(2) 9.5” x 9.5" Batting, 100% cotton such as Wrap-N-Zap*
100% Cotton Thread*
Marking Pen
Sewing Machine
Iron and Ironing Board
Pins or Clips
*SAFETY NOTE: Only use 100% cotton materials (fabric, batting, and thread) if you plan to microwave your cozy. Synthetics can melt or catch fire. Additionally, ensure your fabric does not have any metallics!
----
Match one fabric square with one batting square, wrong side of fabric to batting. Centre the batting on the fabric.

Quilt them together however you like! Simple diagonal lines corner to corner are quick and classic. Repeat with the second fabric and batting square.


*If you would like to round the corners, follow the steps below! If not, skip to marking your darts.
Place the quilted square with the batting facing up on your cutting mat. Measure 2” in each from the bottom and side on each corner and mark a point.

Set your Rotary Circle Cutter to 2”.

Place the pivot point on your marking and trim the corner. Repeat on all sides of both quilted squares.


To mark your dart lines, fold one of your quilted squares in half right sides together (RST) to form a rectangle.

Mark 1" in from the fold and 2" up from the raw edge on both sides of the fold.


Draw a line connecting these two marks. Repeat on the opposite edge.

Sew along each dart line with a straight stitch, backstitching at both ends.
Trim the excess fabric at the darts to reduce bulk, leaving a ¼" seam allowance.


Now fold the quilted square in half RST to line up the other sides. Repeat the steps for making and sewing the remaining two darts.

Now do it all again on the second quilted fabric square!

Place your two darted pieces right sides together, aligning corners and seams. Clip or pin around the edges.

Sew around all four sides with a ¼" seam allowance, leaving a 2–3" gap for turning.
Helpful Tip! If you did not round the corner, you will want to snip the corner, making sure leave the stitches intact, to reduce bulk.

Turn the cozy right side out through the gap. Use a point turner to push out corners.


Press the raw edges of the turning gap towards the inside, maintaining the ¼" seam allowance. Pin or clip in place.


Topstitch around the entire edge to close the gap and finish the edge with a clean professional look!


Pop a bowl inside and admire your cute and practical creation! These can be tossed in the wash and reused endlessly.