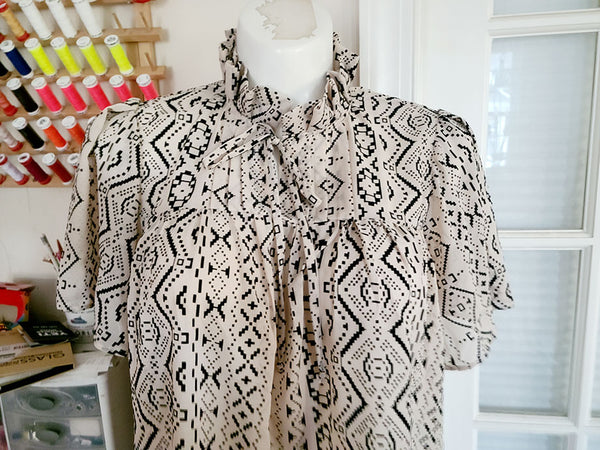
Pleated Top- Garment Sewing

Designer: Marcia Spencer
Instagram: @keechiibstyle
Beginner /Intermediate Level
-------------------------------------

I love a cute top with pleated details. There are so many ways to incorporate pleats into your next garment project that are both decorative and functional. Did you know that gathering stitches are really just a collection of very small pleats?
For this tutorial I will show you how I used at least three of the pleats mentioned in my previous blog “Four Basic Pleats and How to Make Them”, to create volume to the sleeves, decorative interest to the bodice and volume and interest at the neckline.
*Please refer to my previous blog to learn more on how to create these pleats before starting the tutorial.
Tools and Materials Needed:
- OLFA 45mm RTY-2C/NBL Quick-Change Rotary Cutter
- OLFA 7-Inch SCS-2 Serrated-Edge Stainless Steel Scissors
- OLFA 5-Inch SCS- Precision Applique Scissors
- OLFA QR- 6” X 12” Frosted Acrylic Ruler
- OLFA RM-MG/NBL 24”x36 Double-Sided, Self-Healing Rotary Mat
- Simplicity Pattern 9546
- 1 ½ - 2 yards of lightweight Woven Fabric
- Single Fold Bias tape
- Sewing Thread
- Sewing Machine
- Loop turner
- Iron
- Sewing Machine
Instructions:
Cut the Pieces:
- Use Simplicity Pattern 9546 to cut pattern pieces 1-6 using OLFA 45mm Rotary Cutter or OLFA 7- inch Stainless Steel Scissors.

Create Pintuck Front Yoke
- Using OLFA 6” X 12” Frosted Acrylic Ruler transfer your pleat lines from the front bodice yolk onto your fabric using chalk or disappearing fabric marker.

- Fold front edge of yoke front (3) to INSIDE along fold line; press and baste per pattern instructions.

- On RIGHT SIDE Bring the innermost lines together: stitch along broken lines encasing raw front edge.

- To create remaining front tucks, on RIGHT SIDE bring broken lines together. Stitch along broken lines. Press all tucks away from center.


6. Baste across top edge and lower edge in direction of the arrows. Your pintucks are done!
- Bring pintucked yoke front sections together side by side, matching raw edges. Tack the two pieces together within seam allowance.


Connecting The Bodice
- Gather the upper edge of the front (1) between notches

- Pin pleated Yoke front to front, matching notches. Pull up gathering stitches to fit; Distribute fullness evenly; baste. Stitch. Trim. Press seam toward yoke.


- Repeat steps 8 & 9 for back yoke (4) and back (2).

- Stay stitch neck edge of yoke back (4).

- Stitch back to front at shoulder seams. Trim.


Create Neck Ruffle
13. Fold Ruffle (6) in half right sides facing: stitch ends closed leaving long edge open. Turn and press out corners. Baste open edge.


- Create about 1” pleats along the length of the ruffle. (I did not measure mine out precisely).
*If pleated ruffle is too long for neckline, add gathering stitches to gather the extra length of the pleated ruffle to fit neckline.


*If pleated ruffle is too long for neckline, add gathering stitches to gather the extra length of the pleated ruffle to fit neckline.

- With right sides together pin ruffle to neckline. Pull up gathering stitches to fit; baste. Stitch. trim


Collar Ties
16. Fold ties front sides facing. Press. Stitch down long edge. Turn with loop turner. Press.


- Add one tie end to wrong side of the top edge of open pleated yoke. Repeat for second tie on opposite side of yoke front.

- Open out one edge of single fold bias tape. With right sides together, pin tape to neck edge (over ruffle) with Raw edges even and tape extending ⅜ beyond front opening edges. Stitch in a ⅜ seam. Trim seam. Clip curves. Under stitch tape.
- Turn tape to inside, turning under ends at front opening. Press. Top stitch ⅜ from collar seam through binding and bodice fabric.

- Stitch front to back at side seams. Trim. Finish.
Creating the Sleeve
- Create an Box Pleat to the peak of your Sleeve (5) where it connects to shoulder. Press. Baste.

- Add gathering stitches to the upper edge of the sleeve between notches.

- Stitch underarm seam. Trim. Finish
- With right sides together pin sleeve to armhole with center of box pleat matching center shoulder seam and matching arm seams. Pull up gathering stitches to fit. Baste. Stitch. Stitch again ⅛ from first stitching. Trim seam. Press.

- Press up hem on lower edge of sleeve ¼ . Fold over enclosing first fold to create hem on sleeve. Stitch. Press
- Press up hem on lower edge of top ¼ . Fold over enclosing first fold to create top hem. Stitch. Press
VOILA, YOU ARE DONE!