PAPER 101 SERIES - How To Make A Well-Organized Craft Studio At Home (And A Quick Tour Of My New Space!)

Designer: Marcia Izabel Marchiori of Minois Handmade
Instagram: @marciabel
-----------------

We moved into our new home around a month ago and one of the things I love the most here is my new craft studio! Having a dedicated space with plenty of sunlight is like a dream coming true for me, but today - instead of focusing just on paper crafts - I want to share some practical ideas to help you to create the perfect nook (and it could be an entire room or a corner, it doesn’t matter) for you to be creative, making art & daily self-care priorities in your life!
So let’s start planning!
- GATHER INFORMATION - the most important step!
First of all, as we usually do when designing interiors (hello from my architect side 🙃), it is crucial to reflect on your routine, needs and do a thorough soul searching, asking yourself why you need this space, with questions like: what are your goals (near future and long term), ambitions (even if it’s just a hobby), what kind of media you use, storage needs, tools and materials, what brings you joy and ignites your creativity in your daily life, besides the obvious? Sometimes we don’t allow ourselves to deeply think about our intentions, and it makes us feel stuck and without clear ideas: that’s why these questions are so important before making yourself a creative haven!

In order to help you understand this step, I’ll share my own answers when I asked myself these questions, so you can set these as examples of what kinds of answers you could use. I realized some very important things:
- I am a mixed media artist, meaning that I had to find myself spaces to storage different kinds of materials and tools;
- Natural light makes my day infinitely better, so my desk had to be close to/face a window;
- Nature is VERY important to me, so I wanted to bring potted plants inside my room. Also, I need space to store my foraged items: I do love to collect small rocks, tree barks & twigs, driftwood, etc. for my projects;
- I do need my tools to be easily found, accessible and easy to move around my different workstations (being that my desk, my sewing machine table, and so on) ;
- A dedicated corner to read and practice meditation at a daily basis, near my desk (very important to my focus and work flow).
- Last, but one of the most important aspects, I need to work in very colorful environments (color works as a creative fuel to me), and having a gallery wall was important as well (as it helps me to gather memories, inspiration from other artists, past travels, etc.).

- STORAGE AND DISPLAY
The next step in organizing your art space is tidying and getting rid of all the things you do not need or do not spark joy (Marie Kondo fan here): sell or donate them, open space for the new and for the things you love, as we have to remind ourselves from time to time of how our needs are always evolving.
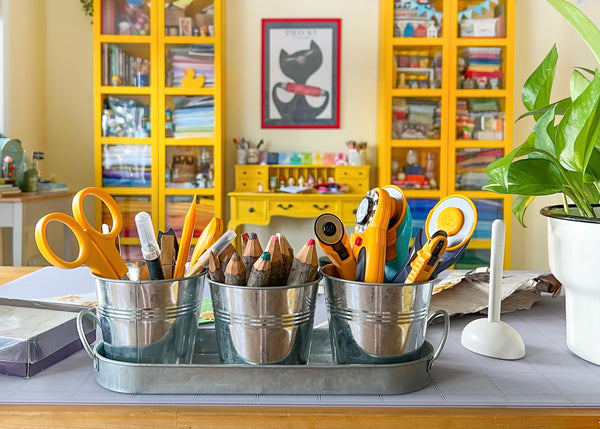
With the items all sorted out, find the proper storage space for them: there is no need to spend lots of money on fancy items, use what you have around first, like mason jars to store your brushes, jam jars to store leftover paint and small objects, plant pots as pen/pencil holders, etc.

There are three important highlights when talking about storage:
- Thrifting is key (starting inside your own place, and finding used glass/ceramic/metal containers to buy is very useful as well);
- Do NOT try to acquire/buy everything at once: you need to give yourself time to find out what would be the ideal container, and hear me out: you will never find everything at a single place at once;
- Use vertical space (aka your wall, cabinet doors, back of the door, etc.): hang your tools, use shelves for décor and materials, books, etc.

And, of course, when possible give all the support you can to local artists and buy the ceramic cups, bowls, baskets and other items from them! You will always find the cutest storage containers to decorate your space, while helping a fellow artist at the same time! ;-)
Examples of storage: tin cans, dollar store cachepots, magazine files for paper, ceramic bowls and cups, mason jars, empty candle glasses, transparent plastic bins (IKEA has great inexpensive options) for storage inside cabinets/closets, sturdier cardboard boxes (such as gift, electronics or shoe boxes), mobile carts (specially useful when you have to use several places at home as a desk), etc. The important thing here is always label the containers/boxes to easily find the items without having to open them.
Always remember: if you cannot see or find your stuff easily, you probably won’t use it!
If you have the space for it, consider getting a cabinet/wardrobe or even drawers to store bulky items. If you are sharing your art space with another room, try to reserve a space inside a closet for that, or install racks, pegboards, shelves and cubbies on the wall, or even over-the-door shelf with baskets. Hang your storage!

TIP: Have a separate & dedicated area for your work in progress, if you can. In my case, as I am lucky to have an entire wardrobe, I leave one of the shelves empty, so I dedicate this space to my works in progress (I always have more than one project going on), so I don’t need to take space from my desk to all of them at the same time.

- FUNCTIONALITY x AESTHETICS
People sometimes tend to underestimate the power of the aesthetics and - as a counterpoint- the "energy-thief” visual clutter too.
Feeling good about your craft space will increase your capacity to focus and create. There’s nothing like working in an environment that inspires you, and it goes beyond just functionality. A beautiful well-decorated place makes you be more productive and creates an instinctive sense of self-care. It’s about making your art a priority in life, a way to express your feeling in your home AND consequently in your projects!
As for me, I realized that a well-organized colorful room combined with a “me-time” corner - where I can sit down and enjoy a book or gather my thoughts - would make me feel creative, energized for the day and much more in the flow.

Design your space to be your oasis of intention, presence and mindfulness, and I guarantee you that it will make all the positive difference in your artistic life!

I truly hope you all find these tips helpful for keeping your craft space inspiring! I am sure you have lots of great organizing ideas too, so please share them with @olfa_craft and me @marciabel . We would love to see your art corner!
Happy crafting!
Marcia
OLFA Tools Shown In This Article:
