Needle Book
Designer: Sarah Gozzo
---------------

OLFA TOOLS
45mm Ergo rotary cutter with pinking blade
MATERIALS
(2) 8” squares cotton fabric “vibrant multi stripes”
6” square extra firm stabilizer sew-in
1” button
Ad tech permanent crafters tape
SET OLFA’s circle cutter to the 2.5” mark. Cut 1 stabilizer circle.
SET OLFA’s circle cutter to the 3” mark and cut 1 cork circle.
SET OLFA’s circle cutter to the 3.25” mark and cut 1 fusible fleece circle.
SET OLFA’s circle cutter to the 3.5” mark and cut 2 fabric circles.
CUT stabilizer in half. Center these pieces on each half of the cork leaving about .25” space around the cork edges and 3/8” between the pieces of stabilizer. Use permanent crafters tape to hold stabilizer in place.

FUSE the fleece to the center of one fabric circle.
SEW the fabric circles together with WST. Set the machine stitch length to 1.8 or less. Sew around the entire circle with a .25” seam allowance. Do not see through the fusible fleece. Sew along side of it.
CUT away the excess fabric from around the circle using OLFA’s Ergo rotary cutter with pinking blade attached. Take care to avoid slicing through the stitches.

CUT a 1” opening with OLFA’s appliqué scissors in the middle of the circle. Separate the layers to only slice through the piece of fabric not fused to fleece.
TURN OUT and work the seam to create a perfect circle.
PRESS with a hot iron.

CENTER the cork onto the fabric circle to hide the fabric’s turning hole. Sew a line straight down the middle taking care to sew perfectly between the stabilizer pieces.
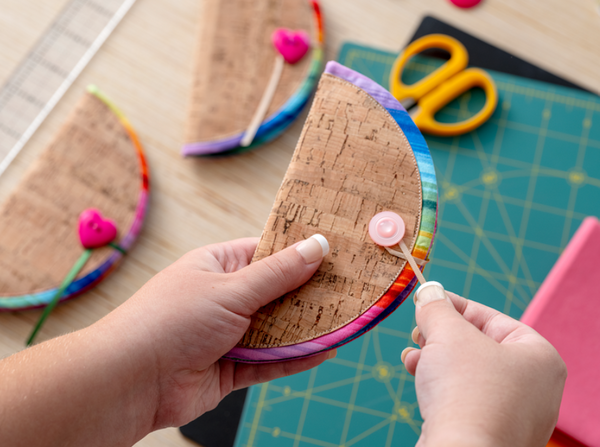
KNOT one end of the ribbon. Place it between the the cork and the fabric circle.
SEW around the entire circle to attach all layers. The stitches should be very close to the raw edges of the cork.

SEW the button on with needle and thread.

