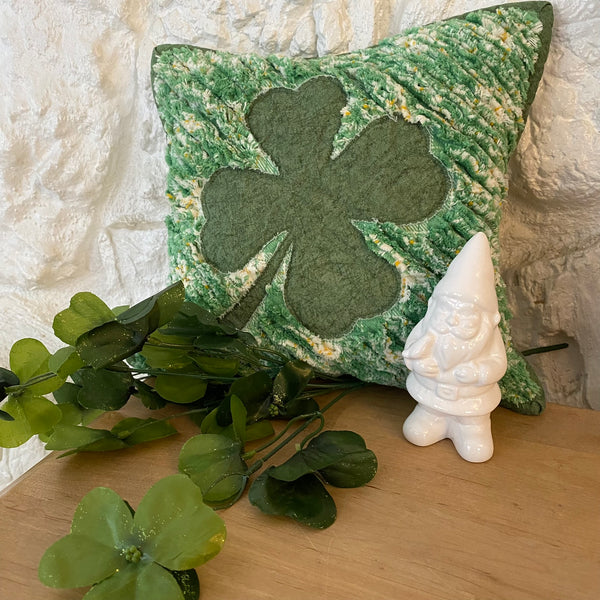
Lucky Shamrock Pillow

Designer: Cindy Staub
@quiltdoodledesigns
-----------------------------

As a kid I remember digging through clover looking for a four leafed clover. Sometimes my sisters would try to fool me with a three leafed clover with a pedal torn in two to form the fourth petal. With the sweet chenille pillow, I don’t have to search for my lucky shamrock anymore! I was able to complete this project in an afternoon.
Make sure to download the free PDF pattern and gather your supplies. You will need:
Tools:
- 8” x 8” green fabric square (shamrock)
- ¼ yard green fabric (binding)
- 2/3-yard green flannel plaid
- Fusible web such as Heat n Bond or Flexifuse
- White and green thread
- Frixion Pen or disappearing ink pen
- Seam Ripper
- OLFA CHN-1 Chenille/Textile Cutter
- OLFA 45mm RTY-2DX/PBL Ergonomic Rotary Cutter, Pacific Blue
- OLFA RM-MG 24" X 36" Green Double-Sided, Self-Healing Rotary Mat
- OLFA QR-6x24 6" X 24" Frosted Acrylic Ruler
- OLFA 5-Inch SCS-4 Precision Appliqué Scissor
- Shamrock Shape to Trace: Here
Now let's begin!
From flannel plaid cut 4- 11” x 11” squares and 2- 11” x 7 ½” rectangles.

Layer the 4- 11” x 11” squares together right side up, pin together.

With a Frixion or disappearing ink pen, draw a line diagonally corner to corner. With white or matching thread sew thru all four layers of the square sewing on the diagonal line.

Then sew lines ½” apart diagonally on the entire square. (Sewing against the bias.)

Trace the Shamrock shape onto the paper side of the fusible web. Iron onto the backside of the green 8” square following the manufacturer’s directions.

Cut the shape out, peel off the fusible backing and iron onto the top of the 11” x 11” flannel square centering the design.

Using the Chenille cutter, carefully cut through the top THREE layers of the fabric, half-way between every 2 lines of stitching, stopping short of the shamrock applique. For areas that you can’t get to with the Chenille cutter, carefully cut the first three layers with a seam ripper.

For example the space between the stem and the clover leaf. Cutting these areas are optional.

With green thread, stitch along the edge of the shamrock an 1/8” sewing through all the layers.

To make the pillow back, fold the long edge of the 11” x 7 ½” rectangle ¼” and press, fold over ¼” and press again. Top stitch along the edge. Repeat on the other 11” x 7 ½” rectangle.
Lay your chenille pillow front right side down. Place the raw edges of the rectangles wrong side down on top of the chenille front. (Wrong sides together.) These back rectangles will overlap to form a pocket. Pin to hold all the layers together and sew a scant ¼” seam around all four edges of the pillow. This seam will be hidden by the binding.

Binding- Cut 2- 2 ½” x WOF, join the strips end to end to create a 2 ½” wide strip long enough to go around the outside edge of the pillow. Fold the strip in half lengthwise, iron.

Sew the binding onto the backside of the pillow using a ¼” seam. Miter the corners.

Fold the binding around to the front of the pillow and topstitch and 1/8” seam using green, or matching thread.

Now it’s time for the magic to happen! Pop your pillow into the washer with a towel and then into the dryer. Washing a drying your pillow will produce the softest chenille! My chenille turned out to be a lovely, muted green with pops of cream and gold.
If you line up and fussy cut your plaid to match up throughout the layers you will end up with a more defined chenille design. To finish up your pillow, stuff it with a pillow form. If you leave it unstuffed it can double as a candle mat.

I hope that you enjoy this festive project for St. Patty’s Day. It’s the perfect sized pillow to add a touch of green to your home. Remember everyone’s a little bit of Irish on St. Patrick’s Day!