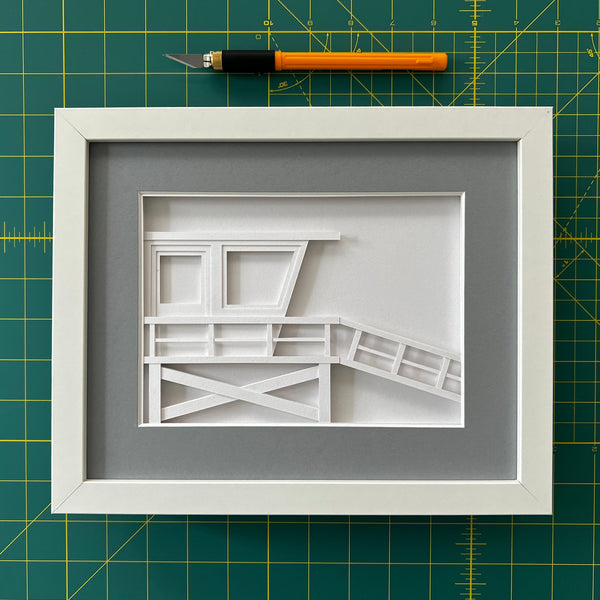
Lifeguard Stand Layered Paper Sculpture
Guest Designer: Margery McDonnell
Email: couperspaperart@gmail.com
Instagram: @couperspaperart
Dimensions: 8x10”
Skill Level: Intermediate
-----------------------------
It’s summertime and I’ve got the beach on my mind! Follow along with me as I show you how to make this layered paper sculpture of a lifeguard stand!

Tools needed:
Additional Supplies:
- Project Files to download and print:
- 8.5x11” cardstock
- 8x10” shadow box
- Glue pen
- 8x10” mat with 5x7” opening (Optional)
Instructions:
Step 1: Print (4) pages of the Layers 1-4 file, and (4) pages of the Layers 5-8 file.

Step 2: Trim off the outside edge of your pages (along the outer line) to cut your pages down to 8x10”.


Step 3: Start cutting! Using your OLFA No. 11 AK-4 Art Knife, cut layer #1. Leave just the sections labeled 1, as in the photo above. For your next paper, cut layer 2, leaving the areas labeled 1 and 2. Then cut layer 3, leaving the areas labeled 1, 2, and 3. Repeat like this for all 8 layers!

Step 4: Time to take a step back! This photo shows you what 8 layers looks like, but you can also print and cut additional layers to build more dimension in your paper sculpture.

Step 5: Using your glue pen, glue all over the printed side of layer 1, then affix layer 2 to it. Then repeat - glue all over the printed side of layer 2 with your glue pen and affix layer 3 to it. Repeat until you’ve glued all of your layers together!

Step 6: Glue a plain sheet of 8x10” cardstock to the back, printed side of your layered paper sculpture.

Step 7: Place into your 8x10” shadowbox, with a mat on top if you choose!

Don’t be afraid to try out cardstock, frames, or mats in different colors! Check out how adorable this paper sculpture looks in blush tones!

Cheers!


