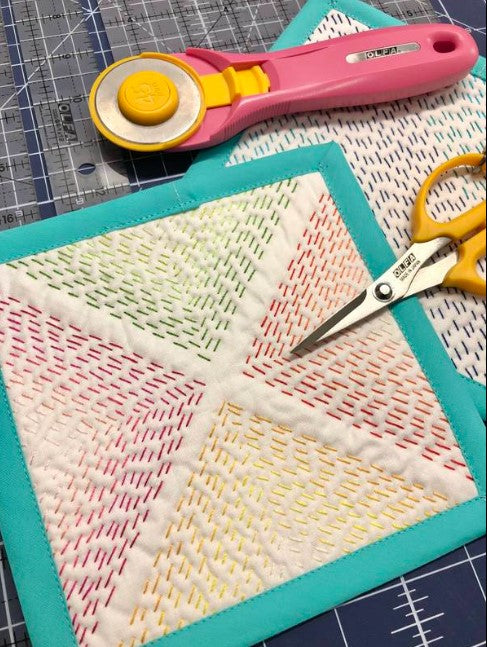
Kantha Samper Mini

Designer: Sarah Gozzo
Instagram: @princess_ina_pouch
----------------------------
Before starting this project, please take a look at my Summer Slice & Stitch – Hand Stitching / Kantha Mini to learn a little more about Kantha and why I specifically love using Aurifil’s 12 weight thread. I use a single strand for Kantha. Your needle is also very important. I use Clover size 3 Gold Eye Milliners needles. The eye is wide to receive the 12 weight thread easily and the needle is long so taking multiple stitches at once is a breeze.
A note about what to do with thread ends. Watch my quick YouTube video https://youtu.be/r4EqIqvM-PA where i share my Kantha tips and tricks including how to hide your thread ends. I like to weave the thread tails into the fabric along the edges where they will be covered by the binding.
MATERIALS:
Water soluble marking pen
(2) 7”x14” White Quilting Cotton
(1) 7”x14” Fusible fleece
(2) 1.75”xWOF fabric for binding
Aurifil 12weight threads
OLFA TOOLS:
OLFA QR-4S 4 1/2" Square Frosted Acrylic Ruler
OLFA QR-1x12 1" X 12" Frosted Acrylic Ruler
OLFA QR-6x12 6" X 12" Frosted Acrylic Ruler
OLFA RM-MG/NBL 24"X36 Double-Sided, Self-Healing Rotary Mat, Navy
INSTRUCTIONS
Fuse the fleece to one rectangle of white quilting cotton according to the directions that come with the fusible fleece. Lay the second piece of white quilting cotton on top. Lightly iron the quilt sandwich so all layers are smooth. Pro tip: for extra hold, use temporary basting spray to adhere the top layer with edges aligned neatly.
Take the quilt sandwich to your 24”x36” cutting mat. Use OLFA’s 6”x24” ruler and OLFA’s 45mm rotary blade to cut away .25” then cut a 6.5”x14” strip.
Turn the strip, cut away the initial .25” then cut it into (2) 6.5” squares. You should now have two perfectly neat 6.5” squares ready to stitch!
Prepare each binding strip by folding one long edge .25” toward the wrong side of the fabric. I have a quick 1.75” binding tutorial on YouTube https://youtube.com/shorts/aRQhed17ykk?feature=share.
KANTHA MINI ‘Diagonal Ombré’
Choose 5 coordinating 12 weight thread colors from dark to light. Example; dark blue to light blue to white. I used: Aurifil 12 weight in colors 2783, 4039, 2810, 2835 and 2024.
Use your water soluble marking pen and OLFA’s 1.25”x12” ruler to mark the exact middle diagonal line. Then mark every inch out to each corner. These are your guidelines. I’ve stitched dark in the middle, graduating to lighter colors as I move out but you could do the opposite.
Start stitching on the middle diagonal line. Kantha stitch 4-6 rows on both sides of the middle line using the same color thread. Switch to the next lighter color when you reach the next marked line. The color changes and number of stitched lines are mirrored on either side of the middle diagonal line.
KANTHA MINI ‘Arrows’
Use your water soluble marker and OLFA’s 1.25”x12” ruler.
Find the center point of this quilt sandwich by folding on the diagonal and finger pressing to create a crease then folding on the diagonal the other way and finger pressing to crease.
Use OLFA’s 1.25”x12” ruler to mark .25” from the creases with ‘arrows’ pointing toward the center. Echo these drawn lines every .5” to fill each quadrant. Kantha stitch on these lines as well as in between. Your stitching lines can be super close together or with up to a quarter inch between:) I chose 5 variants of 4 colors for my Kantha Mini Arrows: Aurifil 12 weight in colors (2270, 2245, 1154, 2220, 2315), (5018, 1114, 5017, 1231, 2886), (1100, 4020, 2530, 2435, 2423), (2140, 2135, 2120, 1135, 2123).
Bind. Use one binding strip per Kantha Sampler Mini block. Attach the binding to the back first, finishing on the front. Use my binding technique seen here:
SHARE your work on Instagram and use the hashtag #kanthasamplermini


