How to Square Your Fabric – Cutting Tips & Tricks

Designer: Erin Kroeker
Website: www.theblanketstatement.ca
Instagram: @theblanketstatement
Skill Level: Beginner

There’s really no way around it… cutting is the foundation of any quilt. Quilting is a craft of precision. That doesn’t mean it will be overly complicated, but accuracy will be your friend, especially when it comes to cutting!
Before we get into it, I’d love to give you one initial piece of advice. Take things slow and steady!
Here’s a quick example. Let’s say you cut a fabric piece off by just 1/16th of an inch. Doesn’t seem like THAT big of a deal, right?
But what if you cut 16 pieces that way? Suddenly, your quilt will be off by an entire inch when you go to sew it together. That’s why accuracy matters!
Try not to feel intimidated if you aren’t a pro at cutting... yet! I am here to give you some tips and tricks to help you along the way! Remember, practicing is the way we ALL learn and improve!

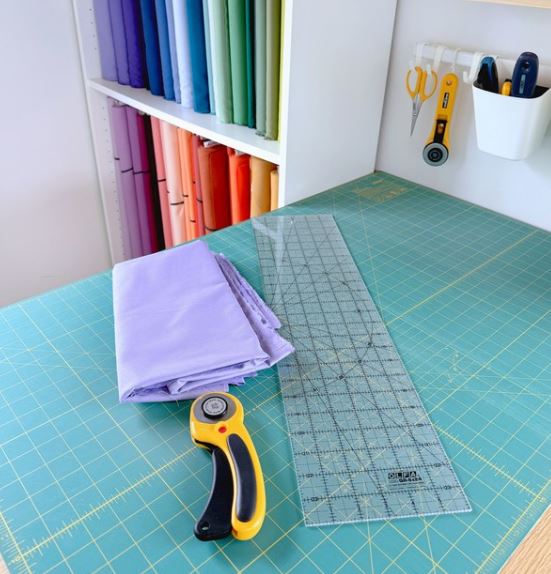
Tools:
- OLFA RM-MG; RM-MG-01 24" x 36" Green Double-Sided, Self-Healing Rotary Mat
- OLFA 45mm RTY-2/DX Ergonomic Rotary Cutter
- OLFA 45mm Tungsten Steel Rotary Blade
- OLFA QR-6x24 6" x 24" Frosted Acrylic Ruler
Let’s start off with a few tips before we even begin cutting!
First, I highly recommend that you start a new project with a fresh rotary blade! Some good indications that it’s time to change your blade are when it starts missing threads, if you’re having to go over the same cut more than once or if your arm/wrist is sore from pushing so hard to get through the fabric. Treat yourself to a new blade, it will feel like butter!

Second, make sure you iron your fabric before you start cutting! This will help you achieve more accurate cuts. No one wants creases, lumps or bumps getting in the way of their ruler or rotary cutter!

Square Up Your Fabric
Before you begin cutting the required pieces for your quilt, you will need to square up your fabric!
There are several reasons why you need to square your fabric before you begin. Fabric that has been stored on a bolt usually hasn’t been folded perfectly square, and the cut made from the fabric store most likely isn’t square either. Additionally, if you prewash your fabrics, they will shrink in the dryer and require a good press and squaring!

Here’s how to square your fabric:
Fold your fabric in half (across the width of fabric) lining up your selvedge edges parallel to each other. (The selvages are the woven ends of the fabric created by the manufacturer.) At this point, you may notice that the fabric isn’t laying smooth. That’s ok!


Gently slide the selvage edges side to side, until the fabric below lays flat and smooth. Remember, always make sure the selvedge edge stays parallel.


Chances are you now have unevenly cut, wonky edge. This is what you want to trim off!
For right-handed folks, place your fabric on the cutting mat so the edge you want to trim is on the right-hand side. (if you’re left-handed - do the opposite!)

Place your ruler with the 1” line directly along the fold in your fabric. Ensure both edges of your fabric are sticking out past your ruler on the right-hand side.


Once perfectly aligned, use your rotary cutter to trim off the wonky edge.


You should be left with a perfectly straight edge and a 90° corner to begin cutting your pieces.


Some More Cutting Tips!
When cutting fabric for a quilt, it’s best to use the lines on your ruler rather than the lines on your cutting mat (when possible). Check the lines running both horizontally and vertically to make sure that your fabric and ruler are in the correct locations.

Measure twice, cut once! Always double check that you are using the correct measurements! When making the same cut over and over, some people like to use masking tape or washi tape to mark the line on the ruler. This can speed things up, or even stop you from accidentally making a mistake!
Make sure your rotary blade is perpendicular to your ruler! If you tilt your rotary cutter, you will get inaccurate results or possibly even move your ruler while you cut.
Use your fingertips rather than a flat hand to apply even pressure to your ruler. The ruler is less likely to slip!

Speaking of fingertips… we want to keep those! Remember to keep your fingers and hands away from the ruler edge and cut away from yourself.
And always, I mean ALWAYS, close the blade guard when setting down your rotary cutter!
If you are making a very long cut and need to reposition your hand, stop your rotary cutter and hold it in place. Then, gently walk your hand further along the ruler while making sure to not shift the ruler or fabric.
Try to move your fabric as little as possible. If needed, you can rotate your cutting mat or the position of your body in relation to the mat.
After making several cuts (even with the best technique), you may end up slightly off square. Regularly check that your fabric edge is square and trim when necessary.
Lastly, I’m sometimes tempted to make one little cut with my non-dominant hand when it seems “easier”. Let me assure you, it’s not worth it!

I said it at the beginning of this blog post, but I’m going to say it again! When you are cutting, make sure to TAKE YOUR TIME. Slow and steady wins this race! Cutting really is the foundation of your quilt. You'll be one step closer to achieving accurate and precise piecing!
Good luck with your cutting - and don’t forget to have fun while you’re doing it!


