How to Make Snowball Corners

Designer: Erin Kroeker
Website: www.theblanketstatement.ca
Instagram: @theblanketstatement
------------------------------------------------------
Skill Level: Beginner

Snowballing corners is one of those techniques that looks a little fancy but is actually quite simple. It’s often used to “soften” the look of a square block by turning it into an octagon shape, but depending on how you place your blocks together, you can also create stars, flowers, and lots of fun secondary patterns.
In this tutorial, I’ll walk you through the steps to snowballing and share a few tips for accuracy, pressing, and keeping your blocks neat and square. Plus, a bonus mini-tutorial for creating half-square triangles from the trimmed corners so there’s less waste

I will be using a 9” finished block, but this technique works beautifully for blocks of all sizes. The general rule of thumb is that your corner squares should be about one-third the size of your main block. That proportion gives you a nice, balanced “snowball” look without overwhelming the center square.
For example:
· A 3" finished block pairs well with 1 ½ " corner squares.
· A 6" finished block works nicely with 2 ½" corner squares.
· An 12" finished block looks balanced with 4 ½" corner squares.
· And of course, a 9" block is great with 3 ½" corner squares, as shown in this tutorial.
You can always adjust depending on the look you want, using slightly smaller squares makes a more subtle snowball, while larger squares create a bolder, chunkier effect. The best part is that the technique never changes. Once you understand the method, you can apply it to any block size you like.
Here's a handy formula you can use for any size block: take the finished block size, divide by three, and then add ½". That number is the size of the small corner squares you’ll cut.
Example:
· For a 6" finished block, divide 6 by 3 = 2
· then add ½" to get 2 ½" corner squares.
· Pair those with a 6 ½" base square (since the base square is always cut ½" larger than the finished size to accommodate seam allowance)

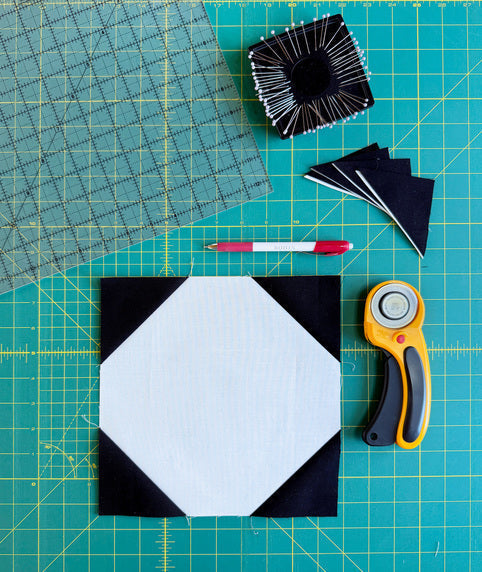
Materials and Tools
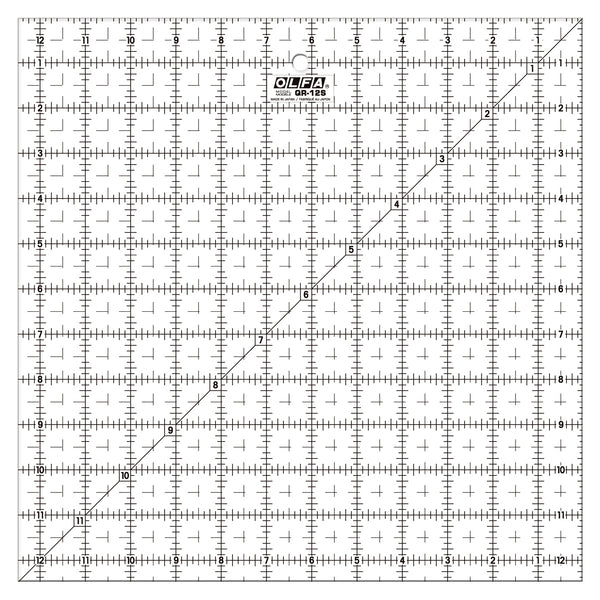
OLFA QR-12S 12 1/2" Square Frosted Acrylic Ruler
OLFA 45mm RTY-2/DX Ergonomic Rotary Cutter
RM-MG-01 24" x 36" Green Double-Sided, Self-Healing Rotary Mat
(1) 9 ½" square of fabric (this is your main block)
(4) 3 ½" squares of fabric (these will become your “snowball” corners)
Iron and pressing surface
Sewing machine
Thread*
*Thread Tip! If your main fabric and corner squares are high contrast, consider using:
· A neutral, like light gray or bone: These shades often act like “magic thread,” blending seamlessly with a wide range of light, medium, and dark fabrics.
· Go lighter, not darker: A light-colored thread usually disappears more easily on darker fabrics than a dark thread does on lighter ones.

1. Take your (4) 3 ½" squares and flip them to the wrong side. Using a ruler, draw a diagonal line from corner to corner on each one. This line will act as your sewing guide.

2. Lay your 9 ½" block right side up. Position one of the 3 ½" squares on a corner, right sides together, with the marked line running directly from corner to corner. Make sure the edges are lined up neatly. Pin if you like, though many quilters prefer to hold it in place while sewing since it’s a small piece.

3. Sew directly on the marked diagonal line.
Accuracy Tip! Try sewing just a thread’s width toward the corner side of your drawn line. This tiny adjustment helps compensate for the fold of the fabric, so when you press the triangle open, it sits perfectly flush with the edge of your main square instead of coming up short.

4. Using your ruler and rotary cutter, trim ¼" seam allowance away from the sewn line towards the corner.


5. Press the corner fabric out toward the corner.
Accuracy Tip! A two-step press works beautifully here: first, press with the fabric still closed to “set the seam”. Then gently flip the triangle open and press again. This keeps your fabric flat and prevents distortion.


6. Repeat these steps for the other three corners.
Work your way around the block, adding one snowball corner at a time. After pressing each new corner open, check that the edges of your triangle line up perfectly with the edges of the main block. If they’re even slightly off, you can nudge the fabric into place with your iron or adjust your sewing line on the next corner.


7. By the time you finish all four, you should have a neat block that still measures 9 ½". If it’s slightly oversized, you can trim it down. If it’s undersized, double-check that you were sewing directly (or just beside) your marked line or your corner square weren’t stretched or distorted during pressing.

Helpful Tips!
· Consistent cutting: Make sure your main square and corner square are cut accurately. Even a small variance will throw off alignment. A fresh, sharp blade can really make a difference!
· Stitch slightly inside the line: Sewing just a thread’s width toward the corner side of the line helps account for fabric fold and keeps your edges straight.
· Press, don’t drag! Using a hot, dry iron, make sure to lift and press the iron straight down to avoid stretching the bias edge of the snowball triangle.
· A little spray starch or pressing spray can help keep those bias edges crisp and stable.
· Press seams toward the snowball corners to reduce bulk in the center of your block or open for a flatter block.

BONUS BLOCKS!
If you’d like to make the most of your fabric (and end up with less waste), try adding a second seam about ½" away from your first line, toward the corner.
You can mark this extra line at the same time as your original diagonal, or after sewing the first seam, just remember to do it before trimming!


Once both seams are stitched, cut a ¼" seam allowance between them and press.


Not only will you finish your snowball corner, but you’ll also create a bonus half-square triangle. It’s a practical and efficient way to reduce waste and a fun way to build up a little stash of HSTs for a future scrappy project.

And that’s it, you’re officially a snowball pro!
Snowballing corners is one of those techniques you’ll come back to again and again. It’s simple enough for beginners, yet versatile enough to add depth and interest to even the most straightforward patchwork designs. Once you’ve mastered it, you’ll start spotting all kinds of ways to use it in your quilting projects.