How to Make Quarter Circles!

Designer: Erin Kroeker
Website: www.theblanketstatement.ca
Instagram: @theblanketstatement
------------------------------------------------------
Skill Level: Confident Beginner

Quarter circle blocks have been part of quilting for generations, bringing gentle movement and timeless charm to quilt designs. From traditional patterns to modern layouts, these curved shapes create a softness that straight seams simply can’t replicate. While curves can feel a little intimidating at first, they’re far more approachable than they look. With a few simple techniques and a bit of practice, sewing quarter circles can become an enjoyable, confidence-building skill, and one that opens the door to endless design possibilities.
Many quilt patterns rely on templates for cutting and piecing curves, which can feel a bit fussy or time-consuming. Thankfully, OLFA has a super handy circle cutter that takes the guesswork out of cutting quarter circles, making the process quick, accurate, and repeatable!

Tools:
OLFA 24” x 36” Self-Healing Rotary Mat
OLFA 45mm Ergonomic Rotary Cutter
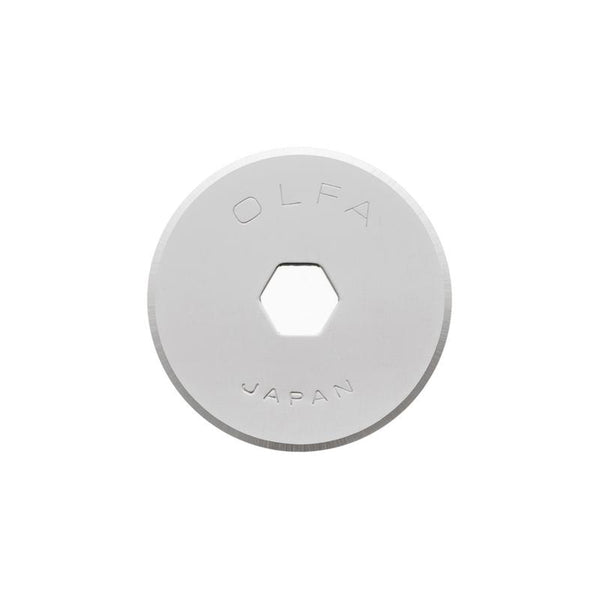
OLFA 45mm Endurance Blades
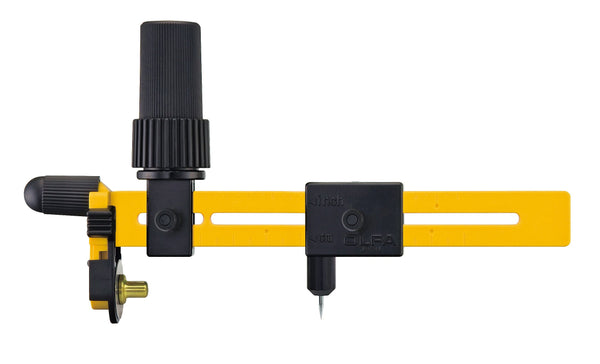
OLFA Rotary Circle Cutter CMP-3 and 18mm Blade
OLFA 6 ½” x 6 ½” Frosted Acrylic Ruler
Fabric & Supplies:
Two Fabrics – Fabric A & B
Thread
Sewing Machine
Iron and Ironing Board
Pins
Marking Pen
----
Some things to note before we get started: quarter circles are often pieced a little oversized, especially when you’re learning. Curves have a bit of a learning curve (get it?!) so I’ve included extra room in the measurements to make trimming stress-free. In this tutorial, we’ll be making quarter circles that are 5” unfinished (4.5” finished once sewn into a block), which will come together in an upcoming tutorial.
Quarter circles are made up of two pieces: one convex curve and one concave, sometimes referred to as the inner curve and outer curve. In this tutorial, Fabric A (Natural) will be the convex/inner curve, and Fabric B (Black) will the be the concave/outer curve.

Using your ruler, cut (1) 5" x 5" square from fabric A and (1) 5 ½" x 5 ½" square from Fabric B.

Next, mark a pivot point for the circle cutter ½" in from both sides on one corner of each square.
TIP! Technically, this marking only needs to be ¼" from each side to account for the seam allowance. However as mentioned above, I like to leave plenty of room for trimming, so I recommend ½", especially if you’re learning!

First, we will cut fabric A, the convex piece. Set your circle cutter to 4 ¼" using the top set of markings (the bottom set is in centimeters).

Place the pivot point directly on your marking, firmly hold the ratchet handle and cut your quarter circle in a clockwise direction.

Next, cut fabric B, the concave piece. Set your circle cutter to 3 ¾" and cut in the same way.
TIP! For all quarter circles, the radius for the concave piece should always be ½" smaller than the convex piece to account for the seam allowance.


You will now have the two pieces needed to sew your quarter circle!

Mark the centre point on each piece by folding in half diagonally and pressing.

For additional accuracy, fold each side in half to the centre point and lightly press.

With RST, align your centre markings and pin in place as shown.
TIP! I know the pieces look a bit wonky and like they won’t fit together, but this is where you need to trust the process!

Next, align the end points of the curves and pin in place.

Then match the remaining markings and pin in place.
If you’re new to sewing curves, you may want to use a few extra pins for accuracy. As you get more comfortable, you’ll likely need fewer, but for now, pins will be your friend! Add at least one additional pin between the pins already in place.
TIP! Many quilters prefer glue basting instead of pins, which is another great option! Use a small amount of washable glue along the seam allowance, baste in place and set with a hot iron.

Using a ¼" seam allowance (a ¼" foot is super helpful!) and a small stitch length (around 1.8) sew the two pieces together. Go slowly, stopping to adjust as needed. Keep the fabric lying flat under the presser foot to avoid bunching or puckering.

First, press the seam allowance to set the seam.

Then, press the seam allowance toward the outside, concave curve.

Now it’s time to trim your quarter circle.
With the convex piece in the upper right, place your ruler so the 4 ¼" marking aligns with the seam at the both the top and right side. Trim off excess from top and side.


Rotate the quarter circle so the concave piece is in the upper right. Place your ruler so the 5" marking aligns the bottom and left side. Trim away excess.

That’s it. You’ve sewn a quarter circle!
Tips for Success:
· Always match centres first. This is the key to accurate curves.
· Let the feed dogs do the work. Guide the fabric gently without pulling or stretching.
· Sew slowly. Curves reward patience.
· Use a short stitch length (around 1.8) for better control.
· Pressing (not ironing) helps prevent distortion.
· Don’t skip trimming. This step ensures your blocks fit together perfectly.
Troubleshooting Common Issues:
Wavy or Rippling Seams — You may be stretching the fabric while sewing. Slow down and relax your grip on the fabric. Check that you are easing the convex piece into the concave piece, not forcing it.
Ends Don’t Line Up — Double check that centres were aligned before pinning. Keep your seam allowance consistent through the curve. Minor mismatches can usually be corrected during trimming.
Block Isn’t Lying Flat — Use steam while pressing if needed and avoid sliding the iron. Press straight up and down. A light application of starch before trimming can also help.
Block Is Too Small — This usually happens when too much is trimmed away or the seam allowance is too large (more than ¼”).