How to Make Découpage Wooden Hangers using Paper Napkins

Designer: Marcia Izabel Marchiori
YouTube: MarciaBel Vlog
Instagram: @marciabel
---------------------------------------
Level: Beginner

Spring is on its way (or at least I hope so, haha), and it’s the perfect time to start thinking about projects that bring a fresh touch to our home. Why not begin with something simple decorating wooden hangers with découpage?
This project is so easy and fun! With just a few patterned paper napkins, you can turn plain wooden hangers into something beautiful. And as a little extra, I’ll also show you how to make matching closet tags.These can help you organize clothes by category, day of the week, or even add a fun touch by making it easier for your kids to find their favorite outfits.
Let’s get creative, there are endless possibilities with this project!

Tools & Supplies Needed
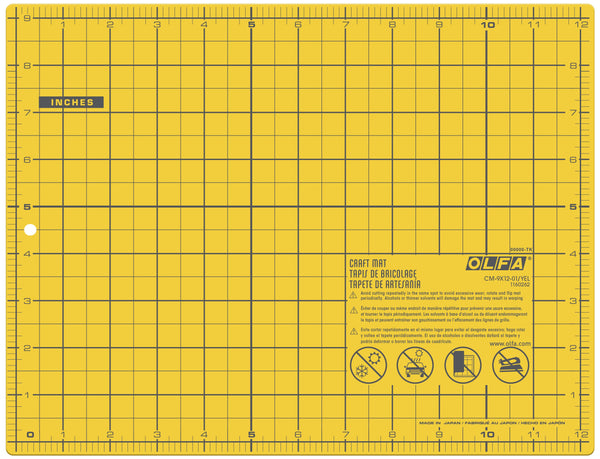
- CM-9x12-01/YEL Double-Sided Self-Healing Cutting Mat
- AK-4 Cushion Grip Art Knife
- 5-Inch SCS-4 Precision Appliqué Scissors
- QR-6x12 6" x 12" Frosted Acrylic Ruler
• Wooden Hangers
• Fine Grit Sandpaper
• Mod Podge (used: matte finish)
• Flat Paintbrush
• Acrylic Paint (optional, matching colors with the napkin pattern)
• Think White Cardstock or Watercolor Paper, for tags
• Ribbon, for tags
• Hole Puncher
• Masking Tape
• Pencil
Instructions:
1. Lightly sand the wooden hangers to create a smooth surface for the paint and glue to adhere to. Wipe away any dust.
2. Place the hanger on top of the napkin and trace the area you want to cover, making sure to leave a little extra space around the edges.

3. Using OLFA scissors, cut along the traced lines.


4. Since paper napkins are usually 3-ply, separate the patterned top layer from the other two. You want a very thin paper layer for a more delicate finish.

5. Wrap the metal hook of the hanger with masking tape to protect it while working.

6. Brush a thin coat of Mod Podge onto the hanger’s surface. Quickly but gently place the napkin onto the glued section, starting from the center and smoothing outward to the edges.


7. Brush another thin layer of Mod Podge over the napkin to seal it. Let it dry completely.

8. Once dry, trim any excess paper around the edges. You have two options:
• Use OLFA scissors for larger areas.

• Use an OLFA art knife for detailed trimming, especially in tight spots.

9. Sand off any remaining excess paper along the edges with fine grit sandpaper. Go very slowly to avoid tearing the napkin.

• Here’s an example of what incorrect sanding:

• This is the correct way of sanding:

10. Repeat the entire process on the other side of the hanger, allowing everything to dry completely.
11. Optional Painting Step: If you want to add extra detail, use acrylic paint and a flat brush to paint the exposed wooden parts of the hanger. Be careful not to paint over the napkin. If you accidentally get paint on it, quickly wipe it off with a clean paper towel.
12. Finally, apply a final coat of Mod Podge over the entire hanger and let it dry.
TIP: For a more durable finish, add multiple coats, letting each one dry well before applying the next. Allow to dry completely for 3-4 days before using.

Making the Closet Tags:
13. Brush a thin layer of Mod Podge onto a piece of thick white cardstock and carefully apply a napkin layer on top.


14. Apply another layer of Mod Podge on top of the napkin and let it dry. Repeat the process for the back of the cardstock.

15. Once dry, use a cutting mat, ruler, and an OLFA art knife to cut a 2 1/4" x 5" rectangle.

16. Print the tag templates on white cardstock HERE (I used watercolor paper) and cut them out (If you want your own wording for the tags, consider the size of the cardstock rectangles to 1 3/4" x 4 3/8”). Then, punch two holes as shown below.


17. Assemble the ribbon and tags as shown in the pictures, then attach them to the closet rail.


Alternative Découpage Method:
If your napkin has larger motifs (like flowers or animals), you can cut them out individually instead of covering the entire hanger.

18. Use OLFA Precision Appliqué Scissors to cut out the designs from the napkin (remember to separate the patterned layer from the other layers).

19. Glue each cut-out piece individually onto the hanger using Mod Podge, following the steps explained previously.

20. Apply a layer of Mod Podge on top, brushing on additional thin coats and drying in between. And your hanger is ready!

Note: Allow hangers to dry completely for 3-4 days before hanging your clothes.
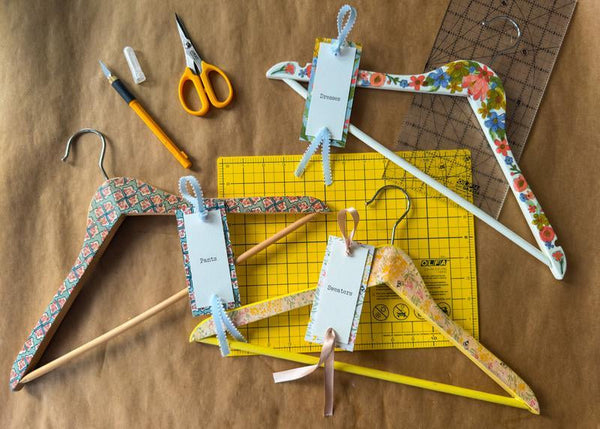
I absolutely love how these hangers turned out! They add such a charming touch to my closet. Even though there are a few drying times involved, the process itself is very relaxed and enjoyable. I hope you have fun making them too!


Don’t forget to tag me @marciabel and @OLFA_craft in your finished project, we would love to see your creations!
With love,
Marcia