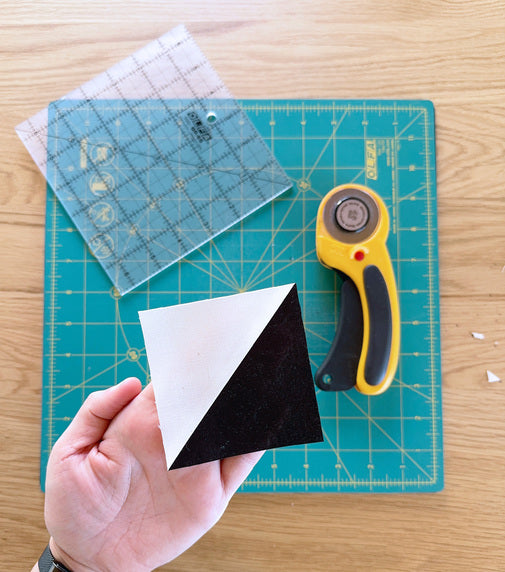
How to Make and Trim Half Square Triangles!

Designer: Erin Kroeker
Website: www.theblanketstatement.ca
Instagram: @theblanketstatement
Skill Level: Beginner
------------------------------------------------------

Half square triangles (HSTs) are one of the quilt world's MVPs—simple to learn, endlessly versatile, and bursting with creative potential!
It’s pretty obvious they are one of my favorite blocks when you look at how often I use them in my quilt pattern designs!
Whether you're a newbie or a seasoned stitcher, traditional quilter or modern maker, mastering HSTs unlocks a universe of design possibilities, making them a must-have in every quilter's toolkit.

Tools:
OLFA RM-MG-01 24" X 36" Green Double-Sided, Self-Healing Rotary Mat
OLFA 45mm RTY-2/DX Ergonomic Rotary Cutter
OLFA 45mm Tungsten Steel Endurance Rotary Blade
OLFA QR-6S 6 1/2" Square Frosted Acrylic Ruler
(Optional) OLFA RM-12S-01 12" Rotating, Self-Healing Cutting Mat
Fabric & Supplies:
Two Fabrics – Fabric A & B
Thread
Sewing Machine
Iron and Ironing Board
HSTs can be made in virtually any size!
For this tutorial, I will be making 3.25” unfinished (2.75” finished) half square triangles. This is the perfect size for an upcoming blog post on how to make a Bear Paw quilt block, so stay tuned!
(If you are following a different quilt pattern, reference the size and technique required.)
I’m going to demonstrate two different techniques commonly used for making HSTs. The first is Two at a Time and the second is Eight at a Time, sometimes referred to as the Magic 8 Method.
Both techniques will finish with the same size HSTs.

TECHNIQUE 1: TWO AT A TIME
Using your square ruler, cut (1) 3.75” x 3.75” square from Fabric A and (1) 3.75” x 3.75” from Fabric B.

On the wrong side of one of your squares, mark a diagonal CUTTING line.
Pair your two squares right sides together (RST).


You can choose to pin the two squares together, or just sew as is! I personally don’t pin at this point - but it’s totally up to you!
Sew a ¼” seam one each side of the marked line.


Cut along the marked line to create TWO HSTs. (Make sure to keep scrolling to learn how to trim your HSTs!)


TECHNIQUE 2: EIGHT AT A TIME
Using your square ruler, cut (1) 7.5” x 7.5” square from Fabric A and (1) 7.5” x 7.5” from Fabric B.

On the wrong side of one of your squares, mark two diagonal CUTTING lines from corner to corner to create an X.
Pair your two squares right sides together (RST).


Pin in place (if you desire), and then sew a ¼” seam on each side of both marked lines.

You are now going to carefully cut the sewn square into eight HSTs. To do that, you’ll need to make a total of FOUR cuts in the following order:
Align your ruler with the center where your drawn lines intersect and with one straight edge of the fabric. It’s very helpful align the 45-degree line on the ruler with the marked cutting line to ensure everything is straight.
Cut vertically down the center. It’s best to leave the pieces where they are - don’t try to rotate the fabric! Make a second cut perpendicular to the first.
Helpful Tip! This is a GREAT time to use an OLFA rotating cutting mat! No need to rotate the fabric when you can rotate the mat instead!


Lastly, cut along both marked diagonal lines between your stitching lines. Try not to shift the fabric!

Separate the pieces into eight individual HSTs!

TRIMMING HSTs
First you will need to press the seam of your HST. You can either press the seam open or to the side based on your preference or pattern instructions. I like pressing open!

One of the most important things to keep in mind when trimming HSTs is that
you want to trim on ALL FOUR SIDES (not just two).
First, place your square ruler on your HST and align the 45-degree line with the seam of your HST. Using the measurements on your ruler, ensure the HST extends past the size you are trimming to. For the HSTs in this tutorial, that is 3.25”.


The first two cuts will be to trim the right-hand side and top of the HST. (Notice the bottom and left side extend past 3.25”, leaving room to trim in the next step).

Now turn your HST or rotate the cutting mat 180 degrees. Again, place the ruler so the 45-degree line on the ruler is in line with the seam.
Next, align the left and bottom sides of the HST with 3.25” (or your desired measurement). Trim the right side and top edge.


And there you have it!
Now that you've learned the ins and outs of making perfect HSTs, it's time to let your creativity soar! Keep quilting, keep experimenting, and most importantly, have fun with it!


