How To Make A Spring Flower Wreath From Egg Cartons

Designer: Marcia Izabel Marchiori
YouTube: MarciaBel Vlog
Instagram: @marciabel
---------------------------------------
Level: Beginner

With its vibrant blooms and rejuvenating spirit, spring reminds us to infuse our surroundings with color and life. What better way to celebrate this season of renewal than by adorning our homes with a handmade creation that captures its essence?
I'm excited to show you how to make a spring flower wreath using basically egg cartons. Yes, you read that right - egg cartons! This tutorial promises not only a budget-friendly solution but also a wonderfully simple crafting experience. You'll learn how to transform humble egg cartons into a stunning wreath bursting with the vibrant hues of spring.

With just a handful of supplies and a dash of creativity, you'll soon find yourself surrounded by this enchanting home decor. After all, what better way to welcome spring than by crafting a wreath and displaying it at your front door?
Let’s get started!

Tools & Supplies Needed
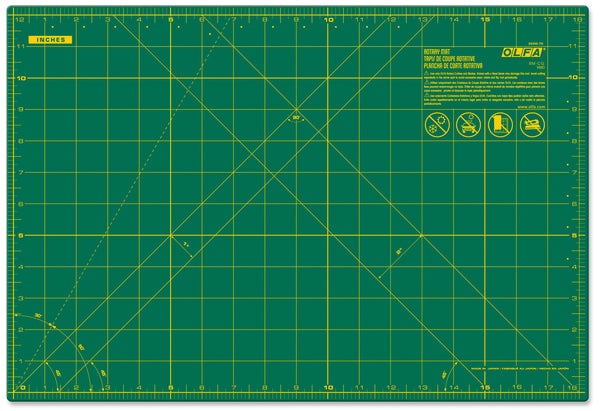
- OLFA RM-CG 12" X 18" Green Double-Sided, Self-Healing Rotary Mat
- OLFA 45mm RTY-2/DX Ergonomic Rotary Cutter
- OLFA QR-1x12 1" X 12" Frosted Acrylic Ruler
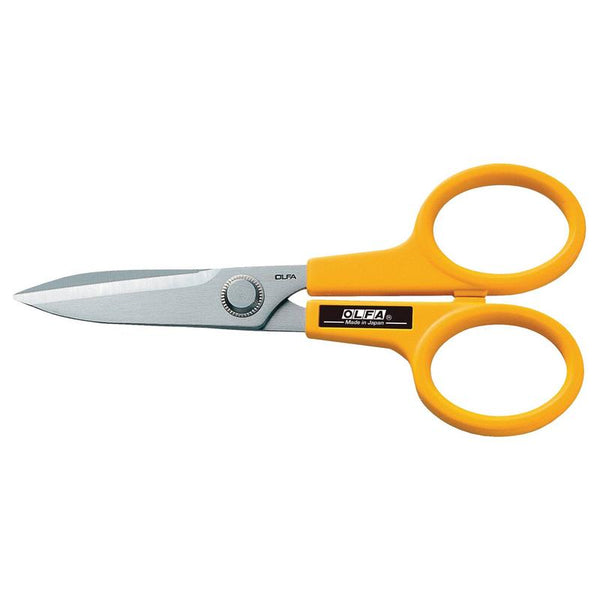
- OLFA 7-Inch SCS-2 Serrated-Edge Stainless Steel Scissors
- Egg Cartons
- Gouache Paint or Acrylic Paint, assorted colors
- Brush
- Fabric (enough to cut 1” strips, fabric used in this project: Riley Blake Designs Lettuce Suzanne fabric C13086-LETTUCE)
- Embellishments: pompoms, yellow crepe paper, dried flowers (used: baby's breath)
- 12” Wooden Hoop
- 1” Grosgrain ribbon
- Pencil and eraser
- Hot Glue Gun
Instructions:
You’ll learn how to make four different flowers, with variations, out of egg cartons.
STEP 1 - CUTTING OUT SHAPES
We are going to cut all flower pieces first, aiming to optimize the use of the carton boxes and minimize waste as much as possible. After cutting, we will group all sets aside (Flowers 1, 2, 3 and 4) for painting in a future step.
- Trace with a pencil the Flower 1 (daffodil) petals in the corners of the carton. It's important to start tracing from the center-bottom of the carton cup to the top, using the curved parts of the carton in each petal. For this project, the OLFA 7-inch scissors are ideal because they are sturdy and strong enough to go through the carton with precision.

- Tip when cutting petals for Flower 1: Pay attention to cutting petals out only from the external parts (edges) of the carton, and be careful not to damage the dividers, as you are going to use these for Flower 2.

- Cut all six petals for Flower 1 using OLFA scissors. Then, using the carton lid, cut out a circle with an approximate 3/4-inch diameter for each Flower 1. Carefully cut and set aside the carton's divider (pointed part) for Flower 2, as seen below.


- Now cut the narrowest and tallest dividers that you have on hand; these will form the center (daffodil’s “corona”, one divider per set) of the Flower 1.

- Trim and gently fold about 1/2 inch of the edge of the divider you just cut (corona - Flower 1). Then, cut the border irregularly to give it an organic aspect.


- When cutting these tall dividers, ensure to keep the rounded cups intact for Flower 3. This is what you have accomplished so far:

- Using the divider parts of Flower 1, create Flower 2 by tracing with a pencil and cutting out 4 petals from it:


- Curl each petal with the scissors closed, using the back part of the blade.

- Here's the result with the 4 petals cut and curled for Flower 2. You can make variations by cutting the petals with a pointed shape or rounded edges. Later, after painting it, you can use a single layer or two as a variation when assembling it.

- For Flower 3, use the cups you cut previously, ensuring to trim the edges to make them even.


- Divide and cut with OLFA scissors the circle into four equal parts, and then each part into half again. Cut the tip of the petals according to your preference.


- For Flower 5 (rose), cut the same kind of cup, but this time divide the circumference into five equal parts (you can use your thumb to loosely measure each petal evenly). Then, round the edges.

- You will need four of these pieces for each Flower 5:

Cut as many shapes and flowers as you desire, and then proceed to the next step!
STEP 2 - PAINTING THE FLOWERS
- For this step, use gouache or acrylic paint to paint your flowers. For my project, I used:
- Yellow, orange, and white for the Flowers 1 (daffodils)
- Hues of purple for Flower 2
- Red, white, and burnt orange for Flower 3
- Pink for roses (Flower 4)

I have a total of three daffodils (Flower 1); two single layers, and one double layer for Flower 2; five variations of Flower 3; and three roses (Flower 4). I also painted a couple of simple green leaves.

STEP 3 - MAKING STAMENS FOR YOUR FLOWERS
Although it's optional, and you could certainly paint the flower stamens with a different color instead, these simple next steps add a great touch of pizzazz to your flower! For this project, I'll be incorporating three options: crepe paper pistils, pompoms, and dried baby's breath flowers.
- Crepe Paper Pistils:
- With an OLFA rotary cutter, ruler, and mat, begin by cutting 1 1/2-inch strips of crepe paper.

- Next, make cuts into one long side of the strip, about every 1/8 inch, to create a fringe.

- Then, twist each fringe tightly between your fingers to create thin, twisted shapes.

- Once you have twisted all the fringes, roll the paper tightly until you reach the desired thickness. Secure the end by gluing it with hot glue. The exact size may vary depending on the size of stamens you desire.


- Pompom Stamens: to make another option for stamens, use pompons purchased from the dollar store. Trim each pompom to the desired circumference using OLFA scissors, according to the size of your flower. Then, attach the trimmed pompon to the center of the flower using hot glue.


- Dried Baby's Breath Flower Stamens: This is the easiest way to add stamens to the flowers that are longer. Simply glue a mini bouquet of dried flowers into the center of the cup.
STEP 4 - ASSEMBLING DAFFODILS AND ROSES
- For Flower 1 (daffodils), start by gluing each petal to the center of the circle you've cut. Then, attach the "corona" to its center to complete the flower. Finish with crepe paper pistils.


- For Flower 4 (roses), begin by gluing all five petals of the first layer closed together to form the center of the rose. Then, continuing to apply glue in the center, layer the other three layers of petals, always tightening towards the center. Finish by curling the petals outward from the outside.


STEP 5 - ASSEMBLING THE WREATH
- Using an OLFA rotary cutter, mat, and ruler, cut 1-inch strips of the green fabric, ensuring you have enough to diagonally wrap the entire wooden hoop. Use hot glue to adhere the beginning and end of the strips to the hoop securely.


- Using the hot glue gun, carefully attach all of the flowers and leaves to the wrapped wooden hoop. Be sure to arrange them in a pleasing composition before securing them in place. Attach ribbon.

And voilà! Your wreath is ready to spread colors throughout the season!


I hope you have a joyful day making these, and don’t forget to tag me @marciabel and @OLFA_craft in your finished artwork, we would love to see your creation!
Marcia


