How to Make a Sashiko-Inspired Paper Bookmark

Designer: Marcia Izabel Marchiori
YouTube: MarciaBel Vlog
Instagram: @marciabel
----------------------------------
Level: Beginner
Have you heard about the sashiko technique?

Sashiko is a traditional Japanese embroidery style that began as a way to repair and strengthen fabric. The word sashiko means “little stabs,” which describes the small, even stitches that form beautiful repeating patterns. Over time, what started as a practical mending method grew into an art form, known for its simple geometric designs, often stitched in white thread on dark fabric. The result is not only strong but also incredibly elegant and calming to look at.

I’ve always loved how sashiko combines beauty with purpose. The rhythm of the stitches and the clean, geometric patterns feel timeless, and they remind us that even the simplest techniques can bring so much charm.


Today, we’re going to make something inspired by this technique: a paper bookmark embroidered with “sashiko-style" stitches. Traditionally, sashiko is done with indigo-dyed fabric, white cotton thread, and a long needle. But for our project, the idea is to keep it simple and use what we already have at home, like sturdy paper and embroidery floss. It’s a fun, creative way to bring the spirit of sashiko into your everyday reading routine while adding a handmade touch to your books.


Tools & Supplies Needed
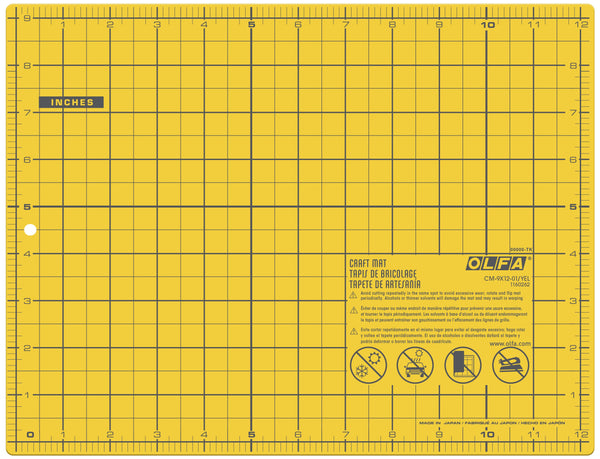
• OLFA CM-9x12-01/YEL Double-Sided Self-Healing Cutting Mat
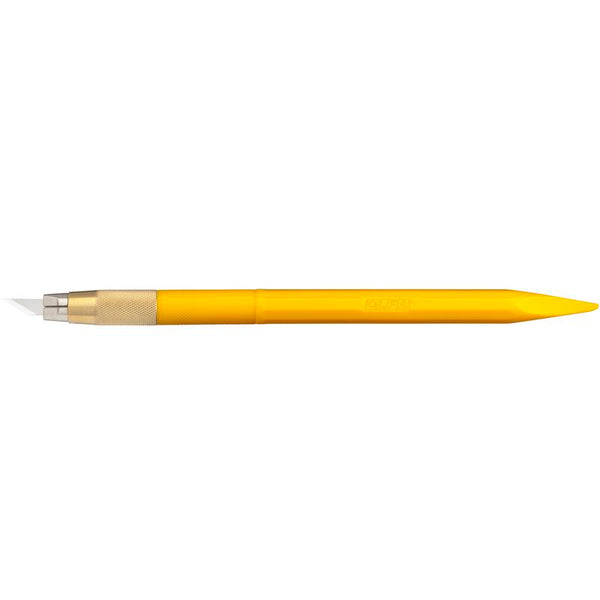
• OLFA AK-5 Designer Graphic Art Knife (we’ll use the blade and needle)
• OLFA QR-6x12 6" x 12" Frosted Acrylic Ruler
• OLFA 5-Inch SCS-4 Precision Appliqué Scissors
• Heavyweight cardstock (92-111 lb), letter size - assorted colors
• Graph Paper (you can print it here too, for free: https://print-graph-paper.com/ )
• Pencil and colored markers
• Felt or Cork (to place under cardstock for puncturing)
• Fine Sashiko needle or embroidery needle
• White Sashiko thread or embroidery floss (or any color you like)
• Punch hole tool
• 1/8” Ribbon (any coordinating color you like) or twine
• 1/4" double-sided tape
• Adhesive Tape
Instructions
Step 1: Create Your Template
• The first step is to design your pattern. Using graph paper, draw the motifs you want to embroider. Sashiko patterns are based on simple geometric shapes and repetition. You can use the square grid to create traditional repeating motifs, but you can also experiment with diagonal or triangular grids. The most important thing is to have a clear, repeating pattern to follow.
Below are a few examples of motifs you can try: straight lines, intersecting lines forming diamonds, triangles, etc. Keep it simple, as the charm of sashiko is in its clean, rhythmic stitches.

• Think about the size of your bookmark as you draw your design. A common bookmark size is about 2 1/4" wide and around 6 - 7" long, but you can adjust it to your preference. Trace the edges onto the graph paper with a pencil, as shown in the next steps.
Now, let’s create the actual template we’ll use in our project, keeping in mind the sashiko way of thinking! Pay attention to the order of drawing the lines, as this usually becomes the stitching order. When stitching, follow the path that uses the least amount of thread, which helps optimize your work. For this pattern, I’ll be using two thread colors
1. First, trace the outline of the bookmark, then draw the diagonal lines, counting the grid as shown below.

2. Next, add the horizontal center lines.

3. Then, draw the vertical lines.

4. Switch to the second color and draw the diagonal lines that run parallel.

5. Continue by tracing each parallel side, one at a time, following the order.


6. Using your OLFA AK-5 art knife and ruler, cut the bookmark to size.

This is the final template:
Step 2: Transfer the Template to Cardstock
Pick the cardstock and thread colors you like best. I chose a metallic indigo blue cardstock because blue is such a classic sashiko color, and I’m pairing it with white and yellow embroidery floss for contrast.
Once your template is ready, it’s time to transfer it onto your cardstock.
• Use adhesive tape to secure your template on top of the cardstock.
• Place felt or cork under the cardstock to protect your surface.

• Using the needle point of your OLFA AK-5, start making tiny punctures following your template. These marks will guide where your thread will go.
Important: Make pinpoint punctures at every line intersection and at the ends of each line. Note: the only exception is the crosses in the center of each diamond shape: don’t puncture the middle. I also find it easier to puncture line by line, so I don’t miss anything along the way. It’s also important to keep your OLFA tool straight and perpendicular to the paper, so the punctures come out neat and clean.

• Using your OLFA ruler and a pencil, lightly trace the edges of the bookmark on the cardstock before removing the template. This gives you a neat frame and helps guide your embroidery.

And this is what it looks like so far:
Step 3: Start Sewing
Now for the fun part: embroidering your paper!
• Separate 4 to 6 strands of embroidery floss. Usually, you’d tie a knot at the end of the floss, but in this case, attach the end to the back of the cardstock with a small piece of adhesive tape. This way, you avoid the extra bulk a knot would create once the bookmark is finished. Thread your needle and begin stitching through the puncture marks, following the same order we used when tracing the pattern


Take your time and enjoy the rhythm of stitching, it’s as calming as it is creative :-)
Step 4: Finish Your Bookmark
• Apply double-sided tape to the back of your embroidered bookmark, making sure to cover all the edges so it stays neatly sealed.

• Place the embroidered rectangle on top of another piece of cardstock in the same color to hide the stitches, and press them together to secure both layers.

• Using your OLFA ruler, art knife, and cutting mat, trim away any extra paper for a clean edge.

Step 5: Add a Ribbon
1. Punch a hole at the top of your bookmark.
2. Thread a ribbon through the hole.

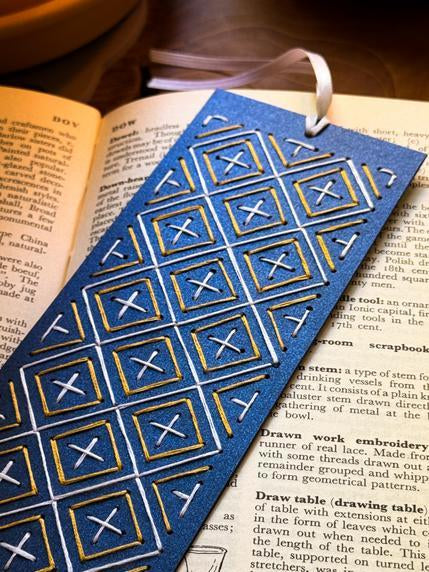
And now your bookmark is ready! It’s simple, handmade, and inspired by the timeless charm of sashiko. Every stitch gives it a personal touch, and it’s perfect for gifting or keeping for yourself :-)


Here are a few more ideas to play with if you’d like to explore this technique further:

I’d love to see your finished work! Tag me @marciabel and @OLFA_craft so we can admire your beautiful bookmarks.
With love,
Marcia