How To Make A Cheerful "Happy Spring" Bunting

Designer: Marcia Izabel Marchiori
YouTube: MarciaBel Vlog
Instagram: @marciabel
---------------------------------------
Level: Beginner

Hey there, fellow crafters! There's something truly special about having handmade creations in our homes, don't you think? I mean, isn’t it magical to infuse a little piece of ourselves into the decor? It's like spreading love and happiness with every stitch and snip.
Now, picture this: it's springtime, the birds are chirping, flowers are blooming, and there's this incredible energy in the air that just makes you want to celebrate. So, why not welcome the season in style with a handmade touch? Today, we're going to create a cheerful "Happy Spring" bunting that'll instantly lift your spirits and add a pop of color to any space. This simple yet charming DIY project serves as a perfect homage to the season, and I'll guide you through the steps to create your very own bunting. And here's the best part: you can also personalize it with any letters you fancy. I am making the bunting in two separate parts, so you can use the "happy" part for several different occasions.
Whether you're a seasoned crafter or a novice enthusiast, this sewing project is completely adaptable and accessible to all skill levels. So gather your supplies, unleash your creativity, and let's get started!
Tools & Supplies Needed
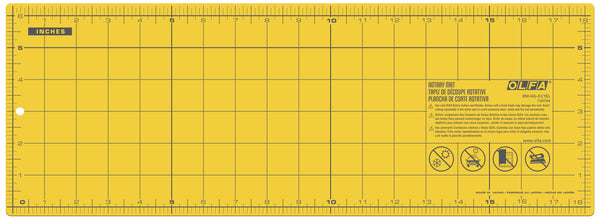
- OLFA RM-HG-01/YEL 6”X18” Double-Sided Self-Healing Rotary Mat, Yellow
- OLFA RTY-2C-RED Quick-Change 45mm Red Rotary Cutter Bee in my Bonet by Lori Holt (You can find the Lori Holt Red rotary cutter here)
- OLFA QR-1x12 1" X 12" Frosted Acrylic Ruler
- OLFA 5-Inch SCS-4 Precision Appliqué Scissors
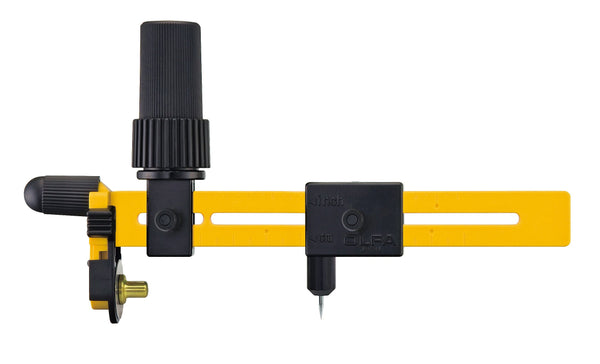
- OLFA CMP-3 Rotary Circle Cutter
- Riley Blake Designs 1/4” Double Fold Bias Tape ST-24567
- Riley Blake Designs Glamper Sewing Pins
- Buttons (used: Riley Blake Designs Cute Little Buttons by Lori Holt of Bee in my Bonnet - Sunshine STB-3607)
- Thermo O Web HeatnBond Lite Iron-On Adhesive
- Riley Blake Designs Starch Brush By Jillily Studio
- Mod Podge and water
- Light colored wool or acrylic felt (color used: light beige)
- Sewing machine (basic skills) & notions
- Magic tape
- Glue to adhere flowers (used: hot glue gun)
- Iron and ironing mat

Fabric Requirements (all from Riley Blake Designs):
- Bunting main fabric: Bee Backgrounds Busy Patchwork Multi (C6392-MULTI)
- Fabric scraps for the flowers consist of 5 x 10” rectangles of:
- Bee Basics Red Tiny Daisy (C6403-RED)
- Lettuce Suzanne (C13086-LETTUCE)
- Daisy Mae (C13088-DAISY)
- Denim Barn Dance (C12028-DENIM)
Instructions
- Let’s begin by printing the letter template to scale HERE (if you are making the "Happy Spring" wording, print only sheet 1). Using OLFA scissors, loosely cut out each letter individually, cutting very closely to the letter lines but not directly on them.

- Iron the interfacing onto enough felt for the letters and squares, following the instructions provided by Therm O Web.

- Then, temporarily attach each letter to the felt with interface with magic tape and, using OLFA scissors, carefully and precisely cut out each letter.

Tip: To cut inside the letters, it's easier to make a sharp cut with the tip of scissors first, then proceed to cut the internal shape of the letter.


These are the final letters. Set them aside to be used later in the project.

- Let’s prepare the fabric for the flowers in advance, so they can dry properly. To give more structure to each flower, stiffen the fabric using the glue and water technique. Start by mixing one part of regular Mod Podge with an equal part of water, and thoroughly blend it manually. Note: The less water you use in this mixture, the stiffer the fabric will be. I found that this ratio worked perfectly with my flowers, but feel free to adjust it according to your preference!
On a protected surface, using a Riley Blake Designs starch brush, apply the mixture to one side of each piece of fabric (the quantity of fabric needed will depend on how many flowers you plan to make. Here, I have four 5 x 10” rectangles, one for each color from the supply list).

- After preparing all of the fabric, hang each piece separately to dry thoroughly. I'm hanging mine near the window to speed up the drying process.

- Grab your main fabric (squares) and, using an OLFA rotary cutter, acrylic ruler, and mat, cut as many strips of squares as needed for your project (for the “Happy Spring” bunting, we’ll need a total of 15 squares). Cut an entire line of squares together at this step, keeping the white borders intact for now.

- Measure and, using an OLFA rotary cutter and acrylic ruler, cut the felt with interfacing according to the size of the fabric square strips you've just prepared. You can work with an entire piece of fabric at this point, but I find it easier to work with groups of three to four squares at a time when applying the felt. Once everything is cut to size, proceed to iron the felt with interfacing directly onto the back of the fabric, following the instructions provided by Therm O Web for the best results.


- Using an OLFA rotary cutter, acrylic ruler, and mat, trim each square, still leaving the white border.

- Now we're going to round one side of each square, and let me tell you, this is one of the things I absolutely adore about the Riley Blake Designs Bee Backgrounds Busy Patchwork Multi fabric! Along with the fact that it has all the coordinating colors you need, the patterns within each square are geometrically designed and overall very symmetrical, making it much easier for you to round each piece. Since each piece is a 3 1/2-inch square, open your OLFA rotary circle cutter to a radius that is half of that (1 3/4 inches). Then, simply locate the center within the pattern and one of the edges of the square, and cut out a semicircle. Trim them precisely, removing all of the remaining white borders.


This is the result of everything already cut and trimmed:

- Now it's time to sew the double fold bias to link all the bunting together! I know there are several ways to do binding, and while some might call this "cheating," I find it practical to use bias tape. Simply slip the bias over the fabric so that the raw edges of each bunting are sandwiched in the middle of the bias. Pin the bias in place and stitch it in place.


- Remove the protective layer from the interfacing and apply the letters to the bunting by pressing them into the fabric.

- Making the fabric flowers: cut out 3 1/2-inch, 3-inch, and 2 1/2-inch pieces from the stiffened fabric you prepared previously, selecting assorted colors for each size of square.

- For each square: fold it in half.

- Then fold in half again.

- And again:

- Hold the bottom of the triangle closed, ensuring that the closed folds are facing towards the right. Leaving the bottom intact, cut a nice big petal shape.

- Open up your cut flower.

- Curl each petal with the scissors closed, using the back part of the blade.

- Glue the three layers together (from the three different sizes of squares), then finish with a cute button as the flower core. Attach it to each side of bunting.

And your spring bunting is ready! :-)


I hope you have lots of fun making these, and don’t forget to tag me @marciabel , @OLFA_craft and @rileyblakedesigns in your finished projects, we would love to see your decor.
Happy Spring!
Marcia