Hibiscus Charm Mini

Designer: Sarah Gozzo
Instagram: @princess_ina_pouch
Finished size 6.5”x6.5
----------------------------

TOOLS:
- OLFA 5-Inch SCS-4 Precision Appliqué Scissors
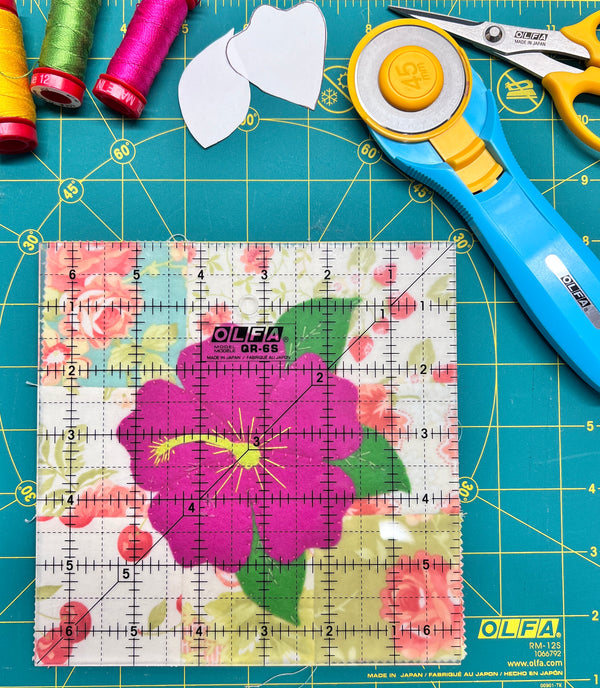
- OLFA QR-6S 6 1/2" Square Frosted Acrylic Ruler
- OLFA RM-12S 12" Rotating, Self-Healing Cutting Mat
- Template- Download Here
MATERIALS: (I used wool felt from Felt on the Fly, specific colors listed below)
- (9) 2.5” precut squares from a charm pack 4”x6” Pink felt (cerise)
- 2”x4” Green felt (sprout) 1”x2”Yellow felt (lemon lime)
- 6.5” square fusible fleece 7” square Backing fabric
- Yellow(2135), green(1114) and pink(4020) Embroidery thread
- 1.5”x30” binding strip Liquid basting glue Printed hibiscus template
Designer Note: YouTube video with Sewing Tips for this project

Instructions:
1. Make a 9 patch: Sew the 2.5” squares into 3 rows of 3 using a scant .25” seam allowance. Press the seams open with a hot iron. Sew the 3 strips together with a scant .25” seam allowance. Press the seams open with a hot iron. Press the completed 9 patch flat and fuse the 6.5” fusible fleece to the back. Set aside.
2. From the printed paper template, cut the petal, leaf and stamen shapes on the line.

3. Use OLFA’s appliqué scissors to cut 5 petals from pink felt, 3 leaves from green felt and 1 stamen from yellow felt. Pro tip: Since the templates are so small, cut the felt into pieces just big enough to fit the paper shape. Use double sided tape to hold the paper shape onto the felt piece. Hand cutting the felt pieces give them a unique shape that adds to the character of the finished hibiscus.
4. Arrange the petals in the middle of the 9 patch so the petal points touch and some of the petals slightly overlap. Slip the leaves under the petals on either side of the flower. Place the stamen in the middle of the flower. Adjust the pieces until you like the placement. Use tiny dots of basting glue to hold the felt in place for stitching. Pro tip: immediately after gluing, lay the 6.5” square ruler flat on top of the appliqué with a weight on top. I use my heavy pincushion. Let the glue dry like this for about 15 minutes before moving on to the next step.

5. Stitch the felt pieces onto the 9 patch with embroidery thread. I use a single strand of Aurifil 12 weight thread and a size 3 Clover Golden eye milliners needle. There are many different ways to stitch the shapes down. I prefer a simple whip stitch. Check out my quick ‘Hibiscus Charm Mini’ YouTube tutorial.

6. Whip stitch around each petal, leaf and stamen. Add small details like leaf veins, ‘whiskers’ at the tip of the stamen and contrasting stitches in the center of each petal. Please watch my YouTube tutorial for stitching tips.
7. Once your stitching is complete, attach the 7” backing fabric. Machine sew a simple outline around the hibiscus. Pro tip: Set your machine stitch length to 1.8 or something similar. Shorter stitches will give you a cleaner look when sewing around curves and points.
8. Use OLFA’s 6.5” square ruler and OLFA’s 45mm rotary cutter to square up by cutting away any excess, making your block a perfect 6.5” square. OLFA’s rotating mat is excellent for this step.

9. Bind your mini quilt using my 1.5” binding method found on my YouTube channel. For this Hibiscus Mini quilt I decided to finish the binding on the front with a wide running embroidery stitch:)