Folk Inspired Felt and Paper Bookmark

Designer: Marcia Izabel Marchiori
YouTube: MarciaBel Vlog
Instagram: @marciabel
------------------------------------

Corner bookmarks are a great way to use felt and fabric scraps from previous sewing projects. They serve as practical companions for our reading materials, but their usefulness extends beyond that. These bookmarks prove invaluable for saving our cherished recipes in cookbooks, marking important dates in planners, and highlighting our latest journal entries.
So let’s make it!

Tools & Supplies Needed
- OLFA FCM-12x17 12" x 17" Folding Cutting Mat
- OLFA QR-4S 4 1/2" Square Frosted Acrylic Ruler
- OLFA AK-4 Cushion Grip Art Knife, paired with OLFA KB4-R/5 Curved Carving Art Blade
- OLFA 45mm RTY-2/DX Ergonomic Rotary Cutter with PIB45-1 Stainless Steel Pinking Blade
- OLFA 5-Inch SCS-4 Precision Appliqué Scissors
- OLFA AK-5 Designer Graphic Art Knife with needle tip
- Felt and coordinating fabric (used in this project: Riley Blake Designs)
- Patterned Paper (two coordinating patterns, used in this project: Riley Blake Designs by Lori Holt of Bee In My Bonet crafting paper collection)
- Floss (coordinating colors with Felt/Fabric. Used in this project: Aurifil)
- Embroidery Needles
- Therm O Web Iron-Adhesive Heat-n-Bond (interface)
- Iron and ironing board
Instructions
- Print template to scale. Gather all tools and materials.
- Using the art knife, paired with the curved carving art blade, cut squares of felt, fabric, two pieces of coordinating paper, and iron-adhesive for each one, leaving some clearance from the template size (around 1/4” per side).

- Iron interface together with each piece of fabric, felt and to one of the papers (back side):

- Remove interface protective sheet and iron both papers together.


This is the result:

- Next, draw template to the back of felt (on the interface paper), then cut the heart out using art knife, paired with curved carving art blade.


- Using the rotary cutter with pinking blade, cut edge of triangle:


- Remove protective paper from the felt, align fabric (keep the protective paper) together. Iron both pieces together.


- Remove protective paper from fabric.

- Cut a square out of the paper you prepared before (with two layers of paper and interface), using the provided square template.
- Using the OLFA square acrylic ruler and AK-5 designer graphic art knife with needle tip, pinpoint holes in two sides of the square (with a distance of 1/8”between them).

This is the result:

- With a erasable pen, draw elements to the felt, then start embroidering it using 2 strands of Aurifil floss.

- Make French knots to the tip of each embroidered branch. To make it, place the needle close to the fabric. Wrap the thread around it twice, as shown.

- Keep the longer end of the thread pulled with your fingers while putting the needle back with your other hand in a point just close to starting point. Pull down the needle through the felt, and you will see the French Knot formed.


- Place felt/fabric piece together with paper square. Start stitching them together with blanket stitches, using the pinpointed holes as guide.


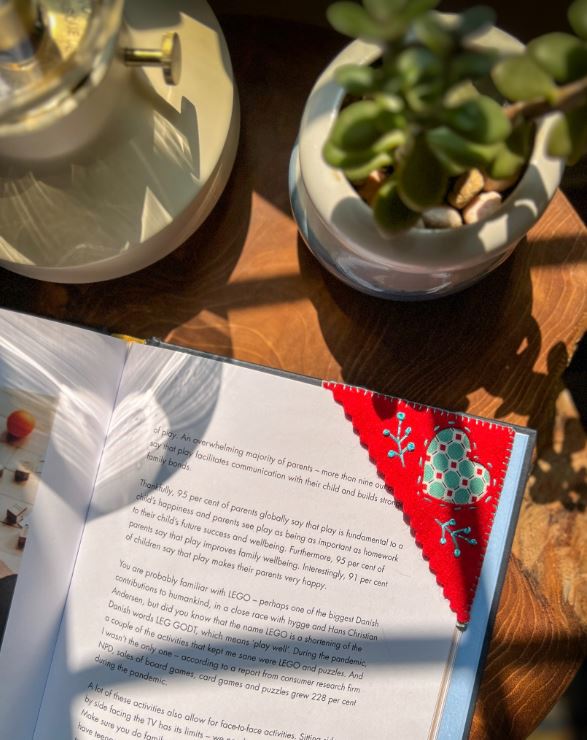
And that’s it, your bookmark is ready to use!

Don’t forget to tag me @marciabel and @OLFA_craft in your finished project, we would love to see which colors you chose!
Marcia
