Five Different Ways To Finish A Hem

Designer: Marcia Spencer
Instagram: @keechiibstyle
-----------------------------------
There are more than a few ways to finish a hem on a garment or sewing project. Based on your project, fabric and desired look will determine which hem will work best for your project. Here are five different hem finishes that I use on projects and how and when I create them.
MATERIALS NEEDED:
- Sewing Machine
- Blind Hem Foot
- Fabric
- Pins or Clips
- iron
OLFA TOOLS NEEDED:
or
- OLFA 5-Inch SCS-4 Precision Applique Scissors
- OLFA RM-MG 24" X 36" Green Double-Sided, Self-Healing Rotary Mat
- OLFA 1” X 12”Frosted Acrylic Ruler
Single Fold Hem
The single fold hem has to be the simplest hem there is to create. It is created the exact way it sounds with a single fold and press. If the fabric frays easily you can finish the edge of the fabric with a serger and then turn it up ⅜ to ⅜ inchand sticth. I usually use this with fabrics like scuba, leathers, vinyls and heavy fabrics that don’t fray.
Double Fold Hem
Once you’ve mastered a single fold, a double fold should be a cinch. You don’’t have to finish the edge of a double fold hem because the edge will not be exposed. With a double fold you will fold the edge toward the back side once, press and then a second time, press and stitch. I use this method the most. I seams to grove the neatest, cleanest hem and works well with most all fabrics
Narrow Rolled Hem
A narrow rolled hem is used mostly with finer, lighter fabrics. It makes a neat, barely there hem that works well with fine fabrics. You may see rolled hems, on scarfs, chiffons, silks etc.
A simple rolled hem can be accomplished on your machine with a special foot. The edges are rolled up when you stitch so that it is not exposed. A similar look can be achieved with the Narrow hem by turning the edges back between ⅛ and ¼ of an inch twice before stitching it down. Personally I use the narrow hem a bit more than a rolled hem but the rolled hem is quicker when done on the machine.
Bound Hem
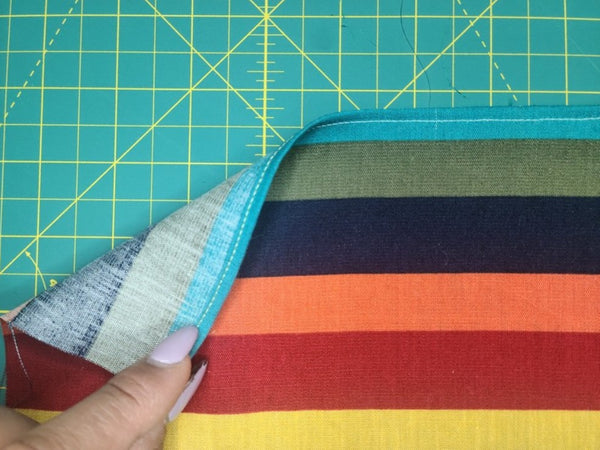
One of my favorite hems is the bound hem. I love to use this hem on pants and jackets. Its easy to accomplish if you purchase your binding but you can also make your own binding.
First turn the edge of your fabric wrong side up. Open your binding up completely and with right side of binding to wrong side of fabric, line the edge of your binding up with the edge of your fabric, pin and stitch along the crease closes to the edge. Trim.
Then fold the binding over the edges using the creases, until its completely closed over stitching. Pin in place. Stitch the binding down from the front, close to the edge of stitching. Press.
This hem also works for lots of different fabrics woven and stretch! With stretch, you may want to create your own binding.
Blind Hem
The blind hem is sewn with a blind hem foot on your sewing machine. It leaves a stitch that is invisible to the eye. It is very clean and very neat. Used alot in tailored pieces, skirts, trousers and dresses. I love a blind hem when I don’t want to leave visible stitches on my hems.
You can serge the edge of the fabric before creating your blind stitch or not. The edges will be completely covered. However, depending on how much the fabric frays serging is an option.
You start by folding the edge of the fabric back ¼ inch, press. Then make a second fold back about 1”. Press.
Turn hem under with inside facing up. Release the blind hem foot down and stitch about ⅛ in from the top crease of the hem.
With so many hem options you should always have a clean finish!


