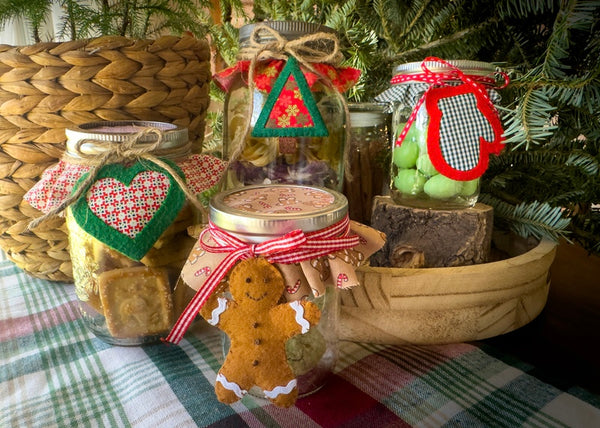
Festive Mason Jar Lids with Handmade Felt Ornaments

Designer: Marcia Izabel Marchiori
YouTube: MarciaBel Vlog
Instagram: @marciabel
---------------------------------------
Level: Beginner

Looking for a creative way to elevate your holiday gift-giving? In this tutorial, I'll show you how to transform mason jar lids into charming, handcrafted ornaments that double as beautiful decorations for your festive treats.

Perfect for cookies, candies, or other holiday goodies, these lids are not only functional but also add a personal touch that your friends and family will adore. Using a mix of felt and fabric, you’ll create cute season themed designs. Plus, your loved one can repurpose the felt decoration as a charming Christmas tree ornament.


Let’s get started and make your holiday gifts truly unforgettable!

Tools & Supplies Needed
- OLFA FCM-17x24 17" x 24" Folding Cutting Mat
- OLFA QR-1x12 1" x 12" Frosted Acrylic Ruler
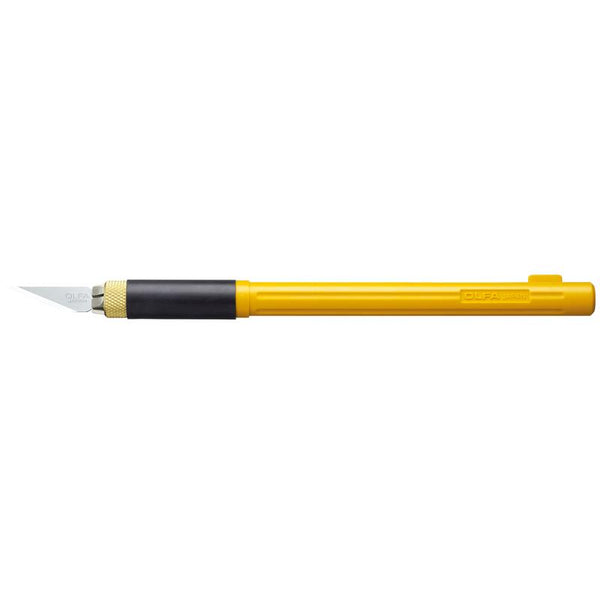
- OLFA AK-4 Cushion Grip Art Knife paired with curved carving art blade
- OLFA CMP-3 Rotary Circle Cutter
- OLFA 5-Inch SCS-4 Precision Appliqué Scissors
- Therm O Web HeatnBond® Lite Iron-On Adhesive
- Fleece
- Felt in assorted colors
- Holiday-themed patterned fabric (coordinating with felt colors)
- Embroidery floss in colors matching the felt, including dark brown (used: Aurifil)
- Embroidery needle and Pins (used: Riley Blake Designs Glamper Pins)
- Pencil or pen for tracing templates
- Erasable pen (used: Pilot Frixion)
- Ribbon or twine
- White mini ric-rac
- Fabric glue
- Iron (used: Oliso M3Pro Project Iron)
- Mason jars
Instructions
Step 1: Prepare Templates
- Print the templates [here].
- Using the OLFA cutting mat, art knife, and ruler for straight lines, cut out all four templates.

Start with the tree, glove, and heart designs.
NOTE: The process detailed below is for making the tree, but the same steps can be used for the glove and heart.
Step 2: Prepare Felt
- Iron fusible interfacing onto the back of the green felt following the manufacturer’s instructions. Keep the protective paper intact for now and follow next step.

- Using a pencil or pen, trace the template onto the protective paper side of the felt.

- Now, trace only the edges of the template onto another piece of regular felt (without interfacing) using an erasable pen.

Step 3: Cut Pieces
- Use the OLFA art knife (and ruler, when needed) to cut along the traced lines on the felt with interfacing. Tip: For easier and more precise cutting, start from the inner lines of the pattern and work your way outward.
Then, cut the traced tree on regular felt to match the size.


- Using OLFA scissors, cut a piece of fleece. For proper proportions, make the fleece about 1/8” larger than the inner triangle.

- Cut a piece of fabric slightly larger than the tree shape.

- Cut a tree trunk from brown felt using the template.

- Cut a piece of ribbon or twine, enough to go around your mason jar lid twice, plus extra for a bow.

Step 4: Assemble the Ornament
- Remove the protective paper from the interfaced felt. Place the right side of the fabric against the back of the felt (where the interfacing is), and iron them together.

- Use OLFA appliqué scissors to trim any excess fabric around the felt tree shape.

- Optional: Stitch around the fabric edges with a single strand of matching floss to add detail.

- Layer the pieces in this order:
- Non-interfaced tree shaped regular felt
- Ribbon/twine folded in half (positioned at the top of the tree, leaving about ½ inch folded side inside).
- Tree trunk at the bottom
Tip: Use fabric glue to hold pieces in place temporarily, if needed.
- Fleece
- Interfaced felt/fabric on top


- Secure the layers with a pin.

- Begin stitching everything together with blanket stitches. Start at the top to secure the ribbon or twine.
How to Make a Blanket Stitch:
- Thread Your Needle: Cut a length of floss, thread it through the needle, and knot one end.
-
Anchor the Stitch:
Start at the edge of the felt. Insert the needle from the back to the front to secure the thread, pulling it through until the knot catches. -
Make the First Stitch:
Insert the needle back into the fabric near the edge (around 1/4 inch from the starting point) and pull it through, leaving a small loop. -
Catch the Loop:
Bring the needle through the loop before pulling the thread tight. This will create the first "bite" of the blanket stitch and secure the edge.
Note: For the first stitch, you will pass the needle through the loop twice. For all following stitches, you only need to pass it through once per stitch. -
Continue Stitching:
Repeat the process along the edge: Insert the needle into the fabric at even intervals along the edge. Then, pass the needle through the loop each time before pulling the thread tight. -
Finish the Stitching:
When you reach the end, secure the thread by making a small knot on the underside of the felt.
Here’s a video of the process to help you visualize the explanation above:
Step 5: Decorate the Lid
- Using the OLFA circle cutter, cut a fabric circle large enough to cover the mason jar lid (6” in diameter for a regular lid).
- Assemble the jar with cookies, the lid, and the fabric circle.
- Wrap the ornament around the lid twice and finish with a bow.

Variations:
For Glove and Heart Ornaments, follow the same steps as the tree ornament.
Gingerbread Ornament:
- Cut two pieces of brown felt using the template, and one piece of fleece slightly smaller than the template.

- On one piece of felt, trace the eyes and buttons with an erasable pen.

- Adorn the arms and legs with ric-rac using fabric glue. Trim the excess with OLFA appliqué

- Embroider the traced face and buttons with dark brown floss.
Use:
- Two strands for the mouth using running stitches;
- Four strands of floss for eyes and buttons, using French knots.
- Assemble the layers:
- Back felt
- Folded ribbon or twine at the top
- Fleece
- Embroidered felt front
- Secure with pins.


- Stitch the edges together with matching floss (two strands) using blanket stitches, as shown in the previous step with the tree.
Enjoy your festive mason jars filled with treats and topped with these adorable handmade ornaments!

Don’t forget to tag me @marciabel and @OLFA_craft in your finished mason jars, we would love to see your creations :-)
Happy Holidays!
Marcia


