DIY Not-So-Spooky Haunted House with Cute Ghost Halloween Ornament

Designer: Marcia Izabel Marchiori
YouTube: MarciaBel Vlog
Instagram: @marciabel
----------------------------------

This little Halloween ornament is more sweet than spooky. It’s a tiny haunted house, but instead of being scary, it’s home to the cutest little ghost! The whole project is about reusing and giving new life to simple materials.
The ghost is made from an egg carton, while the house itself is built from packaging cardboard, with a handmade spider web inside made from plain thread. To finish, we’ll add a charming touch using decoupage with old book pages.
Let’s get started! 👻✨

Tools & Supplies Needed
• OLFA FCM-12x17 12" x 17" Folding Cutting Mat
• OLFA 9mm SAC-1 Stainless-Steel Graphics Knife with 30-Degree Precision Blade
• OLFA QR-1x12 1" x 12" and QR-6x24 6" x 24" Frosted Acrylic Ruler
• OLFA 7-Inch SCS-2 Serrated-Edge Stainless Steel Scissors
• Packaging Cardboard
• Egg Cartoon
• Pencil, needle
• Hot Glue Gun
• Mod Podge Matte
• White Thread
• Old Book Pages
• Black Marker (Used: Uni Posca)
• Water Based Acrylic Paint (Colors: Black and White)
• White Masking Tape
• Plain Brush
Instructions
Step 1: Trace the house shape
On your cardboard, use the OLFA ruler and pencil to trace two rectangles, each measuring 3 ¾" x 4 ½".
From the top of each rectangle, mark the center point. Then, measure 1 ½" from each side and connect the points to form the roof. Repeat for both rectangles.

Step 2: Cut the house
Place your cardboard on the OLFA cutting mat and, with the ruler and graphics knife, carefully cut out both house shapes you just drew.
Step 3: Paint the house backs
Using a brush and black acrylic paint, paint one side of each house shape. Set them aside to dry completely.
Step 4: Shape and paint the ghost
Take the egg carton and, with the OLFA scissors, cut out the most pointed section, as shown below. Trim and shape it into a flowing ghost, cutting the edges in a wavy, organic way so it looks like a little sheet drifting in the air.


Paint the ghost inside and outside with white acrylic paint. Let it dry fully.
Step 5: Make the spider web
Take one of your house shapes (painted side up). With white thread, start by gluing a vertical line in the center, securing the ends with hot glue on the back. Next, glue two diagonal lines at a 45-degree angle from the bottom edges.

Finally, add a horizontal line across the middle, so you have a simple base for your web.
Front: Back:
Back:
Add the spiral: tie a small knot with the thread close to the center.
Begin looping the thread in a spiral, passing it under each line as you go (this keeps it tight). Continue until the web looks full.

This is the result so far:
Step 6: Assemble the house
Glue both house shapes together, with the painted sides facing outward.
Measure the base of your ghost (it should be about 1 ½”). This will be the width for the sides of your house.
Create the house sides: cut 1 ½" strips of cardboard with OLFA graphic knife, mat and ruler. Using Mod Podge, glue two strips together for thickness. Paint them black and let dry.


Once dry, measure, trace and trim each strip to fit the sides of your house. Attach each side with hot glue.


Step 7: Add the book page details
Trace the outline of the house onto an old book page with your pencil. Using your OLFA cutting mat, knife, and ruler, cut out the shape.
 Glue it onto the house back with Mod Podge.

Cut 1 ½" strips of book pages to cover the outer sides and the outer roof. Glue them in place with Mod Podge.
 Seal all remaining surfaces (outer sides, bottom, and back) with a thin coat of Mod Podge. Let everything dry well.
Step 8: Make the bunting
Cut three small pieces of masking tape and fold each over a length of white thread to create pennants.

Trace a line along the bottoms with a pencil, then trim them with OLFA scissors to make them even.


Write one letter of “BOO” on each pennant with a black marker.
Step 9: Add the details
Draw a little ghost face with your black marker. Here are the three pieces, each ready on their own.
Attach the “BOO” bunting across the front with tiny dots of hot glue.  Using hot glue gun, adhere the ghost inside the house. Note: Leave a gap between the bottom of the house and the ghost to create the impression that the ghost is floating.
Finally, add a small piece of string to the roof by threading it through the cardboard with a needle. Tie a knot inside the house to secure it, so the ornament can hang.

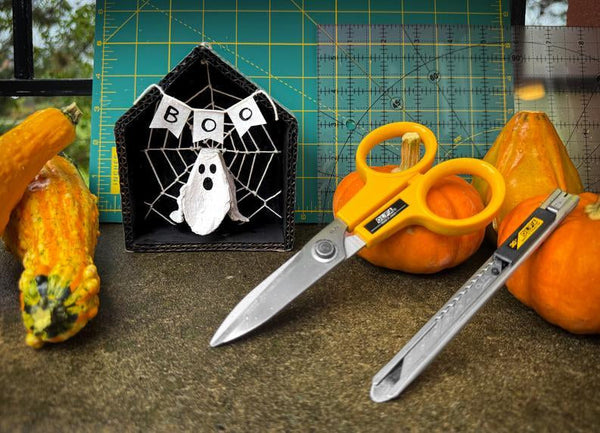
And that’s it, your cute upcycled haunted house ornament is ready. Far from spooky, it’s a sweet little Halloween piece with a handmade charm!

I’d love to see your finished work! Tag me @marciabel and @OLFA_craft so we can admire your cute ornaments.
Happy Halloween! 👻✨
Marcia