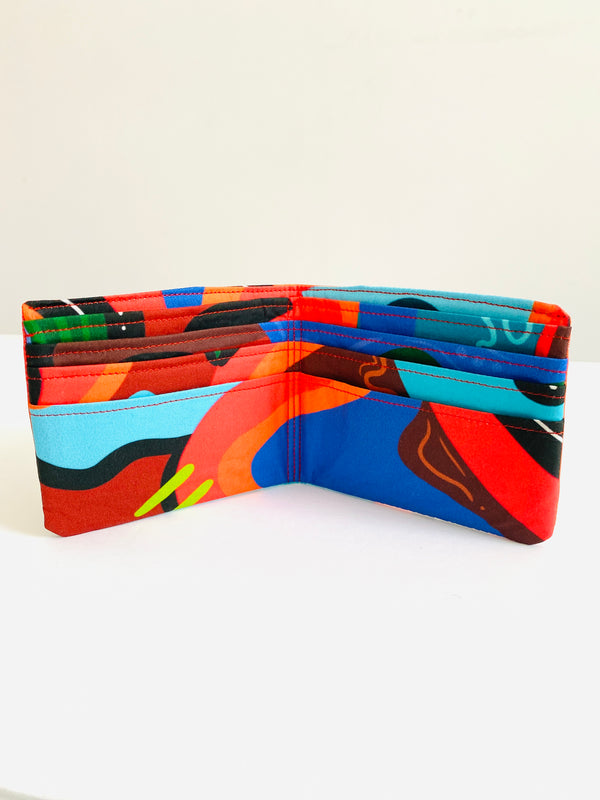
DIY Fabric Wallet
Guest Designer: Michael Gardner
Instagram: daddydressedmebymg
----------------------------
After the project be sure to head over and read OLFA's interview with Michael here.
--------
As an enthusiast of bold prints and color, I just realized I’ve only owned black and brown wallets. This project was the perfect opportunity to change that. The more color the better in my opinion. Fabrics that catch the eye and make a statement provide me with energy and excitement to create. Follow along to create your very own fabric wallet. Here’s everything you’ll need:

Supplies
OLFA 5-Inch SCS-4 Precision Appliqué Scissors
OLFA RM-12S 12" Rotating, Self-Healing Cutting Mat
OLFA 45mm RTY-2/DX Ergonomic Rotary CutterOLFA QR-1x12 1" x 12" Frosted Acrylic Ruler
Fabric - about 1/2 yard
Interfacing
Iron
Clips
Tape Measure
Marking Pen
Designer Notes:
Seam allowance is ¼ inch unless otherwise stated
I used a cotton poplin fabric & medium weight fusible interfacing
Wallet Pattern is available via Faithwerks on Etsy
Measurements are in inches
Instructions
Step One:
Cut three pieces of fabric & interfacing with the following measurements:
One - 9 ½ x 19
Two - 9 ½ x 4 ½

Iron the interfacing to each piece of fabric.

Step Two:
Using your marking pen and ruler, draw lines on the 9 ½ x 19 piece of fabric:
BOTTOM 2 ½ | 1 ¾ |2 ¼ | 1 ¾ |2 ¼ | 1 ¾ |2 ¼ | 4 | TOP

Step Three:
Starting with the top of your fabric (the 4 inch side - wrong side up), fold at the line you created and press. Flip the fabric over, crease at the second line and press. Go to your next line, fold it over and press. Continue folding over each line until you have four rows and press everything.
Top stitch the top of each fold individually. Do not sew the rows to each other.

Step Four:
Baste stitch both sides of the rows with a 1/8 inch seam allowance. Using your measuring tape, find the center of the wallet and draw a line. Create a seam down the middle of the wallet and add an additional stitch ¼ inch on the left and right sides of the middle seam.

Step Five:
Place the 9 ½ x 19 piece of fabric on top of the 9 ½ x 4 ½ piece, right sides together and baste stitch with 1/8 inch seam allowance. Start at the top right corner and sew along the sides and the bottom. Place the second 9 ½ x 4 ½ piece on top of the card slots, right sides together. Sew around the entire wallet with ¼ inch seam allowance and leave about a 4inch hole to turn the wallet right side out.

Step Six:
Trim your corners and seam allowance. Turn the wallet right side out and give it a good press.
Close the remaining hole with a top stitch along the top edge and you’re all done!

Hope you all enjoyed this tutorial. This is a quick sew and so fun. I absolutely love my wallet and can’t wait to make a few more.
