Cozy Fall DIY: Quick and Easy Thanksgiving Garland You’ll Love to Make

Designer: Marcia Izabel Marchiori
YouTube: MarciaBel Vlog
Instagram: @marciabel
----------------------------------
Level: Beginner

Would you like to create an easy Thanksgiving decoration for your celebration this year? This simple quick DIY garland can be made in just a couple of hours on a cozy afternoon, and it’s perfect as a beautiful background for your tablescape or as a charming welcome piece for your porch.

The best part is that you can easily adapt it to any quote or phrase you like. Using a simple font, you’ll create a cozy, creative, and heartfelt decoration to greet your guests this Thanksgiving. Let’s begin!

Tools & Supplies Needed
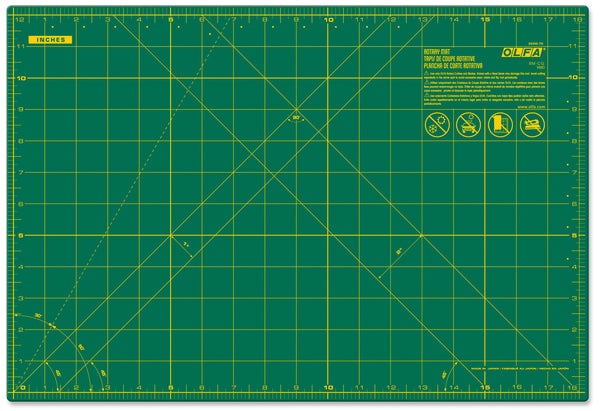
• OLFA RM-CG-01 12" x 18" Green Double-Sided, Self-Healing Rotary Mat
• OLFA 5-Inch SCS-4 Precision Appliqué Scissors or 5-Inch SCS-1 Serrated-Edge Stainless Steel Scissors
• OLFA QR-6x12 6" x 12" Frosted Acrylic Ruler
• OLFA Coral 45mm Ergonomic Rotary Cutter (used: Fat Quarter Shop Exclusive by Olfa #RTY-2DX/CP)
• Felt (assorted fall themed colors)
• Cardstock, letter size (for template)
• Pencil, erasable pen (or regular pen), and needle
• Hot Glue Gun
• Wool Yarn
• Needle
• Two White Mini Pompoms
Instructions
Step 1: Gather your supplies and choose your quote
Start by printing the quote you would like to use, using a simple, boxy font.
Here are some ideas of quotes:
• Thankful
• Be Grateful
• Happy Thanksgiving
• Welcome
For my garland, I used the well-known Arial Block font in my text editor and printed the quote “GIVE THANKS.” You can use any quote you like. The font size will depend on how large you want your garland to be. In this project, I used 245 pt.
Step 2: Make your templates
Pie Template:
Using a pencil and OLFA ruler, trace a 5½ x 4½ inch rectangle on a piece of cardstock. Then draw a center line lengthwise and mark a triangle from those points to create the pie shape.
Pennant Template:
Trace a 4 x 5 inch rectangle. Draw a line through the center lengthwise, then draw another line 1 inch from the bottom. Mark a “V” shape at the bottom to make the pennant shape.

Using your OLFA rotary cutter, ruler, and mat, cut out all shapes to size.
Note: You can adjust the size of your templates if you wish, just remember to change the font size to match.
For the final step in your templates, trace a ¼ inch offset around the pennant shape. This will be your inner layer, to cut later. Do the same for the pie template, but use an ⅛ inch offset. Pause to see my little helper Gema supervising my work ☺️
Step 3: Cut your felt pieces
Using an erasable (or regular pen), trace your templates onto caramel felt. The caramel felt will be the background for your pies and pennants. For my project, I traced four pies and ten pennants, since my quote has ten letters.

Use your OLFA rotary cutter, ruler, and mat to cut four caramel felt pie triangles. Then use the ⅛ inch offset template to cut four more pieces on orange felt.
Repeat the same for the pennants, and use the rotary cutter for the straight sides and OLFA scissors to cut the inner triangle, so you get clean edges.


Repeat the same process for the pennant offset. Cut a second batch of pennants in assorted fall colors. Since my quote has ten letters, I cut two pennants in each coordinating color. These are the pieces you’ll have so far:
Step 4: Cut the letters
This part may sound a little unusual, but it works great!
First, loosely cut around each printed letter.
 Then tape the letters onto the felt with transparent tape, making sure all sides are secured. I tape them all at once to save time and materials.
Using OLFA scissors, carefully cut out each letter.
Step 5: Assemble the garland pieces
Use a hot glue gun to attach each letter to the smaller pennants. To keep them straight, apply glue in sections and press gently.

Cut ½ inch strips of cream-colored felt using your rotary cutter, ruler, and mat.
Place each strip on top of the orange triangle pies to make the lattice crust for two of them. Align the strips parallel to the triangle’s wide sides, weaving them together before gluing them down.

Glue the strips in sections, then trim any excess with your rotary cutter and ruler.

Cut a 15 x 1 inch strip of cream felt and glue it along the top of each pie, shaping gentle waves to look like a pie crust.

For the other two pie slices, glue a small white pompom on top to look like whipped cream.
Step 6: String your garland
Arrange your letters in order, placing one pie slice on each end of the words. Using a needle and yarn, string all the pieces together. I made two separate garlands, one for each word.


And that’s it!
Your Thanksgiving garland is ready. I hope you have all the reasons to decorate your home with this beautiful piece and to celebrate the season with gratitude.
 I’d love to see your finished work! Tag me @marciabel and @OLFA_craft so we can admire your cute garland.
Happy Thanksgiving! 🧡
Marcia