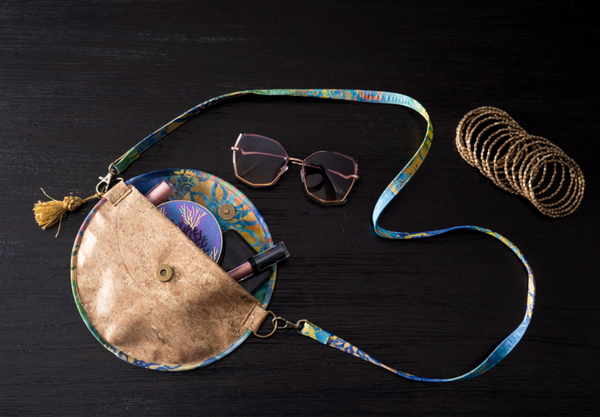
Cork Cross Body Bag
Designer: Sarah Gozzo
---------------
NOTE: Instructional photos below are using a different interior fabric than the final project above.
OLFA TOOLS
45mm quick change rotary cutter
24”x36” self healing rotary mat
MATERIALS
BAG:
1/3yd bright red large floral batik fabric
(1) package .25” double fold Bias binding PC201
SHOULDER STRAP:
(2) .5” swivel hooks antique brass
4”x44” bright red large floral batik fabric
INSTRUCTIONS
CUT cork. Set OLFA’s circle cutter to the widest setting and cut 2 circles.
Set OLFA’s circle cutter to the smallest setting and cut 1 cork circle.
Also cut 1 cork rectangles, 2”x3”. Fold both 3” sides .5” to meet on the middle. It should measure 1”x3”. Top stitch 1/8” from both folded edges. Cut in half to create 2 pieces that measure 1”x1.5”. These are the D-ring tabs. Set aside.
FUSE SF101 to the wrong side of a 10”x20” piece of liner fabric according to the SF101 directions. Once cool, fold in half to be 10”x10”. With OLFA’s circle cutter set to the widest setting, cut a circle through all layers creating 2 fabric circles.
BASTE each liner circles to each cork circles with WST. Now you have the front and back of your bag.
NOTE: fabric used in sample is not the same as the final project.
FOLD the front circle over toward the fabric side with a 3” fold so the fabric is RST. Finger press the fold and clip on the sides. This will be the inside front of the bag.
NOTE: fabric used in sample is not the same as the final project.
PLACE the front piece, folded side down on top of the back piece, fabric side up. Align the bottom and sides as they should look when finished.
MARK the magnetic snap placement and follow the instructions on the back of the magnetic snaps and as follows:
DOUBLE CHECK to be sure the magnetic snap parts line up when closing the purse flap before completing the installation.
The flatter half of the magnetic snap should be installed on the fabric side of the back circle 1” down from the top along the midline. Hand sew the small cork circle to cover the exposed hardware on the cork side.
The chunky side of the magnetic snap should be installed 3.75” up from the bottom on the cork side of the front circle. The inside flap will cover this hardware.
TOPSTITCH the front fold along the curve of the cork on the inside of the front piece. Use thread that will look appealing on the front as it will be visible. Now realign the front and back pieces for the next step.
BASTE the front onto the back with a scant 1/8” seam allowance. Sew the .25” double fold bias binding around the entire circle.
INSTALL the 1” D-rings. Use the 1”x1.5” cork pieces to loop through the D-ring then wrap over the binding on either side of the bag about .25” below the fold of the flap. Sew a straight line back and forth a few tines close to the raw edge of the D-ring tabs.
ADD the tassel by passing the tassel loop through one D-ring then passing the tassel back through the tassel loop.
STRAP:
CUT a 4”x44” strip of cotton batik.
IRON the ends of the strip over .5”. Then iron the strip in half lengthwise. Then fold both lengths in .5” to meet in the middle. Steamy hot iron. Finally fold in half lengthwise and iron.
SEW the entire way around the .5”x43” strap by topstitching close to the edges.
INSTALL swivel hooks on both ends by folding the fabric over the hook about 1” and sewing in place by following the topstitch lines.
FINISH the bag by hooking the swivel hooks onto the bag’s D-rings.


