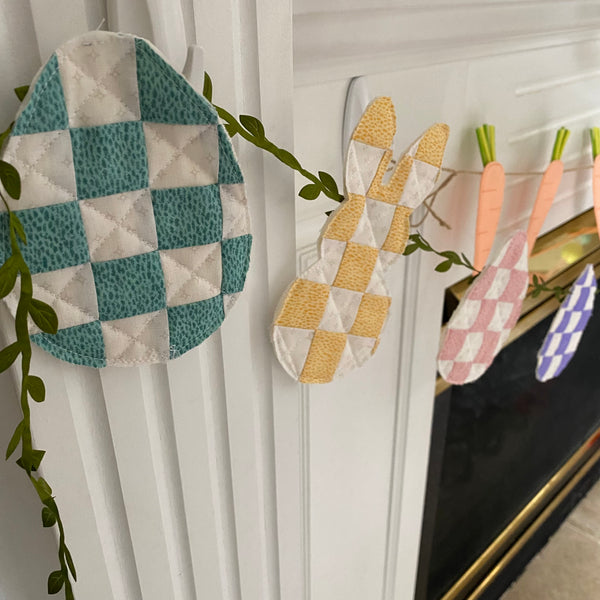
Checkerboard Easter Garland

Designer: Cindy Staub
@quiltdoodledesigns
-----------------------------
This is a fun springtime garland that can be hung in a window, across a mantel or in a doorway. The sample was made with fabric from Marcus Fabrics Triple Time Basics by Laura Berringer. I used four different colors, but you can switch it up and use as many as you would like!
Tools:
- 1/8 yard in four different spring colors
- ½ yard cream fabric for backing and checkerboard
- Batting- 4 - 9” x 9” squares
- Ribbon in length desired for garland
- White and green thread
- Template: Link Here
- OLFA 45mm RTY-2/DX Ergonomic Rotary Cutter
- OLFA RM-MG 24" X 36" Green Double-Sided, Self-Healing Rotary Mat
- OLFA QR-6x12 6" X 12" Frosted Acrylic Ruler
- OLFA 5-Inch SCS-4 Precision Appliqué Scissors
Let’s begin!
- From each color fabric cut: 1- 1 ½” x WOF strip, (WOF- width of fabric

- From cream fabric cut:
- 4 – 1 ½” x WOF strip
- 4 – 9” x 9” squares (backing)

- Sew one color strip to one cream strip along the long edge right sides together using a ¼” seam. I like to use my quarter inch foot on my sewing machine.
- Press to the dark side. Cut in half.
- Sew each half together right sides together along the long edge to form a light, dark, light, dark strip.
- Press to the dark side. Cut in half.
- Sew each half together right sides together along the long edge. Press to the dark side. You should now have a rectangle of alternating color and cream strips.

- Then cut this rectangle into 8 – 1 ½” strips of alternating colors.

- Here are all of my checkboard strips in the colors I have chosen.
- Sew the strips together to form a checkboard panel. Your seams should ‘nest’ together.
- Press your checkerboard square.
- Layer the backing, batting, and checkerboard square.
- Quilt your panel as desired. I stitched a crosshatch design using my walking foot. I made four quilted panels total, pink, yellow, purple, and blue.

- Cut the bunny and egg template out and pin on top of checkerboard quilted square.

- Sew along the edge of the template thru all three layers.

- Trim around each shape leaving a 1/8” from the outer stitched line of the shape using your applique scissors. I was able to get one bunny and two eggs from each quilted square.

- Repeat until you have enough bunnies and eggs to form a garland of your desired length. I made a total of 4 bunnies and 8 eggs. You can make more or less for your garland, depending how long you would like it to be.
- Attach the bunnies and eggs to the ribbon leaving about 3” in between each shape.

- Hang and enjoy! I hope that you enjoy making this fun quilted project. The eggs are also cute used as coasters. They add a festive spring touch to and brunch or Easter dinner.


