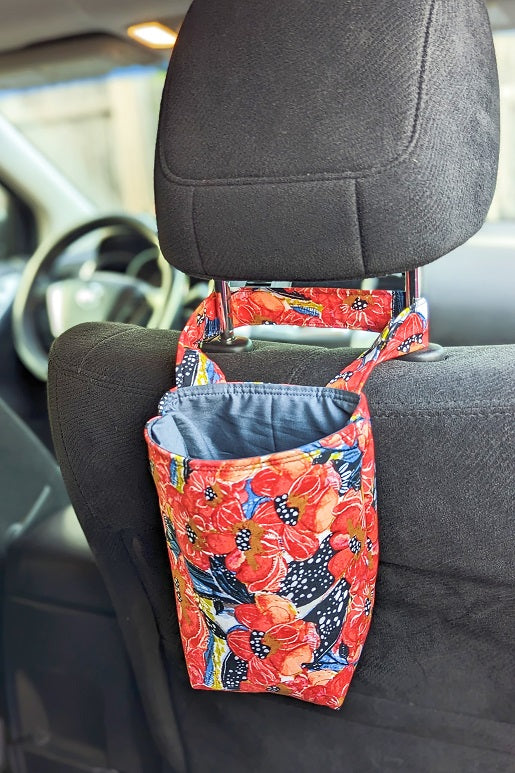
Car Trash Bin

Designer: Daisi Toegel
Instagram: @daisitoegel
Website: www.flowersew.com
------------------------------------------------------------

Learn how to make a trash bin to your car! This project is fun and easy, and add a touch of organization to your automobile. The versatile handle makes it possible to be hung on the gear shift or on the front seat neck, for back passengers.
Let’s get started.
Tools Needed:
- OLFA RM-SG 18" X 24" Green Double-Sided, Self-Healing Rotary Mat
- OLFA 45mm RTY-2C/NBL Quick-Change Rotary Cutter, Navy
- OLFA 45mm Tungsten Steel Rotary Blade - 1, 2, 5, Or 10 Packs
- OLFA QR-12S 12 1/2" Square Frosted Acrylic Ruler
Fabric Requirements:
- (2) 8 1/2in x 10in main fabric
- (2) 8 1/2in x 10in the lining
- (2) 8 1/2in x 10in stabilizer – recommend Thermoweb Fleece Fusible High Loft
- (1) 3in square (main fabric)
- (1) 3” x 14” rectangle (main fabric)
- (1) 1” x 13 1/2" and (1) 1” x 2 1/2" stabilizer
- (1) set of snap buttons

Start with the 3” square, press one side 1/4” to the inside, and press two other sides in the same way. Insert the 1” x 2 1/2" stabilizer piece, close to form a rectangle and secure with clips or pins.
Sew an U shape to finish all 3 edges that will show when the bag is done.
Install one pair of the snap button (doesn’t matter the order of the buttons to snap).

Finish the longer strap in the same way and install the other set of snap buttons. Button both parts together.

Fuse the main fabric to the stabilizer. Mark 2in far from each edge of the shorter side (8 1/2”) and pin one handle raw edge inside the mark, and the other tip on the other side in the same manner. Sew 1/8” seam to secure the handle, and backstitch.

Next, with right sides together, lay the lining fabric on top of the main fabric for both parts. Sew using 1/4" seam allowance, flip it back and press. Topstitch straight or using decorative stitches.

On each bottom corner, cut out a 2” x 2” square. This will form the boxed edges.

Open both sets you’ve sewn, lay the part with the handle right side up on your cutting mat, and on top of it lay the other part with right sides touching.

Pin the entire set in place and sew on both horizontal and vertical sides. Leave a 3” opening on one of the longer sides on the lining part to turn the project later.

Sew the boxed edges. Join each corner together diagonally and sew using 1/4" seam allowance. Repeat for all four sides.

Turn the project right side out and sew the opening using 1/8” seam allowance to close.
You can use it with a dog waste bag or without anything, the project is fully washable!

Your car clean, organized and with a cute style!

Loop it on the backseat head by unbuttoning the snap.

I hope you enjoyed this quick and functional project. Hope you make many to gift this Father’s Day!!!